















PSDS3YGXAFSS General Electric Refrigerator - Instructions
Keep searches simple. Use keywords, e.g. "leaking", "pump", "broken" or "fit".
Icemaker flap not closing, frosting up
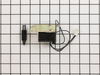
Watched video, however could not get outer casing off. Under the panel are three small holes, pushed up with an Allen key, used a small screwdriver to wedge out, came out easily, followed instructions from video on removing and replacing solenoid
Parts Used:
-
Graeme from Sarasota, FL
-
Difficulty Level:Easy
-
Total Repair Time:15 - 30 mins
-
Tools:Screw drivers
9 of 11 people
found this instruction helpful.
Was this instruction helpful to you?
Thank you for voting!
Ice maker door not opening
Removed panel from front of freezer door by pushing up on three spring loaded screws located in the opening where the ice door opens and closes. they are about 1 inch apart on the bottom of the opening. Push up to free ice maker panel. Remove three screws from solenoid, located at the top right. Remove wire, replace with new and that is it. Fixed the problem!! Our ice maker hadn't worked for months. Be careful if you remove the round ice maker door to clean. There is a spring that located on the left side of sprocket. The spring fell off and took me a while to figure where it came from. Recieved package in three days and the job took minutes. Works great! Very easy to complete.
Parts Used:
-
scott from lake orion, MI
-
Difficulty Level:Really Easy
-
Total Repair Time:Less than 15 mins
-
Tools:Nutdriver, Screw drivers
8 of 10 people
found this instruction helpful.
Was this instruction helpful to you?
Thank you for voting!
Rusty water on refrigerator floor
turned out to be a rusty drain pan in the refrigerator section behind the fan fixture attached to the wall.I followed the instructions of a prior customer on the website and it worked like a charm. Super happy to have done it myself!! Can't believe they don't use plastic for this part as it would rust again if I didn't coat it with the rustproofing spray.
Parts Used:
-
Leslie from BEND, OR
-
Difficulty Level:Really Easy
-
Total Repair Time:30 - 60 mins
-
Tools:Screw drivers
7 of 7 people
found this instruction helpful.
Was this instruction helpful to you?
Thank you for voting!
My Door Stop Broke
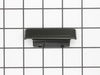
I had to remove 2 screws to get the broken door stop off then I put the new door stop on by using the 2 same screws.
Parts Used:
-
M from STERLING HEIGHTS, MI
-
Difficulty Level:Really Easy
-
Total Repair Time:Less than 15 mins
-
Tools:Screw drivers
7 of 8 people
found this instruction helpful.
Was this instruction helpful to you?
Thank you for voting!
Twice I ordered the oven light bulb & each time the light bulb was defected
I had to call for a appointment for repair with GE Appliance because I thought then it . .was something electrical. The technician came out & checked everything out, turned out it was not electrical, The technician went out to his truck got a light bulb from his truck, put it in & it worked. It cost me $121.00 for trip charge from GE appliance for a light bulb that worked, your light bulbs were defective twice. Very disappointed with your products, cost me alot of money for a good light bulb thru GE appliance
Parts Used:

-
Barbara from BELLEVUE, WA
-
Difficulty Level:Very Difficult
-
Total Repair Time:Less than 15 mins
15 of 32 people
found this instruction helpful.
Was this instruction helpful to you?
Thank you for voting!
Light switch shorting out causing open door alarm to go off
Easy fix, but they don't give you plenty of wire to work with. When I pulled the switch out it only had about an inch of wire that came with it. meaning if I didn't have a grasp on the wires as I was removing the switch they would have slipped back up the opening
Parts Used:
-
George from Mount Prospect, IL
-
Difficulty Level:Really Easy
-
Total Repair Time:Less than 15 mins
-
Tools:Screw drivers
7 of 9 people
found this instruction helpful.
Was this instruction helpful to you?
Thank you for voting!
Refrigerator door switch went bad
It was very simple! I assessed the situation and gathered my tools for the job. I used a flat head screwdriver, pliers, and electrical tape. I used the flat head screwdriver to release the switch from its location, the pliers to take the electrical terminations apart. I taped the wires individual so that I would not loose them in the door, also not to short them out. I then unpackaged the new switch to install. Pulled the tape off one of the of the terminals while holding the wire, and attached it to the new switchs terminal post. Did the same with the other wire, then snapped the new switch back into place. Immediately had results. I opened and closed the door a few times in amazement that something so annoying such as a light in your fridge could be so easy to fix. Most of all, having a business to rely on to find the part and deliver in a timely fashion. Thank you Partselect.com, you were outstanding!!!
Parts Used:
-
Jeffrey from lake Stevens, WA
-
Difficulty Level:Really Easy
-
Total Repair Time:Less than 15 mins
-
Tools:Pliers, Screw drivers
8 of 12 people
found this instruction helpful.
Was this instruction helpful to you?
Thank you for voting!
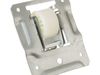
Stripped Front Leveling Roller & Screw
Raised side of fridge enough to get 1/4" ratchet with 1/4" socket under roller wheel assy. Removed three hex-head screws to separate damaged wheel assy from fridge frame. From panel below fridge compartment, backed-out stripped leveling screw. Mounted new roller assy and then threaded in new leveling screw from front. Lowered fridge and adjusted leveling screw for proper height. Suggest putting a 2x4 under fridge for safety when hands are under unit.
Parts Used:
-
George from ARLINGTON, VA
-
Difficulty Level:Easy
-
Total Repair Time:30 - 60 mins
-
Tools:Socket set
6 of 6 people
found this instruction helpful.
Was this instruction helpful to you?
Thank you for voting!
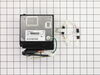
Compressor would not kick on and condenser fan ran constantly
Remove back panel on bottom of fridge to access compressor area. Remove screws from water solenoid and water valve and push to the side so the side of the compressor can be accessed. Then locate the inverter box. You will find a Phillips head screw on the bottom of the inverter. This is the only screw that hold the inverter in place. Remove the screw and tilt the inverter box forward away from the compressor, then lift the box out of the the holder. You may have to wiggle it a bit to get it out. Remove the plug that attaches to the compressor and then with the power on check your voltage coming to the compressor. It should read 120 volt. If it doesn’t your inverter is bad. Remove the other plug on the inverter box and pull the box out.
Reinstall the unit in reverse order. Use the appropriate jumper to plug into the wire connection going to box and then plug it into the connection off the fridge.
Once everything is reinstalled and before you put the back panel on plug your refrigerator back in and you should be able to hear the compressor working or feel the top of it to make sure. If it’s working you are good and can reinstall the back panel.
It will take 4-5 hours to come back to temp if it’s been off for any length of time.
Reinstall the unit in reverse order. Use the appropriate jumper to plug into the wire connection going to box and then plug it into the connection off the fridge.
Once everything is reinstalled and before you put the back panel on plug your refrigerator back in and you should be able to hear the compressor working or feel the top of it to make sure. If it’s working you are good and can reinstall the back panel.
It will take 4-5 hours to come back to temp if it’s been off for any length of time.
Parts Used:
-
Charles from ORO VALLEY, AZ
-
Difficulty Level:Really Easy
-
Total Repair Time:15 - 30 mins
-
Tools:Nutdriver, Screw drivers, Socket set
6 of 6 people
found this instruction helpful.
Was this instruction helpful to you?
Thank you for voting!
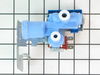
No water from the dispenser and Water leaking on floor
I searched YouTube for the problem and was quickly taken to several videos that detailed to required actions. This encouraged me to proceed, so I took the back cover off and found the water valve leaking. I then googled the make and model of the frig and found the part. The YouTube videos provided all of the details needed to determine the problem and replace the faulty part. Once the part arrived, I was able to install the new one in a few minutes. Operation returned to the water dispenser and the leak was gone. Total cost of the repair was $56 and took about 1.5 hours to remove the original part, order the replacement and install it when it came. Perfect!
Parts Used:
-
Dennis from MARTINSBURG, WV
-
Difficulty Level:Really Easy
-
Total Repair Time:Less than 15 mins
-
Tools:Nutdriver, Screw drivers, Wrench (Adjustable)
7 of 10 people
found this instruction helpful.
Was this instruction helpful to you?
Thank you for voting!
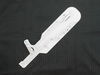
Plastic piece that holds up motor that pushes out ice cubes broke off from bucket glide
Took out ice tray and then slid motor out of right side bracket and sat on shelf. Removed the 3 screws holding up left side bucket glide first. Make sure you have correct size socket for the 3 screws on bucket glide. Works best with a screwdriver type socket tool. I then removed broken plastic piece from motor (screw in motor is different size than the ones for left side bucket glide). I put in new left side bucket glide (rear back screw a little bit of a challenge but it can be done) and then slid motor back into right side bracket and fastened motor to new plastic piece that sticks out from left side bucket glide. Put back in ice tray and good to go!
Parts Used:
-
Ronald from GREENWOOD, IN
-
Difficulty Level:Really Easy
-
Total Repair Time:15 - 30 mins
-
Tools:Socket set
5 of 5 people
found this instruction helpful.
Was this instruction helpful to you?
Thank you for voting!
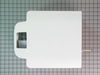
Ice crusher wouldn't work reliably
Removed ice bucket and observed the plastic drive bushing for the auger had the drive dog broken off. I removed the four screws on outer shell for the ice bucket, removed it and found the auger had key stoned a hole in the ice tray housing. At that point I decided to replace the ice bucket and auger assy. The new one works fine.
Parts Used:
-
Edward from San Antonio, TX
-
Difficulty Level:Really Easy
-
Total Repair Time:More than 2 hours
5 of 5 people
found this instruction helpful.
Was this instruction helpful to you?
Thank you for voting!
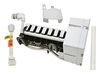
Unit had stopped making ice
Ordered the icemaker replacement. unplugged the unit, followed the simple instructions and got it done in less than 30 minutes. It did take a LONG time to start making ice. But it's working now.
Parts Used:
-
Ron from ORANGE, CA
-
Difficulty Level:Really Easy
-
Total Repair Time:30 - 60 mins
-
Tools:Nutdriver, Screw drivers
5 of 5 people
found this instruction helpful.
Was this instruction helpful to you?
Thank you for voting!
Uncontrollable water out of ice maker.
Since I didnot know if the issue was with the “ice maker” or the “ water valve” I decided to replace both components. I replaced the ice cube maker first, which required removing the attached bracket from the old unit on to the new unit. One screw attached and than I leveled the unit( total time was about 1 hr) a little learning curve. Next I replaced the “water valve” (total time 20 min.) I replaced each hose one at a time and the same for the electric connectors. Total parts arrived in about 1 week and cost a little over $255.00. I called the appliance store and they quoted me an estimate of over $700 ++++.
Everything works perfectly!! BELIEVE in yourself.
Everything works perfectly!! BELIEVE in yourself.
Parts Used:
-
David from STONY BROOK, NY
-
Difficulty Level:Really Easy
-
Total Repair Time:30 - 60 mins
-
Tools:Nutdriver, Screw drivers
5 of 6 people
found this instruction helpful.
Was this instruction helpful to you?
Thank you for voting!
Ice maker door didn't open and close properly
I removed the outer plate by sticking a very small screwdriver in the small holes at the bottom of the plate and pulling the plate toward me.
I then removed the 4 screws from the internal plate and pulled the plate toward me.
Then I romoved the 3 screws holding the old solenoid and unplugged it.
Next I put the new solenoid in place and replaced the three screws.
Finally I plugged in the solenoid and replaced the internal and external plates.
I then removed the 4 screws from the internal plate and pulled the plate toward me.
Then I romoved the 3 screws holding the old solenoid and unplugged it.
Next I put the new solenoid in place and replaced the three screws.
Finally I plugged in the solenoid and replaced the internal and external plates.
Parts Used:
-
M Alan from Lebanon, TN
-
Difficulty Level:Really Easy
-
Total Repair Time:15 - 30 mins
-
Tools:Screw drivers
5 of 6 people
found this instruction helpful.
Was this instruction helpful to you?
Thank you for voting!