















PLW8363L2B Amana Washer - Instructions
Keep searches simple. Use keywords, e.g. "leaking", "pump", "broken" or "fit".
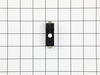
Washer Wouldn't Turn On
Found out that these switches go from time to time and are usually the culprit when the washer won't operate. Opened the cabinet facing. Warning: there are plenty of YouTube videos on opening Maytag washers. None helped me with this model. I ended up finding the screws to open near the floor on front. Once it's opened, just replace the faulty switch, reconnect and you're in business. Getting the washer opened was about the hardest part of this repair. Total cost: Less than $30.
Parts Used:
-
Jeffrey from Erial, NJ
-
Difficulty Level:Really Easy
-
Total Repair Time:15 - 30 mins
-
Tools:Nutdriver, Screw drivers
0 of 1 people
found this instruction helpful.
Was this instruction helpful to you?
Thank you for voting!
No warm Water on rinse
Remove 3 screws on Washer control top. Then 3 screws holding clear cover and removed. Remove 3 phillips screws holding face of panel on and tilted panel to get at wires. Marked the wire colors on eace of 4 terminals and removed them. Used plires to push the top on the switch near the knob and turned the switch counterclockwise. When the lugs lined up the switch slid out the back. Just reversed the above to reinstall following the proper colors on the wires to reinstall. Washer works fine now.
Parts Used:

-
Terry E. from Johnstown, PA
-
Difficulty Level:Really Easy
-
Total Repair Time:30 - 60 mins
-
Tools:Nutdriver, Pliers, Screw drivers
0 of 1 people
found this instruction helpful.
Was this instruction helpful to you?
Thank you for voting!
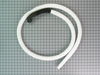
water leaking when washing
I was at work but a friend of ours and my husband did the repair. But what I was impressed about is how fast we got the part. thanks a lot
Parts Used:
-
Joyce from Gary, SD
-
Difficulty Level:Really Easy
-
Total Repair Time:30 - 60 mins
-
Tools:Socket set
0 of 2 people
found this instruction helpful.
Was this instruction helpful to you?
Thank you for voting!
Washing machine was leaking
Wow! My husband and I researched the problem online and ordered the part after reading from others how to take the machine apart. We are very unhandy, so we felt quite an accomplishment fixing the drain hose with rubber elbow ourselves! Thank you for the diagrams that so clearly showed the part we needed to order.
Parts Used:
-
Deborah from Boulder, CO
-
Difficulty Level:A Bit Difficult
-
Total Repair Time:More than 2 hours
-
Tools:Pliers, Screw drivers
0 of 2 people
found this instruction helpful.
Was this instruction helpful to you?
Thank you for voting!
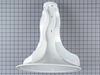
piece of agitator broke off - unbalanced loads of laundry
We did not have instructions on how to remove broken agitator. Looking online, we found easy instructions but found it difficult to remove the agitator even though it was supposed to be an easy task.
Our particular model was supposed to "pop" off with little resistance. Not so!
It took some stong muscle and will power to remove the part but putting the new agitator on was simple.
Our particular model was supposed to "pop" off with little resistance. Not so!
It took some stong muscle and will power to remove the part but putting the new agitator on was simple.
Parts Used:
-
Denise from Des Moines, IA
-
Difficulty Level:Really Easy
-
Total Repair Time:30 - 60 mins
11 of 37 people
found this instruction helpful.
Was this instruction helpful to you?
Thank you for voting!
drain hose had water leak
remove front cover disconnect water supply remove hose clamp,take drain line replace with new hose reconnect water supply replace front cover job complete.
Parts Used:
-
William from New Lenox, IL
-
Difficulty Level:Really Easy
-
Total Repair Time:15 - 30 mins
-
Tools:Nutdriver, Screw drivers
0 of 5 people
found this instruction helpful.
Was this instruction helpful to you?
Thank you for voting!
Bad tube seals and bearings
Disassembled washer as per directions with seal kit. Removed inner tub. Cut both tub shaft bearing in half; punched out from outter tub. Installed new bearings using .5 inch threaded rod, washer and bolts. Installed new seal on inner tub shaft. Installed inner tube. Re-assembled washer.
Parts Used:
-
DAVID from SANDY HOOK, CT
-
Difficulty Level:Difficult
-
Total Repair Time:More than 2 hours
-
Tools:Nutdriver, Socket set, Wrench set
1 of 9 people
found this instruction helpful.
Was this instruction helpful to you?
Thank you for voting!
Agitator And Bell Housing Seperated From Drive Shaft
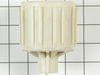
Since the agitator and bell housing seperated as once piece from the drive shaft I didn't have to remove them and the schematic showed how the agitator snapped on to the bell housing and the parts I needed for the fix. The new seal went on with no problem, I just used some of the supplied grease on the tight spots. The hardest part was attaching the bell housing. It came to within an inch of the top of the shaft with no problem with a rubber hammer. But the top screw shroud broke when I tried to hammer it the rest of the way using a wood dowel and a block of wood. I couldn't even get the threads of the supplied screw to even touch the drive shaft. So I bought a longer (1 inch) cap screw from the hardware store and added a washer and suplied ring. After torqing it to 5 ft-lbs instead of the 10-20 the plastic beneath the screw was looking kind of thin and stressed and I was afraid of it breaking through or the screw snapping off in the shaft, so I left it alone and used some silicone caulk to seal in the plug that goes in on top of the screw since the side of the shroud broke off. I slipped on the agitator and am testing a load now as we speak. If I get ten more years out of the washer it will definitely be worth the $100 in parts and shipping !
Parts Used:
-
MARVIN from PEORIA, AZ
-
Difficulty Level:A Bit Difficult
-
Total Repair Time:1- 2 hours
-
Tools:Screw drivers, Socket set
11 of 40 people
found this instruction helpful.
Was this instruction helpful to you?
Thank you for voting!
fan belt was broken
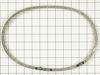
First thing I did was to read the great information from other customers. John from Milton's post titled "frayed v belt" was excellent; so was Joseph from Goldsboro NC under the Pump part posts. I would add the following info which wasn't readily available. The Torx/starbit size mentioned in the posts referenced is a T25 the Amana lw8203w2 I have. I bought a t25 size torx wrench at my local hardware store for $2. I got everything together --the belt took some arm strength for an amateur like me to get on. Also, would recommend gloves as some of the edges are sharp down there. Everything appeared okay and when I started the spin cycle it started then cut off. I thought maybe besides the fan belt there was electronics faulty. However, I found an amana repair guide for my model online at scribd and under the troubleshooting section, it described the cutout of the spin cycle and if the new fan belt is too tight, it will bind and the spin cycle will cut out. So I opened up the front again and worked the belt for several turns to "stretch it" and voila, it worked perfectly.
Parts Used:
-
Daniel from Oreland, PA
-
Difficulty Level:A Bit Difficult
-
Total Repair Time:30 - 60 mins
-
Tools:Nutdriver, Socket set
Was this instruction helpful to you?
Thank you for voting!
Water leaking under the washer
Removed old hose, drained the water from the hose. Put new hose on.
Parts Used:
-
Laura from Westfield, MA
-
Difficulty Level:A Bit Difficult
-
Total Repair Time:30 - 60 mins
-
Tools:Nutdriver
Was this instruction helpful to you?
Thank you for voting!
Leg was mssing after move into new home.
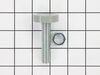
Purchased x4 new adjustable legs. Leaned the washer back and held in place with block of wood. Loosened the two older front legs with an adjustable wrench because they had a locking nut and replaced with new legs. Repeated process on back side of washer. Once all the new legs were installed leveled the machine adjusting the legs if necessary.
Parts Used:
-
Matthew from The Woodlands, TX
-
Difficulty Level:Easy
-
Total Repair Time:Less than 15 mins
-
Tools:Wrench (Adjustable)
Was this instruction helpful to you?
Thank you for voting!
drain hose had a hole near wall drain.
The new hose was exactly like the one I removed. It was simply a matter of putting the new hose through the back, replacing the hose clamp, take the piece off the old hose that makes the bend in the hose to go in the wall drain. Replace the lower front panel with two screws and I was done.
Parts Used:
-
Ed from Klamath Falls, OR
-
Difficulty Level:Really Easy
-
Total Repair Time:15 - 30 mins
-
Tools:Nutdriver
Was this instruction helpful to you?
Thank you for voting!
Washing machine was making a banging noise
Turned off water & unpluged ac power. Removed 2 screws on front panel. Removed panel. Found peices of V belt. Removed 4 screws from electric motor which allowed the belt to come out. Ordered new belt on line. Received the item in one day. Reversed the above sequence above. Now the washer is running as good as new.
Parts Used:
-
Paul from East Berlin, PA
-
Difficulty Level:Really Easy
-
Total Repair Time:15 - 30 mins
-
Tools:Nutdriver, Screw drivers, Socket set
Was this instruction helpful to you?
Thank you for voting!