















PGB960BEJ2TS General Electric Range - Instructions
Keep searches simple. Use keywords, e.g. "leaking", "pump", "broken" or "fit".
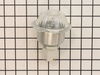
Oven Lamp Holder Burned
removed two phillips screws. Unplugged electrical connections replaced unit from PartSelect. They sent holder cover and new bulb (surprise). Great store with great directions.
Parts Used:
-
Jack from Okmulgee, OK
-
Difficulty Level:Really Easy
-
Total Repair Time:Less than 15 mins
-
Tools:Screw drivers
24 of 32 people
found this instruction helpful.
Was this instruction helpful to you?
Thank you for voting!
Interior light needed replaced
Unplugged the appliance for safety. Removed two 1/4" screws that held the assembly in place. Carefully removed the wire guard that retains the glass shield. Unscrewed old light bulb and replaced with new part. Reversed the steps after cleaning glass cover.
Parts Used:

-
Leo from TWIN FALLS, ID
-
Difficulty Level:Really Easy
-
Total Repair Time:Less than 15 mins
-
Tools:Nutdriver
22 of 43 people
found this instruction helpful.
Was this instruction helpful to you?
Thank you for voting!
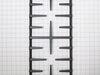
Grate to replace griddle
-
Barbara from LOUISVILLE, KY
-
Difficulty Level:Very Easy
-
Total Repair Time:Less than 15 mins
10 of 14 people
found this instruction helpful.
Was this instruction helpful to you?
Thank you for voting!
Twice I ordered the oven light bulb & each time the light bulb was defected
I had to call for a appointment for repair with GE Appliance because I thought then it . .was something electrical. The technician came out & checked everything out, turned out it was not electrical, The technician went out to his truck got a light bulb from his truck, put it in & it worked. It cost me $121.00 for trip charge from GE appliance for a light bulb that worked, your light bulbs were defective twice. Very disappointed with your products, cost me alot of money for a good light bulb thru GE appliance
Parts Used:
-
Barbara from BELLEVUE, WA
-
Difficulty Level:Very Difficult
-
Total Repair Time:Less than 15 mins
15 of 32 people
found this instruction helpful.
Was this instruction helpful to you?
Thank you for voting!
Oven light did not work
Turned off power to the oven, Removed the oven light housing, installed new housing, turned power on and walla.
Parts Used:
-
Howard from Rio Vista, CA
-
Difficulty Level:Really Easy
-
Total Repair Time:Less than 15 mins
-
Tools:Nutdriver
9 of 16 people
found this instruction helpful.
Was this instruction helpful to you?
Thank you for voting!
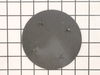
Original burner cap was chipping; must have been dropped somewhere along the line.
New burner cap replaced old; just placed over burner; no tools required.
One suggestion: burner cap should have been shipped with thicker bubble protection (easy to do). It was minimally wrapped and placed in a thin, bubble envelope, risking damage in shipping process. Luckily, the burner arrived in tact and usable.
One suggestion: burner cap should have been shipped with thicker bubble protection (easy to do). It was minimally wrapped and placed in a thin, bubble envelope, risking damage in shipping process. Luckily, the burner arrived in tact and usable.
Parts Used:
-
Mitzi from Briarcliff Manor, NY
-
Difficulty Level:Really Easy
-
Total Repair Time:Less than 15 mins
8 of 15 people
found this instruction helpful.
Was this instruction helpful to you?
Thank you for voting!
wire connection to socket was bad
Disconnected the old socket ( 2 srews ) removed the two wires from the old socket, reconnected them to the new socket and reinstalled the lamp.
Parts Used:
-
David from Gansevoort, NY
-
Difficulty Level:A Bit Difficult
-
Total Repair Time:15 - 30 mins
-
Tools:Pliers, Screw drivers
6 of 10 people
found this instruction helpful.
Was this instruction helpful to you?
Thank you for voting!
Light not working tried to Remove light assembly not knowing glass could screw out. Without thinking grounded exposed hot wire to burner bracket melting light socket connector. Had to replace socket.
First and most important trun off curcit breaker. Use 1/4 inch but driver to remove socket (2) screws. Remove ground and hot wire clips from old socket, replace on new socket. Screw back into oven ceiling and turn on power. Reset clock and your are done. Very simple.
Parts Used:
-
Richard from CUMMING, GA
-
Difficulty Level:Really Easy
-
Total Repair Time:15 - 30 mins
-
Tools:Socket set
4 of 4 people
found this instruction helpful.
Was this instruction helpful to you?
Thank you for voting!
One burner would not light from spark. All other burners lite with spark.
First I checked that the wire and sparker was working by switching the wires on top of the range. I did this by pulling out the sparker switching it from the back working burner on the same side. The same burner would not light so I knew it was not the sparker.
Then watch a bunch of videos and found this gal to be the most helpful on how to take apart my exact stove.
Go here: https://www.youtube.com/watch?v=WRGfuhUzEaY
I did not take everything apart like she did. I ordered the spark module and just replaced it following her method to take off the back, switch the wires to the new module, then put everything back together again.
All burners have been working perfectly since the fix.
Then watch a bunch of videos and found this gal to be the most helpful on how to take apart my exact stove.
Go here: https://www.youtube.com/watch?v=WRGfuhUzEaY
I did not take everything apart like she did. I ordered the spark module and just replaced it following her method to take off the back, switch the wires to the new module, then put everything back together again.
All burners have been working perfectly since the fix.
Parts Used:

-
Thomas from DEARBORN, MI
-
Difficulty Level:Easy
-
Total Repair Time:30 - 60 mins
-
Tools:Nutdriver
4 of 6 people
found this instruction helpful.
Was this instruction helpful to you?
Thank you for voting!
Oven Light Assembly damaged
I have a double oven and coincidently I had to replace the two Oven Light Assemblies.
I am really glad about your web site because once I got the number from my oven model you guys were the first ones that came up. Thanks to your prompt and reliable service my oven is back to its original state.
Jose Figueroa
I am really glad about your web site because once I got the number from my oven model you guys were the first ones that came up. Thanks to your prompt and reliable service my oven is back to its original state.
Jose Figueroa
Parts Used:
-
Jose from Frederick, MD
-
Difficulty Level:Really Easy
-
Total Repair Time:15 - 30 mins
-
Tools:Nutdriver, Pliers
5 of 10 people
found this instruction helpful.
Was this instruction helpful to you?
Thank you for voting!
Large burner cap finish was damaged
Just lifted old burner off with my fingers and replaced with the new one. What needs to be focused on here is the fact that Part Select has such a complete line of parts rather than the difficulty in the install.
Parts Used:
-
Richard B from CLARKSBORO, NJ
-
Difficulty Level:Very Easy
-
Total Repair Time:Less than 15 mins
3 of 4 people
found this instruction helpful.
Was this instruction helpful to you?
Thank you for voting!
the griddle was scratch up
-
Betty from PHILADELPHIA, PA
-
Difficulty Level:Really Easy
-
Total Repair Time:Less than 15 mins
2 of 2 people
found this instruction helpful.
Was this instruction helpful to you?
Thank you for voting!
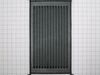
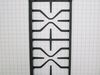
Original Grates and Reversible needed replacing. The replacements were a perfect fit.
Did a search and found PartsSelect.
Inserted the model number of the GE Profile Gas Range.
Located the the needed parts, and added to the 'shopping' cart.
Then purchased, then waited for delivery.
Inserted the model number of the GE Profile Gas Range.
Located the the needed parts, and added to the 'shopping' cart.
Then purchased, then waited for delivery.
Parts Used:
-
Karen from CEDAR RAPIDS, IA
-
Difficulty Level:Really Easy
-
Total Repair Time:Less than 15 mins
3 of 5 people
found this instruction helpful.
Was this instruction helpful to you?
Thank you for voting!
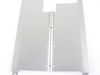
Wrong parts
Your diagram on your website says lower oven is incorrect everything on there is upper oven I ordered the wrong part because your diagrams are all wrong OK
Parts Used:
-
AMON from MARYSVILLE, CA
-
Difficulty Level:Very Difficult
-
Total Repair Time:30 - 60 mins
2 of 2 people
found this instruction helpful.
Was this instruction helpful to you?
Thank you for voting!
The light inside the oven had burned out
0. As a safety precaution, unplug the range or hit the relevant fuse breaker before you start. You might also want to grab a flashlight. Definitely do not try to do this while the oven is hot.
1. Pinch the wire over the light bulb cap to remove it. This is inside the oven at the back.
2. Pop off the hemispherical glass cap.
3. Unscrew the old light bulb, and screw the new light bulb in its place.
4. Put the cap back.
5. Secure the cap by putting the wire back in its slots on the cap.
No tools needed, the cap is just held in place with pressure from the wire.
1. Pinch the wire over the light bulb cap to remove it. This is inside the oven at the back.
2. Pop off the hemispherical glass cap.
3. Unscrew the old light bulb, and screw the new light bulb in its place.
4. Put the cap back.
5. Secure the cap by putting the wire back in its slots on the cap.
No tools needed, the cap is just held in place with pressure from the wire.
Parts Used:
-
Catherine from SEATTLE, WA
-
Difficulty Level:Very Easy
-
Total Repair Time:Less than 15 mins
3 of 5 people
found this instruction helpful.
Was this instruction helpful to you?
Thank you for voting!