















PFDN445EL2MV General Electric Dryer - Instructions
Keep searches simple. Use keywords, e.g. "leaking", "pump", "broken" or "fit".
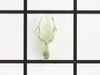
I broke the door strike on the dryer.
Wife was out of town, visiting family. I broke the door strike by wedging the dryer door between the laundry room door, closed the laundry room door and it snapped the door strike breaking it. I ordered the part, and it shipped fast using the standard shipping, nothing fancy. Grabbed a pair of pliers and pushed the new door strike into place. It snapped right in, fits and works perfect like nothing ever happened. The wife will never know :)
Parts Used:
-
CHRISTOPHER from PHENIX CITY, AL
-
Difficulty Level:Really Easy
-
Total Repair Time:Less than 15 mins
-
Tools:Pliers
1 person
found this instruction helpful.
Was this instruction helpful to you?
Thank you for voting!
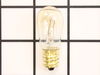
light bulb dead
-
Carole from Wynnewood, PA
-
Difficulty Level:Really Easy
-
Total Repair Time:Less than 15 mins
2 of 4 people
found this instruction helpful.
Was this instruction helpful to you?
Thank you for voting!
Burnt out bulb
-
Jeffry from ROCKVILLE, MD
-
Difficulty Level:Very Easy
-
Total Repair Time:Less than 15 mins
1 person
found this instruction helpful.
Was this instruction helpful to you?
Thank you for voting!
Bulb was intermittently working
Inspected door switch operation and was working properly and simply looked for bulb in the dryer drum housing and located it immediately above the door opening,unscrewed it and noticed the broken elements inside. The bulb is a 10w/120V. Installed bulb problem solved.
Parts Used:
-
Peter from LEOMINSTER, MA
-
Difficulty Level:Very Easy
-
Total Repair Time:Less than 15 mins
1 person
found this instruction helpful.
Was this instruction helpful to you?
Thank you for voting!
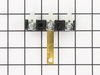
When moving the dryer there was a loud pop and the dryer circuit breaker tripped.
When the dryer was installed last year by the dealer, one of the hot leads was not screwed down tightly. Over time the screw loosened and began to arc causing the plastic holding the screw to melt. When I moved the dryer the hot lead fell off and hit the terminal block cover shorting out the dryer. I was able to locate the exact terminal block I needed with their helpful dryer section diagrams. The part came in the time they said. I took off the old terminal block with just 2 attached screws. i kept track of which screws held the hot and neutral conductors and the ground before I removed them. I was then able to slide on the dryer wires and attached the home conductors. I put on the cover plate, turned on the circuit breaker and it worked.
Parts Used:
-
LARRY from HAMILTON, OH
-
Difficulty Level:A Bit Difficult
-
Total Repair Time:30 - 60 mins
-
Tools:Pliers, Screw drivers
1 person
found this instruction helpful.
Was this instruction helpful to you?
Thank you for voting!
Reversing the dryer door.
-
Chris from WACO, TX
-
Difficulty Level:Easy
-
Total Repair Time:15 - 30 mins
-
Tools:Screw drivers
1 person
found this instruction helpful.
Was this instruction helpful to you?
Thank you for voting!
Original terminal grounding block melted for unknown reason.
Unscrewed the old, screwed in the new making sure wires matched up same as before. Reset my breaker and works like new again.
Parts Used:
-
Manuel, J from MCALESTER, OK
-
Difficulty Level:Very Easy
-
Total Repair Time:15 - 30 mins
-
Tools:Screw drivers
1 person
found this instruction helpful.
Was this instruction helpful to you?
Thank you for voting!
Bulb burned out
Unscrewed the old bulb using the lefty loosey method. Installed the new bulb by turning it clockwise or righty tighty.
Parts Used:
-
Pete from CEDAR RAPIDS, IA
-
Difficulty Level:Very Easy
-
Total Repair Time:Less than 15 mins
1 person
found this instruction helpful.
Was this instruction helpful to you?
Thank you for voting!
Switch not working.
Open the door and removed the part. Installed the new part and started the dryer.
Parts Used:
-
Alan from BELFORD, NJ
-
Difficulty Level:Very Easy
-
Total Repair Time:Less than 15 mins
1 person
found this instruction helpful.
Was this instruction helpful to you?
Thank you for voting!
Dryer would shut off on heat dry after a couple of minutes. I could feel the heat working. It would only continue to run on fluff/no heat
Pulled the drum an found spade clip burned on wire. Hi limit Thermostat crumbled/ broke while pulling spade clip so I trimmed back the wire, cleaned the spade clip and soldered the wire back on. Isolated the other thermostats in the system and tested for resistance. Reassembled dryer.
Parts Used:
-
Dave from Wallingford, CT
-
Difficulty Level:Really Easy
-
Total Repair Time:15 - 30 mins
-
Tools:Pliers, Screw drivers
1 of 2 people
found this instruction helpful.
Was this instruction helpful to you?
Thank you for voting!
Light bulb blew out inside the dryer
-
Donna from Vista, CA
-
Difficulty Level:Really Easy
-
Total Repair Time:Less than 15 mins
3 of 8 people
found this instruction helpful.
Was this instruction helpful to you?
Thank you for voting!
Had difficulty finding the correct size in any store.
All the stores had either a smaller watt or a larger watt and the book suggested always using the correct watt. I was glad to find it on this sight and it was delivered very quickly.
Parts Used:
-
Linda from The Woodlands, TX
-
Difficulty Level:Really Easy
-
Total Repair Time:Less than 15 mins
0 of 1 people
found this instruction helpful.
Was this instruction helpful to you?
Thank you for voting!
clip on door broke
-
edward from early branch, SC
-
Difficulty Level:Really Easy
-
Total Repair Time:Less than 15 mins
0 of 1 people
found this instruction helpful.
Was this instruction helpful to you?
Thank you for voting!
melted plastic on diffuser
Removed the 3 star screws, putting in a piece if wire as I removed them. Wire was not stiff enough and let the drum slip thus binding making it hard to remove. Started over. Finally called a friend for help. I bought 3 tension pins the same size as the screws. When removing the diffuser screws, insert a tension pin in the hole as you remove each of the screws. The tension pins are hard metal and do not have a head. The diffuser will slip over them. After the diffuser was in place, we turned on the dryer to make sure it was running ok. I noticed what looked like lint toward the front. It was part of the felt gasket on the front of the drum and front of the dryer. We removed the screws on the dryer front and pulled it forward. The felt was rethreaded into its slot, put the front back in place,and replaced the screws that hold everything in place. If you turn the part of the dryer that spins by hand, make sure you are turning it in the correct direction. Turning it the wrong way is probably what caused the felt gasket to come loose causing more work.
Parts Used:
-
Carol from Arco, ID
-
Difficulty Level:A Bit Difficult
-
Total Repair Time:1- 2 hours
-
Tools:Screw drivers
0 of 1 people
found this instruction helpful.
Was this instruction helpful to you?
Thank you for voting!
aligning heat deflector with drum
As I pulled each of the 3 bolts, I put a alignment rod into each of the holes. After I pulled the old deflector off, I had basically 3 pins/rods to slip the new deflector on and keep everything in basic alignment. Pulled one rod, reinstalled the bolt, so on and so on. Ran motor for noises or misalignment and had neither. Pretty simple repair.
Parts Used:
-
Thomas from Northglenn, CO
-
Difficulty Level:A Bit Difficult
-
Total Repair Time:30 - 60 mins
0 of 1 people
found this instruction helpful.
Was this instruction helpful to you?
Thank you for voting!