















PDW7300NB General Electric Dishwasher - Instructions
Keep searches simple. Use keywords, e.g. "leaking", "pump", "broken" or "fit".
Leak at bottom of door.
I watched the parts select video and followed their instructions. Only “ issue” was there were no screws on the door behind the exterior skin as in the video, so lifting the inside door liner to put the new lower door seal in was concerning. I was able to pull the liner up enough and slid the seal in with no problem. The video was the key to a smooth repair.
Parts Used:
-
Robert from Clay, NY
-
Difficulty Level:Really Easy
-
Total Repair Time:30 - 60 mins
-
Tools:Pliers, Screw drivers
4 of 4 people
found this instruction helpful.
Was this instruction helpful to you?
Thank you for voting!
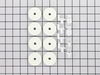
Three of the 8 wheels broke.
The newly purchased wheels have a little different design and could be installed in a matter of few seconds.
Parts Used:
-
Asok from HELOTES, TX
-
Difficulty Level:Very Easy
-
Total Repair Time:Less than 15 mins
5 of 7 people
found this instruction helpful.
Was this instruction helpful to you?
Thank you for voting!
Wheels and axles on bottom dishwasher rack broke.
-
Joan from FREEPORT, ME
-
Difficulty Level:Really Easy
-
Total Repair Time:Less than 15 mins
6 of 10 people
found this instruction helpful.
Was this instruction helpful to you?
Thank you for voting!
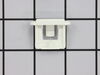
Upper rack kept dropping from the wheels when we pulled it out
We knew roughly how we needed to put the cap on the rail, but our technique of simply forcing it in the end of the rail wasn't working. The trick is to bend the moveable part of the plastic cap inward while you're sliding it in, and it clicks right into place.
The location of the cap we were replacing was the upper back left, which made it a little tricky to reach back there and insert it, especially for a bigger guy like myself. We took the bottom rack out and my smaller wife was more easily able to lean in the dishwasher and reach back there to insert it.
The location of the cap we were replacing was the upper back left, which made it a little tricky to reach back there and insert it, especially for a bigger guy like myself. We took the bottom rack out and my smaller wife was more easily able to lean in the dishwasher and reach back there to insert it.
Parts Used:
-
Joel from Cypress, TX
-
Difficulty Level:Easy
-
Total Repair Time:Less than 15 mins
4 of 4 people
found this instruction helpful.
Was this instruction helpful to you?
Thank you for voting!
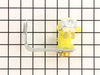
Water leak under Unit
Remove Base Access Panel; Removed Valve Mounting Bracket & Valve; Disconnected Wire Connector; Disconnected Supply Line & distribution Hose; Reversed the Process. Piece of Cake; Part was O.E.M.Component Exact Fit; Took Longer to Write this than it took for Fix. Thanks I Will Be Back for other Parts.!
Parts Used:
-
GEORGE from LEVITTOWN, PA
-
Difficulty Level:Really Easy
-
Total Repair Time:Less than 15 mins
-
Tools:Nutdriver, Pliers
8 of 16 people
found this instruction helpful.
Was this instruction helpful to you?
Thank you for voting!
rack slide end cap missing
installed part on inside end of rail. no tools needed. original part wouldn't stay on rail. finished in 2 minutes
wife happy
wife happy
Parts Used:
-
Carrell from Cochranville, PA
-
Difficulty Level:Really Easy
-
Total Repair Time:Less than 15 mins
4 of 4 people
found this instruction helpful.
Was this instruction helpful to you?
Thank you for voting!
The lower dishrack connectors on the original roller axle parts had loosened so the rollers kept falling off
1. assemble each of the new rollers and axles by inserting the axle through the roller from the back side; push until the two parts snap together; 2. remove the cutlery basket, take the lower dishrack out of the dishwasher and turn it upside down; 3. remove the old rollers from the dishrack and send them for recycling; 4. push each roller on the corresponding wire shaft of the dishrack, with the axle connector arm against the vertical part of the shaft, pushing the roller assembly against the shaft until it snaps together. NOTE: the new rollers are wider than the originals and fit snugly on the tracks; no wobbling; the connector snaps are an improved design that should last as long as the dishwasher.
Parts Used:
-
DONALD from PORTLAND, ME
-
Difficulty Level:Really Easy
-
Total Repair Time:Less than 15 mins
6 of 10 people
found this instruction helpful.
Was this instruction helpful to you?
Thank you for voting!
Wheel had melted and support cracked
Removed the lower rack and installed new wheels with clips
Parts Used:
-
Tom from UPPR CHICHSTR, PA
-
Difficulty Level:Very Easy
-
Total Repair Time:Less than 15 mins
5 of 7 people
found this instruction helpful.
Was this instruction helpful to you?
Thank you for voting!
Wheels on lower rack failed
-
Wayne from DUMFRIES, VA
-
Difficulty Level:Really Easy
-
Total Repair Time:Less than 15 mins
6 of 10 people
found this instruction helpful.
Was this instruction helpful to you?
Thank you for voting!
missing wheel on bottom rack of dishwasher
Just snapped the stud roller through the center of the wheel and then attatched it to rack.
Parts Used:
-
Laura from Roanoke, VA
-
Difficulty Level:Really Easy
-
Total Repair Time:Less than 15 mins
5 of 7 people
found this instruction helpful.
Was this instruction helpful to you?
Thank you for voting!
Bottom tray not moving properly
Install the rollers on the studs first, then snap the assembly onto the tray. Really easy.
Parts Used:
-
Marvin from Lake Worth, FL
-
Difficulty Level:Really Easy
-
Total Repair Time:Less than 15 mins
5 of 8 people
found this instruction helpful.
Was this instruction helpful to you?
Thank you for voting!
Bottom dish rack would not roll in and out because several wheels were off because of broken axles. It had to be lifted to get in and out which resulted in many chipped and broken dishes.
I removed the bottom rack from dishwasher. Took off the wheels with the broken axles. Put the new axles on the new wheels and slipped them on the rack. They fit perfectly and rack now glides in and out smoothly. Easy as pie, and took less than 10 minutes. Parts arrived in just two days. Thanks for the great service.
Parts Used:
-
Darrell from WAHPETON, ND
-
Difficulty Level:Very Easy
-
Total Repair Time:Less than 15 mins
6 of 11 people
found this instruction helpful.
Was this instruction helpful to you?
Thank you for voting!
The wheels on the lower rack of our dishwasher kept falling off.
Removed the lower rack. Took off the old wheels. Put the axles on the new wheels which took a little manpower, but became easier once you did a couple (there are 8 wheels). Then snapped the new wheels on the rack which was really simple. The new design is much improved to the old one. The wheels glide better, then they ever did. We're sorry we didn't think of this repair years ago and the cost was a fraction of the cost of a new dishwasher.
Parts Used:
-
Sharon from THE VILLAGES, FL
-
Difficulty Level:Really Easy
-
Total Repair Time:Less than 15 mins
4 of 6 people
found this instruction helpful.
Was this instruction helpful to you?
Thank you for voting!
one old roller broke
pulled off all old rollers and axiies and snapped on new ones
Parts Used:
-
Barry from FISHKILL, NY
-
Difficulty Level:Really Easy
-
Total Repair Time:Less than 15 mins
5 of 9 people
found this instruction helpful.
Was this instruction helpful to you?
Thank you for voting!
Water leakage at valve
I watched the video that came with email on part. Gave instructions on how to. Thank you !
Parts Used:
-
Jimmy G from SPRING, TX
-
Difficulty Level:Very Easy
-
Total Repair Time:Less than 15 mins
-
Tools:Screw drivers, Wrench (Adjustable)
3 of 3 people
found this instruction helpful.
Was this instruction helpful to you?
Thank you for voting!