















PDRS0MBYALSS General Electric Refrigerator - Instructions
Keep searches simple. Use keywords, e.g. "leaking", "pump", "broken" or "fit".
The door activated light switch was missing.
Pulled the two wires out from the access hole in the lower part of the refrigerator. Put them in the spade connectors on the new switch, and pushed the switch into place.
Parts Used:

-
Don from Eugene, OR
-
Difficulty Level:Really Easy
-
Total Repair Time:Less than 15 mins
1 of 3 people
found this instruction helpful.
Was this instruction helpful to you?
Thank you for voting!
Light socket missing in refrigerator
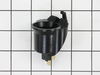
Frig parts had been scavenged in an apartment complex. Restoring socket was only a matter of plugging in two spade contacts and clipping in socket.
Parts Used:
-
Wayne from Issaquah, WA
-
Difficulty Level:Really Easy
-
Total Repair Time:Less than 15 mins
1 of 4 people
found this instruction helpful.
Was this instruction helpful to you?
Thank you for voting!
Bad switch for door prevented interior light from coming on
Just as your video described, although due to the age of the fridge, it took a bit longer to remove the defective switch. Your video made this so simple, I can't imagine why we lived with a dark fridge for so long! I was ready to buy a whole new fridge, as repairmen are often nonexistent for small repairs. I am the biggest fan of your company & it's repair video. THANK YOU SO MUCH
Parts Used:
-
Patricia from Sylva, NC
-
Difficulty Level:A Bit Difficult
-
Total Repair Time:15 - 30 mins
-
Tools:Pliers, Screw drivers
0 of 1 people
found this instruction helpful.
Was this instruction helpful to you?
Thank you for voting!
light in freezer section not working
Using plyers Pulled old switch down and out. Put new one in and pushed new switch up into position. The switch plugs into the contacts, no wiring needed. Worked like a charm. You saved me 200 dollars GE repair bill. Thanks
Parts Used:
-
Victor from Fort Myers, FL
-
Difficulty Level:Easy
-
Total Repair Time:15 - 30 mins
-
Tools:Pliers, Screw drivers
6 of 24 people
found this instruction helpful.
Was this instruction helpful to you?
Thank you for voting!
Refrigerator Fresh Food condenser iced-up. Frozen side OK
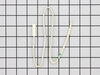
Had to remove all the covers and fans to expose the condenser, which was difficult as the parts were frozen to it. The styrofoam covering the condenser made it almost impossible to defrost it. Therefore, I ripped the styrofoam off to expose the condenser. Was not really difficult to fix the styrofoam cover using metal tape. Replaced temperature sensor in aluminum block, and used butyl sealant to secure. Had to also re-install parts of ice-ball kit that were not well covered. Lots of parts to keep track of, but anyone could do it.
Parts Used:
-
Dan from Decatur, GA
-
Difficulty Level:Difficult
-
Total Repair Time:More than 2 hours
-
Tools:Nutdriver, Screw drivers
Was this instruction helpful to you?
Thank you for voting!
Fridge wouldn't keep temp
My son replaced both temperature sensors and the fridge works great now!!! Like brand new again!!!!
Parts Used:
-
Richard from Nesquehoning, PA
-
Difficulty Level:Really Easy
-
Total Repair Time:Less than 15 mins
Was this instruction helpful to you?
Thank you for voting!
Fridge/Freezer getting too warm
What an awesome site! After putting in my model number and finding the problem I was having, I simply picked the 2 parts that were most likely to solve the problem. I bought a defrost thermostat, and defrost heater. To a high certainty, they would solve my problem. They didn't however! I ended up having to buy a temperature sensor on another order a few weeks later when the problem resurfaced! My own fault. I should have bought it the first time. As others have written: the longest part of the job is defrosting the ice from the coil. One thing I did that I didn't see suggested: plug the drain hole below the coil. I put a couple towels in the bottom of the freezer and ran the hair dryer. Didn't take long. I read that the amount of water created will overflow the pan under the refrigerator, so I plugged the drain hole. Once you clean that mess up, the repair is pretty straight forward. Great site. Even through I had to make two separate purchases, I still saved a lot of money. Thanks!
Parts Used:
-
Nick from Burnt Cabins, PA
-
Difficulty Level:Easy
-
Total Repair Time:1- 2 hours
-
Tools:Screw drivers, Socket set
Was this instruction helpful to you?
Thank you for voting!
no light in freezer
-
christopher from collegeville, PA
-
Difficulty Level:Really Easy
-
Total Repair Time:Less than 15 mins
Was this instruction helpful to you?
Thank you for voting!
Both the fridge aqnd freezer would not get cold.
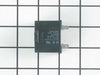
Easy. Followed the video instrucations. the part was right there next to the compressor.
Parts Used:
-
Mary from Farmingdale, NY
-
Difficulty Level:Easy
-
Total Repair Time:Less than 15 mins
-
Tools:Screw drivers
Was this instruction helpful to you?
Thank you for voting!
needed new light socket
-
Charles from Williamsburg, VA
-
Difficulty Level:Really Easy
-
Total Repair Time:Less than 15 mins
Was this instruction helpful to you?
Thank you for voting!
failed light switch
I started removing the switch by prying on the right side with a screwdriver, when it emerged enough I used pliers to finish removing it. I then unpluged rhe wires from the bad switch and pluged them on the new switch and "poped" it into the hole.
Parts Used:
-
Jules from Crowley, LA
-
Difficulty Level:Easy
-
Total Repair Time:Less than 15 mins
-
Tools:Pliers, Screw drivers
Was this instruction helpful to you?
Thank you for voting!
light would not stay on
First I flipped breaker to off position for refigerator, Pulled down on socket and broke it free. Then took needle nose piars to pull wire and plug out from hole, so I could conect to new light socket then snaped it in place . Hardest part was getting wire and plug out of hole.
Parts Used:
-
Kenneth from Leavenworth, KS
-
Difficulty Level:Easy
-
Total Repair Time:Less than 15 mins
Was this instruction helpful to you?
Thank you for voting!
refig light did not work
-
paul from east hanover, NJ
-
Difficulty Level:Really Easy
-
Total Repair Time:15 - 30 mins
-
Tools:Pliers, Screw drivers
Was this instruction helpful to you?
Thank you for voting!
coils were icing up and refrigerator section was warm freezer was cold
Unplugged unit and removed vented cover over compressor section. The run capacitor is a simple fix 1 Phillips head screw and 2 spade wire connectors. For the temperature sensor I had to remove all drawers and the ice maker to remove the back cover to expose the condenser. Put a bowl at the drain stem in the rear of the unit and used a heat gun to defrost the coils on the condenser. Cut the wire about 3" from the sensor end . cut about the same off the new sensor stripped the wires put shrink wrap on each wire, attached butt connecors . heat gun for the shrink wrap and reassembled everything. Simple job that took about a half hour to do both. I will monitor the fridge for a couple of weeks to see if I need to change the control board.
Parts Used:
-
Chuck from TARRYTOWN, NY
-
Difficulty Level:Easy
-
Total Repair Time:30 - 60 mins
-
Tools:Screw drivers
Was this instruction helpful to you?
Thank you for voting!
defrost problem (refrigerator/freezer not cooling)
After replacing the Defrost Thermostat, Defrost Heater Assembly, and the Main Board, I concluded that the problem must be the Defrost Thermistor, which I replaced in less than 10 minutes and it fixed the problem! I cut the wires on the old thermistor and connected the new one after stripping the wires and taped the new connections with electrical wire. Fast and easy repair (the last part anyway ;).
Parts Used:
-
Gordon from Sugar Grove, IL
-
Difficulty Level:Easy
-
Total Repair Time:More than 2 hours
-
Tools:Pliers, Screw drivers
Was this instruction helpful to you?
Thank you for voting!