















PDCS1NCZCLSS General Electric Refrigerator - Instructions
Keep searches simple. Use keywords, e.g. "leaking", "pump", "broken" or "fit".
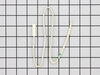
Fridge wouldn't keep temp
My son replaced both temperature sensors and the fridge works great now!!! Like brand new again!!!!
Parts Used:
-
Richard from Nesquehoning, PA
-
Difficulty Level:Really Easy
-
Total Repair Time:Less than 15 mins
Was this instruction helpful to you?
Thank you for voting!
sticky switch
easy pry out, disconnect wiring, connect on new switch and press in switch.
Parts Used:

-
ANTHONY from NEW EGYPT, NJ
-
Difficulty Level:Really Easy
-
Total Repair Time:Less than 15 mins
-
Tools:Pliers, Screw drivers
Was this instruction helpful to you?
Thank you for voting!
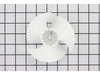
Rat chewed up fan blades in refrigerator at our camp.
We just pried off the fan blades and pushed on the new part. Could not have been easier. The rat has been permanently dipatched and, hopefully, that is that.
Parts Used:
-
Wendell from Baton Rouge, LA
-
Difficulty Level:Really Easy
-
Total Repair Time:Less than 15 mins
-
Tools:Screw drivers
Was this instruction helpful to you?
Thank you for voting!
Fridge was freezing food near the back, adjusting internal temp not fixing the problem
Unplugged the refrigerator first....then on the inside of the fridge, I popped the temp sensor cover off (upper LH side) and exposed the old sensor. I snipped off the old sensor about 3" down from the end and connected the new sensor (which I trimmed down to about 3" long) with some heat shrink wire nuts/connectors. Let the fridge run for a day or so and confirmed the problem was solved! Oh yeah, there was no way to tell the 2 wires apart (power vs. ground) on the sensor. However there was a manufacturer's stamp on the wires. So note the orientation of the text and mark one of the wires with a sharpie on both the old and new sensor before trimming. This will give you a reference for which wires to connect when adding the new sensor to the old wires.
Parts Used:
-
Zachary from Decatur, GA
-
Difficulty Level:Easy
-
Total Repair Time:Less than 15 mins
-
Tools:Pliers
Was this instruction helpful to you?
Thank you for voting!
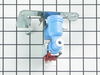
Water would not stop flowing.
First I unplugged the refrigerator. I removed the cardboard from the back and unhooked the inlet water line with a wrench and the water line to the ice maker, which was a quick connect. I unplugged the wire harness and removed the valve, then installed the new valve, plugged in the wire harness and hooked up the water lines. I turned on the water line and plugged in the refrigerator. The ice maker works great.
Parts Used:
-
Mark from Monroe, WI
-
Difficulty Level:Really Easy
-
Total Repair Time:Less than 15 mins
-
Tools:Nutdriver, Wrench set
Was this instruction helpful to you?
Thank you for voting!
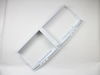
cracked veg top
In the description you negelcted to mention that it was a stripped top and that all moving parts from the old top would have to be transferred to the new top. It was doable but a hint at this possibility should have been indicated. An torx wrench was needed and fortunately my son was in and had his set of wrenches with him.
Parts Used:
-
Rose from Pound Ridge, NY
-
Difficulty Level:Really Easy
-
Total Repair Time:Less than 15 mins
Was this instruction helpful to you?
Thank you for voting!
extreme frost build up inside in back of freezer,also veggies were freezing in the fridge draw
no brainer,watched the video,worst thing was to thaw the freezer,it was realy frosted,works like new,very happy thank you.
Parts Used:
-
larry from lisbon, ME
-
Difficulty Level:Really Easy
-
Total Repair Time:15 - 30 mins
-
Tools:Screw drivers
Was this instruction helpful to you?
Thank you for voting!
Food section of fridge always warm
Located temperature sensor on condenser in the freezer section( as per instructional video ). Cut off bad sensor with wire cutter then soldered on the new sensor and sealed with electrical shrink wrap.
Parts Used:
-
Troy from Dacula, GA
-
Difficulty Level:Easy
-
Total Repair Time:15 - 30 mins
-
Tools:Pliers, Socket set
Was this instruction helpful to you?
Thank you for voting!
freezer no cold enought
as per video- follow all of the videos and u r going to save a lot of money tx partselect im glad I found u guys ps only order from partselect.com they only ship the correct parts remember look at the video select the symptom and buy as per video tx again problemsolved
Parts Used:
-
John J. from Deland, FL
-
Difficulty Level:Really Easy
-
Total Repair Time:15 - 30 mins
-
Tools:Nutdriver, Pliers
Was this instruction helpful to you?
Thank you for voting!
Glass one piece veg/Fruit bins cover fell and broke during cleaning
First tried to install glass directly inside fridge. Glass did not fit. However, when the bins were removed as well as the top that holds the glass, the glass was inserted on a flat surface, it fit perfectly. No tools necessary and the bins and cover come in and out easily. The only trick is to hold the top with the glass on an angle to fit back in making sure that the glass does not slide out.
Parts Used:

-
Fred from Jupiter, FL
-
Difficulty Level:A Bit Difficult
-
Total Repair Time:15 - 30 mins
Was this instruction helpful to you?
Thank you for voting!
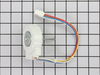
The refrigerator was making load and unusual noises.
I identified the noise was coming from the coils / and the fan. Cleaning the fan helped reduce the noise a bit but it still kept recurring. I ordered the part, which was really easy using the diagram on the website. The instructions and the video were really helpful and was able to remove the old motor and replace it with the new one with relative ease. While there I cleaned the fan blade and vacuumed the surrounding area. This whole repair went quite smoothly and has given me the confidence to take on other repairs before calling out the repairman.
Parts Used:
-
Ajaykumar from Plainsboro, NJ
-
Difficulty Level:Easy
-
Total Repair Time:15 - 30 mins
-
Tools:Pliers, Screw drivers
Was this instruction helpful to you?
Thank you for voting!
refig light did not work
-
paul from east hanover, NJ
-
Difficulty Level:Really Easy
-
Total Repair Time:15 - 30 mins
-
Tools:Pliers, Screw drivers
Was this instruction helpful to you?
Thank you for voting!
frige too cold
changed sensors did not repair problem,replaced damper with mechanical damper fixed problem.
Parts Used:
-
John from Island Lake, IL
-
Difficulty Level:A Bit Difficult
-
Total Repair Time:15 - 30 mins
-
Tools:Nutdriver, Pliers, Screw drivers
Was this instruction helpful to you?
Thank you for voting!
coil frosting up and refridgerator section was not cooling
took out shelves and removed the back plate my removing 2 screws with a nutdriver.removed the old defrost timer and defrost heater which was really easy.then installed the new ones.the video i watched on the website was really helpfull.
Parts Used:
-
Vernon from Harmony, NC
-
Difficulty Level:Really Easy
-
Total Repair Time:15 - 30 mins
-
Tools:Nutdriver, Screw drivers
Was this instruction helpful to you?
Thank you for voting!
My fridge was colder than my freezer
I can't tell you how luck I feel after finding your website I ordered the temperature sensor after watching one of your videos on-line and the repair went just as on the video. I pulled the "bad" sensor out, and replaced it with the new one. Keep in mind that this is the first time I ever touch an appliance, needless to say I'm feeling pretty good about that! All in all it took me about 20 minutes to complete my repair and it now has been about 4 days and the refrigerator is working like new again!
Parts Used:
-
Marco from Fallbrook, CA
-
Difficulty Level:Easy
-
Total Repair Time:15 - 30 mins
-
Tools:Nutdriver, Pliers
Was this instruction helpful to you?
Thank you for voting!