















PCB975DP3WW General Electric Range - Instructions
Keep searches simple. Use keywords, e.g. "leaking", "pump", "broken" or "fit".
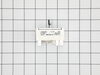
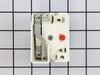
Old Element Cotrols were sparking due some type of Electrical Short
Unplugged the stove, removed the back control cover, removed the Element Control Knob on front, removed the two screws holding the control in place, pull one wire of old control and connected to the new control - one at a time to ensure proper placement, re-attached the screws, control knob, back cover, plugged in stove, and repairs were completed in less then 15 minutes for both controls.
Parts Used:
-
Steven from Boerne, TX
-
Difficulty Level:Easy
-
Total Repair Time:Less than 15 mins
-
Tools:Pliers, Screw drivers
Was this instruction helpful to you?
Thank you for voting!
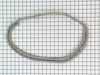
gasket on door was brittle
I feel like Macho Mom. I called in the repair guy since I was afraid of dealing with the gas. HE repaired one item but could tell I was comfortable fixing things and pointed out that the gasket was brittle and would cause major problems if not replaced. Took longer to order the part than do the repair, don't know what I was afraid of!
Parts Used:
-
Barbara from Bethesda, MD
-
Difficulty Level:Really Easy
-
Total Repair Time:Less than 15 mins
Was this instruction helpful to you?
Thank you for voting!
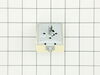
Dual burner on range stopped working.
Changed out the burner with a new replacement and it still didn't work. The socket on the old burner had a burn mark on it. The infinite switch operated sloppy not crisp like the other burners.Ordered a replacement online. Moved the range away from wall and cabinet and shut off electric at panel box. Removed upper back panel. removed switch knob and 2 screws holding switch. Compared electrical connections of both switches and saw that they were different. Read instructions which were included with new switch and found diagram for connecting old lead to new lead correctly. After all leads were connected, remounted new switch powered up and tested OK.
Parts Used:
-
Robert from Estero, FL
-
Difficulty Level:Easy
-
Total Repair Time:Less than 15 mins
-
Tools:Nutdriver, Pliers, Screw drivers
Was this instruction helpful to you?
Thank you for voting!
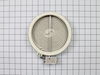
Burner not operational.
Disconnected power supply. Removed damaged element by releasing retainer clips and unplugging wire contacts. Replaced with new element.
Parts Used:
-
Gerald from Philadelphia, PA
-
Difficulty Level:Really Easy
-
Total Repair Time:Less than 15 mins
-
Tools:Screw drivers
Was this instruction helpful to you?
Thank you for voting!