Your coupon for will be reflected when you check out!
✖
Your coupon for
✖
Hello!
You're visiting the PartSelect site in U.S.
Would you like to shop on the Canadian site?
Stay on this site
Go to Canadian site
✖
Model Number Locations
1Select Category Type
Select Category Type
2Select Product Type
Select Product Type
3Select {MODEL} Type
Select {MODEL} Type
Sample Model Number Tags
Model numbers can be made up of numbers (1005400, for example) or a combination of letters and numbers (LAT1000AAE). The model number will most likely appear on either a paper sticker or a metal plate. Your appliance's model number tag may look similar to the sample model number tags shown here (model number highlighted in yellow):
Model has been saved to My Models. If you're not signed in, your lists are available on this device and will expire within 30 days.
Model has been saved to My Models.
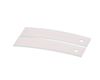
This authentic, white Drum Bearing Slide, also known as the bearing drum slide, glide, or pad, is a plastic, easy-to-install part for your dryer. It replaces the dryer's front drum slide to allow for ...
This fastening nut secures components firmly in place, helping maintain proper alignment and safe operation. It is commonly used as a replacement when original hardware is stripped, lost, or damaged.
The problem was intermittent. It only happened when the unit was first started. After it was restarted it usually worked until the load was dry. I looked at the schematics and saw that only the hi-temp therostat and the motor overload could stop the dryer completely. I put my volt meter on the hi-temp thermostat and ran the dryer. Wh
... Read moreen the dryer stopped I realized the hi-temp therm. was tripping. I read the web site help for this symptom and the suggestion was the bias therm. I replaced it and the unit worked.
I wanted to fix the cheapest possible problem first which was the thermostat.
Got the dryer apart and it was the wrong thermostat for the dryer, which was good news! I looked in inside floor of the dryer cabinet and saw alot of tiny "springs". Couldn't figure how they got there.
Turned out they were coils from t
... Read morehe heating element. Must have burnt out and fell free from the element. So I ordered that and replaced it.
I want to say that I'm in NJ and I ordered that thermostat and got it in ONE DAY! Thought that was too good to be true but when I ordered the heating element THAT CAME IN ONE DAY!
I don't know what kind of people work in the shipping department but they are awesome! You really made the difference on this job.
So did the info on your website. I've never even seen a dryer apart before. It was a piece of cake thanks to you guys. You just saved me about $500.
I first unplugged the unit, opened the top, disconnected and took off the control panel, took off the front panel to determine the source of the squeaking noise coming from the Dryer. I saw that 3 of the 4 Front Drum Glides were gone and the drum had worn away significant amounts of plastic from the Top Bearing Assembly. I purchased the
... Read moreTop Bearing Assembly and a set of 4 Front Drum Glides. Disassembled the damaged parts and reassembled with the new replacement parts. The reassembly took less than 20 minutes. I plugged in the Dryer and viola! It works as good as new.