















NT1896T Admiral Refrigerator - Instructions
Keep searches simple. Use keywords, e.g. "leaking", "pump", "broken" or "fit".
light switch sticking
I watched the video and thought "I can do this". Made some notes and then proceeded to remove the old switch and replace with the new one. Thank you.
Parts Used:

-
Paula from Rush, NY
-
Difficulty Level:Easy
-
Total Repair Time:Less than 15 mins
-
Tools:Pliers, Screw drivers
Was this instruction helpful to you?
Thank you for voting!
Light did not come on (bad bulb!) on TC18KL
I have never before seen a bulb with the filament intact not light. If the bulb's filament seems intact, screw the bulb into a known working lamp and see if it lights. When screwing it back into the socket in the fridge, it takes a bit of extra effort to fully seat (until it does, it won't light!). For replacing the switch, I unplugged the unit, used a paint scraper and worked it under the switch bezel from the right side. A bit of moxie, and the switch came out. The replacement switch had a different spade contact spacing than the original. I used a pair of scissors to cut the rubber bridge between the two switch wire connectors so I could connect to the new switch. In the end, it turned out to be the bulb. NOTE: The Model TC18KL is _not_ listed! What I finally found that the number "P7803211WL" on the sticker is actually a manufacturing code. Found this out by searching, and Sears' part search came up with matches.
Parts Used:
-
Louis from Beloit, WI
-
Difficulty Level:A Bit Difficult
-
Total Repair Time:Less than 15 mins
Was this instruction helpful to you?
Thank you for voting!
Light switch in the refrigerator was faulty from the first day we installed the fridge.
I had ordered some other parts for something entirely different off your website and service was great. So after almost ten years of a dark refrigerator, because of a defective switch, I decided to see if you had the part to fix it... You did and the part got here in 3 days. I had a working light switch and all the light in the world where my husband needed it most (in the fridge). It took me at the most ten minutes to replace the part. All is well now and I have a happy husband who can find the leftovers just fine. Thanks for your great service!
Parts Used:
-
Mary from Wasilla, AK
-
Difficulty Level:Easy
-
Total Repair Time:Less than 15 mins
-
Tools:Screw drivers
Was this instruction helpful to you?
Thank you for voting!
No light in frig
We tried repairing with a new switch which was very easy to install but it didn't fix the problem.
Parts Used:
-
Irene from Whitehall, MT
-
Difficulty Level:Really Easy
-
Total Repair Time:Less than 15 mins
Was this instruction helpful to you?
Thank you for voting!
Light switch which turns on the lights when the door opens went out
This is an easy fix, simply remove and replace. What I was impressed with is that a how to video was provided along with my part. I wish all manufactures would offer this, the video was easy to understand and you had a good view of the operation. Thanks, a job well done.
Parts Used:
-
Dennis from Lawrenceville, GA
-
Difficulty Level:Really Easy
-
Total Repair Time:Less than 15 mins
-
Tools:Nutdriver
Was this instruction helpful to you?
Thank you for voting!
Temp in the refrig side was too high. Freezer OK
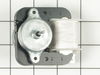
I unpluged the refrig, removed the shelves and the back panel on the freezer side of the unit. This exposed the fan motor and fan blade. I removed two screws holding the fan unit in place, unpluged the wires connecting the fan unit to power, and then removed two other screws securing the fan motor to the bracket. I removed the fan motor blade from the old unit and installed it on the new fam motor. I replaced the fan unit into the bracket, pluged the wires back into the fan motor and secured the motor to the refrig. Replaced the back panel and shelves, pluged the refrig into the wall.....easy.
Parts Used:
-
James from Sacramento, CA
-
Difficulty Level:Easy
-
Total Repair Time:Less than 15 mins
-
Tools:Screw drivers
Was this instruction helpful to you?
Thank you for voting!
light would come on and off
-
Dora from Rock Island, IL
-
Difficulty Level:Really Easy
-
Total Repair Time:Less than 15 mins
Was this instruction helpful to you?
Thank you for voting!
Broke the arm off the food compartment rocker switch
After receiving the new part almost immediately,using two screw drivers, removed the broken switch from the plastic frame. Be careful not to scratch or otherwise tear the plastic...very pliable. Since the original switch was factory installed and the wires were packed in fiberglass insulation, the switch came out but the wires and clips were still in place and could not reach the new switch. It was necessary to pull them down with bent long nose pliers...used a lot of "pull" but the wires held up.Connected the switch, turned the power on and there was light! Reports from other users really took the uncertainty out of the task.
Parts Used:
-
David from St. Pete Beach, FL
-
Difficulty Level:A Bit Difficult
-
Total Repair Time:15 - 30 mins
-
Tools:Pliers, Screw drivers
Was this instruction helpful to you?
Thank you for voting!
Refrigerator was running very cold
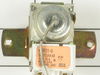
Unscrewed the right control knob. Removed the left temperature control knob (there is no screw holding it), removed one screw to rear of small panel then pried open from the rear of the small panel, there are two plastic tabs in front of the small panel holding it in place. Unscrewed the failed control unit and replaced it with the new one. Replaced the small panel and screw then the left side control knob, making sure of the alignment in the "off" position as the knob has to be pressured into a clamp arrangement on the cold control thermostat. Re-screwed the right knob into place, as well.
Parts Used:
-
Henry from Newland, NC
-
Difficulty Level:Easy
-
Total Repair Time:15 - 30 mins
-
Tools:Pliers, Screw drivers
Was this instruction helpful to you?
Thank you for voting!
Switch didn't work
followed the video as instructed. Saved two repairman calls, one to find the problem, one to install. Net savings was about $130.00
Parts Used:
-
Don from Laramie, WY
-
Difficulty Level:Easy
-
Total Repair Time:15 - 30 mins
Was this instruction helpful to you?
Thank you for voting!
Both light bulbs had been replaced, but lights did not turn on.
I tried to remove the old light switch using a putty knife and a hammer. It was hard to compress the plastic tabs to pull it back through the hole, but all of a sudden, the lights came on. I guess banging on the switch freed-up the contacts. The new switch is now a spare part in case I need it.
Parts Used:
-
Richard from Arlington, MA
-
Difficulty Level:A Bit Difficult
-
Total Repair Time:30 - 60 mins
-
Tools:Pliers, Screw drivers
Was this instruction helpful to you?
Thank you for voting!
Long time!
Well the repair was not bad the package came in real fast thank you very much. Doing the work was real hard took about an hour to do and then putting it on I do not think it stayed on good still using some duck tape to hold it and the top and bottom are real fat and will not sink on in. I do not know what to do or what I did wrong. I am kind of afraid to take it off because it might rip. Some of it ripped as I was putting it on too. Do you have any ideas of what I can do or what might be my problem? Thanks.
Sincerley,
Dustin Takla
Sincerley,
Dustin Takla
Parts Used:
 – Part Number: WP70048-3")
-
Dustin from Lake Zurich, IL
-
Difficulty Level:Difficult
-
Total Repair Time:1- 2 hours
-
Tools:Wrench (Adjustable)
Was this instruction helpful to you?
Thank you for voting!
Freezer and Refrigerator not cooling properly
Researched this problem on the web. Disassembled the main refrigeration unit (slide out freezer floor panel). The cooling coils were completely iced up. Thawed overnight. Tested the coil thermostat with a multimeter and discovered it worked. Note that the activation temp on this thermostat is 15 degrees Fahrenheit so the ice-water bath test on many web videos will NOT work. My test was in another refrigerator freezer compartment (everyone has two, right?). When the temperature went below 15 and stayed there for 15 minutes, the thermostat opened the circuit. Further investigation revealed that the defrost heater was burnt and shorted. Replaced the defrost heater only to discover that the defrost timer was also broken. After replacing the defrost timer and testing each component thoroughly, the refrigerator is back in service. Freezer maintains about 8 F and the main refrigerator stays at about 36. The unit cycles off properly and the defrost timer is correctly initiating a defrost cycle. Further, when the defrost heater is cycled on, the thermostat correctly shuts it off once the coils are defrosted. Watch the youtube videos. Find your parts and note their specifications so you can test them properly. And good luck.
Parts Used:
-
Edward from Sykesville, MD
-
Difficulty Level:A Bit Difficult
-
Total Repair Time:1- 2 hours
-
Tools:Nutdriver, Screw drivers, Socket set, Wrench set
Was this instruction helpful to you?
Thank you for voting!