















NEW2H1 Norge Range - Instructions
Keep searches simple. Use keywords, e.g. "leaking", "pump", "broken" or "fit".
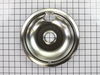
Dirty drip bowl
-
Paul from Carnegie, PA
-
Difficulty Level:Really Easy
-
Total Repair Time:Less than 15 mins
Was this instruction helpful to you?
Thank you for voting!
I wanted to purchase new drip pans, since those that I have are a bit grimy
I will begin by saying that not only will I continue to order my parts from PartsSelect, but I also highly recommend this business. If you call Whirlpool be careful that they forward your call for parts to some preferred vendor, which a customer might assume is Whirlpool but it is not. PartsSelect is the same type of business, but with outstanding customer service. With regard to the drip pan, Whirlpool had not updated the part number for these as I found out when i called them. Whirlpool no longer uses the drip pans without the holes which is a serious problem since this could be hazardous to the owners of these ranges if you are forced to purchase the drip pans with the holes in them. That said, I ended up keeping my old drip pans, because if you spill grease under the new ones with the holes in them and since the range design with the fan built in on the top does not allow you to lift the top to clean under the pans, you could end up with a grease fire. This is not the fault of PartsSelect and they handled my order in a manner that I would give them a rating of exceptional for customer service.
Parts Used:
-
Hedy from Richmond, VA
-
Difficulty Level:Really Easy
-
Total Repair Time:Less than 15 mins
Was this instruction helpful to you?
Thank you for voting!
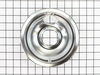
I needed to replace to two 8* drip bowls on the kitchen range
(a) I took out (and threw away) two stained 8* chrome drip bowls on my kitchen range; (b) ti put in two new 8" chrome drip bowls on my kitchen range. I'm pleased that I was equal to the task.
Parts Used:
-
Dallas from Arlington, TX
-
Difficulty Level:Really Easy
-
Total Repair Time:Less than 15 mins
Was this instruction helpful to you?
Thank you for voting!
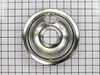
Stove needed new bowls
-
Karen from Kettering, OH
-
Difficulty Level:Really Easy
-
Total Repair Time:Less than 15 mins
Was this instruction helpful to you?
Thank you for voting!
Old dirty drip pans
Removed heating element, installed new drip pan, replaced heating element. Was amazed at fast delivery - ordered in afternoon, arrived fed ex next morning!
Parts Used:
-
gizella from mays landing, NJ
-
Difficulty Level:Really Easy
-
Total Repair Time:Less than 15 mins
Was this instruction helpful to you?
Thank you for voting!
Burner coil was falling apart.
-
Mary Kay from North Charleston, SC
-
Difficulty Level:Really Easy
-
Total Repair Time:Less than 15 mins
Was this instruction helpful to you?
Thank you for voting!
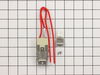
heating coils would not work
Remove heat coils, take body of coil inserts out, remove screws from body, cut old receptacle out, tie new recptacle wires to the old piece of left over wires using wire nuts, and reassemble body, insert heating coils and test.
Parts Used:
-
Adam from Kempner, TX
-
Difficulty Level:Really Easy
-
Total Repair Time:15 - 30 mins
-
Tools:Nutdriver
Was this instruction helpful to you?
Thank you for voting!
Cartridge wire burned out
I was unable to remove the screw which held the electrical element.. so I took the new surface burner receptacle and removed the metal part, and used the old one and put in the new one in the old metal part and rewired, and it is like new.. now I need to do another one.
Parts Used:
-
Robert from San Francisco, CA
-
Difficulty Level:A Bit Difficult
-
Total Repair Time:30 - 60 mins
-
Tools:Pliers, Screw drivers, Socket set
Was this instruction helpful to you?
Thank you for voting!
Burner element stopped working
The repair itself is really quite easy. Cut the wires, strip the ends and attach the new receptacle with wire nuts. The hard part was getting to it. My cooktop is about 30 years old, so I had to wade through piles of nasty built up grease. Some of the sheet metal screws were unworkable, so I had to cut them off with a Dremel tool. Not a pretty picture, but that's how repair work is on old stuff.
Parts Used:
-
Robert from Lodi, CA
-
Difficulty Level:Really Easy
-
Total Repair Time:1- 2 hours
-
Tools:Screw drivers
Was this instruction helpful to you?
Thank you for voting!
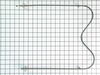
Replace lower heating element in oven
Simply unscrew the heating element attachment and remove, then replace with new one. My biggest problem was remembering how the oven door is removed to gain reasonable access to inside rear of oven. After exploring for a few minutes and pulling on oven door , it slide of it's hingrs - and then I remembered. Next problem was my wife making me clean the oven when the old element and oven door was removed.
Parts Used:
-
Thomas from Huntsville, AL
-
Difficulty Level:A Bit Difficult
-
Total Repair Time:30 - 60 mins
-
Tools:Screw drivers
Was this instruction helpful to you?
Thank you for voting!
unable to remove screw with screwdriver
-
Emmett from Rayville, LA
-
Difficulty Level:A Bit Difficult
-
Total Repair Time:30 - 60 mins
-
Tools:Pliers, Screw drivers
Was this instruction helpful to you?
Thank you for voting!