















NEA2H0 Norge Range - Instructions
Keep searches simple. Use keywords, e.g. "leaking", "pump", "broken" or "fit".
Burner was slow heating at times. Moved back burner to front still same thing.
Unscrewed screw holding bracket. Used side cutters to cut wires. Replaced the bracket, put the shrink wrap on wires, twisted wires together and held with wire caps. Shrunk the wrap with lighter. I'm a 67 year old female.. No problems.
Parts Used:

-
Gail M from Lockport, NY
-
Difficulty Level:Really Easy
-
Total Repair Time:Less than 15 mins
-
Tools:Screw drivers
Was this instruction helpful to you?
Thank you for voting!
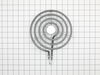
part of original burner not working
slide new burner in slot and turned on stove. Worked perfectly.
Parts Used:
-
SUSAN K from SEDALIA, MO
-
Difficulty Level:Really Easy
-
Total Repair Time:Less than 15 mins
Was this instruction helpful to you?
Thank you for voting!
The surface burner socket that the burner plugs into melted.
Cut the old wires off, removed the screw holding the clamp, installed the new parts. Problems I encountered were the wire nuts. They were too small for the wire gage of the replacement part and the original oven. I had larger wire nuts in my workshop. Also, why so many extra parts like the shrink wrap tubing, two metal clamps to hold the socket, etc.
Parts Used:
-
Gary from Chesapeake, VA
-
Difficulty Level:Easy
-
Total Repair Time:Less than 15 mins
-
Tools:Screw drivers
Was this instruction helpful to you?
Thank you for voting!
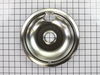
I needed to replace to two 8* drip bowls on the kitchen range
(a) I took out (and threw away) two stained 8* chrome drip bowls on my kitchen range; (b) ti put in two new 8" chrome drip bowls on my kitchen range. I'm pleased that I was equal to the task.
Parts Used:
-
Dallas from Arlington, TX
-
Difficulty Level:Really Easy
-
Total Repair Time:Less than 15 mins
Was this instruction helpful to you?
Thank you for voting!
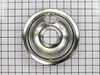
Stove needed new bowls
-
Karen from Kettering, OH
-
Difficulty Level:Really Easy
-
Total Repair Time:Less than 15 mins
Was this instruction helpful to you?
Thank you for voting!
Old dirty drip pans
Removed heating element, installed new drip pan, replaced heating element. Was amazed at fast delivery - ordered in afternoon, arrived fed ex next morning!
Parts Used:
-
gizella from mays landing, NJ
-
Difficulty Level:Really Easy
-
Total Repair Time:Less than 15 mins
Was this instruction helpful to you?
Thank you for voting!
The drip pans needed replacing.
Put in the new drip pan -- which are really nice shiny ones.
Parts Used:
-
Alison from Carnation, WA
-
Difficulty Level:Really Easy
-
Total Repair Time:Less than 15 mins
Was this instruction helpful to you?
Thank you for voting!
Dirty drip bowls
Just remove old bowls from range top and put new ones. That is all ... just super simple! :)
Parts Used:
-
Paul from Carnegie, PA
-
Difficulty Level:Really Easy
-
Total Repair Time:Less than 15 mins
Was this instruction helpful to you?
Thank you for voting!
Dirty drip bowl
-
Paul from Carnegie, PA
-
Difficulty Level:Really Easy
-
Total Repair Time:Less than 15 mins
Was this instruction helpful to you?
Thank you for voting!
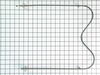
Replace lower heating element in oven
Simply unscrew the heating element attachment and remove, then replace with new one. My biggest problem was remembering how the oven door is removed to gain reasonable access to inside rear of oven. After exploring for a few minutes and pulling on oven door , it slide of it's hingrs - and then I remembered. Next problem was my wife making me clean the oven when the old element and oven door was removed.
Parts Used:
-
Thomas from Huntsville, AL
-
Difficulty Level:A Bit Difficult
-
Total Repair Time:30 - 60 mins
-
Tools:Screw drivers
Was this instruction helpful to you?
Thank you for voting!
one burner that would not heat and others that would not out out much heat
I noticed that one of the burner blocks was completely burned and the others were corroded. I ordered blocks for all four burners. Installation was easy except for one block. The screw holding the bracket to the range top was completely corroded in place. I used a correct size easy-out, which is a left hand tap and drill, to remove the screw. That took about five minutes, including tracking the easy-out down in one of my many toolboxes. The entire replacement of four blocks took about one and a half hours. Stove top cooks like new on all burners! The part kit had all the right parts and they fit like a glove!
Parts Used:
-
Charles from Villa Ridge, MO
-
Difficulty Level:Easy
-
Total Repair Time:30 - 60 mins
-
Tools:Screw drivers
Was this instruction helpful to you?
Thank you for voting!
electric surface unit not working
After turning off circuit breaker to the stove, I removed all surface units , removed the 4 screws holding the top and lifted up. The plug in was burned out (the wire was burned). Look at the old plug-in so as to be able to match the new one and insert the pre- crimped end of wires into the block and the block into the metal holder that matches your old one. (The kit comes with 2 different metal holders)After this, cut out the old wires and wire nut the new wires with the stove wires. Put shrink wrap protector on the wire nuts and heat to shrink it tight.attach the block to the stove top and wa la its done. Very easy.
Parts Used:
-
vincent from Martinsville, VA
-
Difficulty Level:Easy
-
Total Repair Time:30 - 60 mins
-
Tools:Screw drivers
Was this instruction helpful to you?
Thank you for voting!
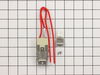
unable to remove screw with screwdriver
-
Emmett from Rayville, LA
-
Difficulty Level:A Bit Difficult
-
Total Repair Time:30 - 60 mins
-
Tools:Pliers, Screw drivers
Was this instruction helpful to you?
Thank you for voting!
Cartridge wire burned out
I was unable to remove the screw which held the electrical element.. so I took the new surface burner receptacle and removed the metal part, and used the old one and put in the new one in the old metal part and rewired, and it is like new.. now I need to do another one.
Parts Used:
-
Robert from San Francisco, CA
-
Difficulty Level:A Bit Difficult
-
Total Repair Time:30 - 60 mins
-
Tools:Pliers, Screw drivers, Socket set
Was this instruction helpful to you?
Thank you for voting!
Burner element stopped working
The repair itself is really quite easy. Cut the wires, strip the ends and attach the new receptacle with wire nuts. The hard part was getting to it. My cooktop is about 30 years old, so I had to wade through piles of nasty built up grease. Some of the sheet metal screws were unworkable, so I had to cut them off with a Dremel tool. Not a pretty picture, but that's how repair work is on old stuff.
Parts Used:
-
Robert from Lodi, CA
-
Difficulty Level:Really Easy
-
Total Repair Time:1- 2 hours
-
Tools:Screw drivers
Was this instruction helpful to you?
Thank you for voting!