















NEA2G1 Norge Range - Instructions
Keep searches simple. Use keywords, e.g. "leaking", "pump", "broken" or "fit".
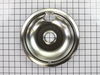
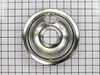
I needed to replace my burner pans.
The Drip Pans are a cinch to replace with no tools necessary. The best part is that the Web Site is extremely easy to use, and the parts arrived two days after being ordered.
Parts Used:
-
Robert from Wilton, CA
-
Difficulty Level:Really Easy
-
Total Repair Time:Less than 15 mins
Was this instruction helpful to you?
Thank you for voting!
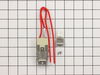
one pole of the socket corroded to nothing
Starting by me making a substitute prong to keep the stove working while the part this coming by mail. was a piece of cake.
Parts Used:
-
martien from williamstown, MA
-
Difficulty Level:Easy
-
Total Repair Time:Less than 15 mins
Was this instruction helpful to you?
Thank you for voting!
drip pan were burnt out
simply remove the burner take out the drip pan and bowl individually. Install the new one and replace the burner. no tool was used.
Parts Used:
-
Delroy from Miramar, FL
-
Difficulty Level:Really Easy
-
Total Repair Time:Less than 15 mins
Was this instruction helpful to you?
Thank you for voting!
Porcelan Electric Burner Plug broke
The video on your website showed me how to take out 1 screw, cut the existing wires and strip the ends. The kit came with 2 porcelan wire nuts to re-connect the wires and it was done. Less than 10 minutes. It saved me $100.00 to get it repaired.I bought 2 in case I need another one in the future.They only cost $11.00 each. Awesome website.
Parts Used:
-
John J from Coatesville, PA
-
Difficulty Level:Really Easy
-
Total Repair Time:Less than 15 mins
-
Tools:Screw drivers
Was this instruction helpful to you?
Thank you for voting!
Drip bowls were all rusted.
Removed old rusted drip bowls and put in the new ones. Very easy to do and needed no tools. It made my 25 plus Jenn Air look new again!
Parts Used:
-
Robin from Seneca, SC
-
Difficulty Level:Really Easy
-
Total Repair Time:Less than 15 mins
Was this instruction helpful to you?
Thank you for voting!
old drip bowl was worn out
-
Richard from Germantown, MD
-
Difficulty Level:Really Easy
-
Total Repair Time:Less than 15 mins
Was this instruction helpful to you?
Thank you for voting!
heating coils would not work
Remove heat coils, take body of coil inserts out, remove screws from body, cut old receptacle out, tie new recptacle wires to the old piece of left over wires using wire nuts, and reassemble body, insert heating coils and test.
Parts Used:
-
Adam from Kempner, TX
-
Difficulty Level:Really Easy
-
Total Repair Time:15 - 30 mins
-
Tools:Nutdriver
Was this instruction helpful to you?
Thank you for voting!
surface burner stopped working. Was not heating up.
The repair only took me 10 minutes to do. I purchased the surface replacement kit from partselect.com. The part arrived in two days. The instructions were very simple. I read the instructions on line during my purchase. When I received the new part, I simply did the repair. Including shipping, the cost was less than $20.00. A service call would have been at least 5x the cost. Thank you for being there Partselect. (Tim from south bend indiana)
Parts Used:
-
timothy from south bend, IN
-
Difficulty Level:Really Easy
-
Total Repair Time:Less than 15 mins
-
Tools:Nutdriver
Was this instruction helpful to you?
Thank you for voting!
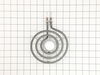
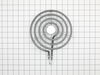
Burners quit working
Bought two new replacement burners,they work great!
Parts Used:
-
Brenda from Brazoria, TX
-
Difficulty Level:Really Easy
-
Total Repair Time:Less than 15 mins
Was this instruction helpful to you?
Thank you for voting!
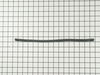
Door gasket broken
This part showed up so fast I couldn't believe it. Took longer to unwrap the package than to install the gasket.
Parts Used:
-
Tim from North Hills, CA
-
Difficulty Level:Really Easy
-
Total Repair Time:Less than 15 mins
Was this instruction helpful to you?
Thank you for voting!
Burner did not heat
-
lula from Antelope, CA
-
Difficulty Level:Really Easy
-
Total Repair Time:15 - 30 mins
-
Tools:Screw drivers
Was this instruction helpful to you?
Thank you for voting!
I had a power serge and it burned the Plug at the termial block and melted a few wire.
After we got the part in the mail my husband put it on and shortened the wires and put new plugs on the ends of the wires and we had to get a new plug put it on and it was fixed.
Parts Used:

-
Robin from Vanderbilt, PA
-
Difficulty Level:Really Easy
-
Total Repair Time:15 - 30 mins
-
Tools:Socket set
Was this instruction helpful to you?
Thank you for voting!
Not heating
Was easy cut the wires of as told to do wire nut the ends together and put back together and tested and worked great. Done
Parts Used:
-
Darwin from wisconsin rapids, WI
-
Difficulty Level:Really Easy
-
Total Repair Time:15 - 30 mins
-
Tools:Pliers, Screw drivers
Was this instruction helpful to you?
Thank you for voting!
Drip bowls tarnished.
Remove heating element coils. & old drip pans. Install the new drip pans and reinsert the heating elements and insure all elements were level. For aesthetic reasons I replaced all the drip pans - 2 x 8" & 2 x 6".
Parts Used:
-
Jennifer from Albion, NE
-
Difficulty Level:Really Easy
-
Total Repair Time:15 - 30 mins
Was this instruction helpful to you?
Thank you for voting!
burners would not come on without moving them around
took old screw out of stove top that held them in and cut the two wires off close to the burner stripped the wires and used the screw caps to put each line together it doesn't matter which line goes where and screwed it back on with the old screw and tried the two burners and they both worked job done ps it took longer for me to type this but i am slow at typing
Parts Used:
-
Ronald E. from Marissa, IL
-
Difficulty Level:Really Easy
-
Total Repair Time:15 - 30 mins
-
Tools:Screw drivers
Was this instruction helpful to you?
Thank you for voting!