


MW4371G Samsung Microwave - Overview
Models starting with MW4371G
Click on the best match to narrow your results.
Keep searches simple, eg. "belt" or "pump".

Cooking Tray
PartSelect #: PS651544
Manufacturer #: WB49X10097
This glass tray rotates in your microwave ensuring more even temperatures.
$89.01
In Stock

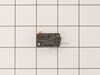
Micro Door Switch
PartSelect #: PS4131192
Manufacturer #: 3405-001034
This door switch, also known as a safety switch, is a genuine OEM replacement part for microwaves. It is a safety mechanism that sends signals to the microwaves control system, telling it when the doo...
$32.63
On Order

High-Voltage Diode
PartSelect #: PS4235633
Manufacturer #: DE91-70063D
This high-voltage diode is designed for use within various makes and models of microwaves and is a genuine OEM part that converts alternating current (AC) into direct current (DC). If you notice your ...
$33.69
In Stock


Common Symptoms of models starting with MW4371G
[Viewing 3 of 3]No heat
Fixed by
these parts
these parts

Show All
Doesn’t shut off
Fixed by
these parts
these parts
Show All
Won’t turn on
Fixed by
these parts
these parts
Show All


Keep searches simple. Use keywords, e.g. "leaking", "pump", "broken" or "fit".
Microwave Cooking Tray Missing
I ordered a microwave cooking tray from PartSelect; userfriendly site; and within two days, my part was delievered and easily installed. Thank you PartSelect!
Parts Used:
-
Chris from Elmhurst, NY
-
Difficulty Level:Really Easy
-
Total Repair Time:Less than 15 mins
522 of 590 people
found this instruction helpful.
Was this instruction helpful to you?
Thank you for voting!
Broken oven tray
-
Scott from Atlanta, GA
-
Difficulty Level:Really Easy
-
Total Repair Time:Less than 15 mins
442 of 523 people
found this instruction helpful.
Was this instruction helpful to you?
Thank you for voting!
cooking tray brook
-
Giuseppe from Elmwood Park, IL
-
Difficulty Level:Really Easy
-
Total Repair Time:Less than 15 mins
138 of 216 people
found this instruction helpful.
Was this instruction helpful to you?
Thank you for voting!