Your coupon for will be reflected when you check out!
✖
Your coupon for
✖
Hello!
You're visiting the PartSelect site in U.S.
Would you like to shop on the Canadian site?
Stay on this site
Go to Canadian site
✖
Model Number Locations
1Select Category Type
Select Category Type
2Select Product Type
Select Product Type
3Select {MODEL} Type
Select {MODEL} Type
Sample Model Number Tags
Model numbers can be made up of numbers (1005400, for example) or a combination of letters and numbers (LAT1000AAE). The model number will most likely appear on either a paper sticker or a metal plate. Your appliance's model number tag may look similar to the sample model number tags shown here (model number highlighted in yellow):
Model has been saved to My Models. If you're not signed in, your lists are available on this device and will expire within 30 days.
Model has been saved to My Models.
This touch-up paint can be used on a wide variety of household appliances. It is most often used on washers, dryer, refrigerators, dishwashers, ranges, freezers, trash compactors, or microwaves. It is...
The hose clamp is used to hold the water hose in place which will prevent the hose from leaking water. Sometimes the clamp may lose its ability to latch on, causing a leaking washer. For the installat...
This washing machine cleaner includes three time-release tablets designed to remove odor-causing residues, grime, and buildup from high-efficiency and top-load washing machines. The tablets work by cl...
Introducing the Whirlpool Washer Washplate Screw - your reliable solution for fixing broken or loose washplates in your washing machine. This OEM genuine part, compatible with distinct models of Whirl...
This washer lid lock assembly is designed for top-load washing machines and ensures the lid remains securely closed during wash and spin cycles. It replaces worn or malfunctioning latches, helping pre...
This is an impact absorber, also known as a sound dampening pad, for washing machines. This sound dampening pad attaches to the top of your washing machine drum to reduce the severity and harshness of...
This clutch slider kit is genuine OEM replacement kit that fits in various models of washing machine. It is a part of the transmission system in your washer which is responsible for controlling the mo...
This is a clutch designed for use within top-load washers. The clutch is used to engage the transmission of your washer during the agitation and spinning cycles, to ensure it runs properly. If your wa...
Introducing the Lid Lock Bezel in classic white, an essential component designed for select Whirlpool washing machine models. This genuine OEM part guarantees a perfect fit and premium quality, enhanc...
This product comes in a bottle with a brush like Liquid Paper. It goes on incredibly easy. A second coat might be needed. I wanted to prevent rust from setting in so I covered the scratches and dings. The paint is a little brighter since my washer is 10 years old but it still looks great.
DIY'er working on a Maytag Centennial type washing machine should be aware that replacing a a transmission or agitator due to worn out splines is only half a job done well. I originally replaced my transmission due to worn splines, only to discover later that the worn agitator splines caused the new transmission splines to wear out at an
... Read more accelerated rate. Transmission and Agitator should be replaced together, along with a new Agitator mounting bolt. There are plenty of video's online of how to do this repair so I won't get into that here. Just wanted to drop the above sage advice. Transmissions for these washers aren't cheap.
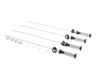
replaces all 4 suspension rods. 1. unplug machine. Take a zip tie and attach the end to form a loop. Keep the loop as large as possible. 2. Remove 4 self tapping screws in back of machine top two are into the tabs, 1 in the washer top and 1 in the electrical cover. 3. Use plastic pry bar to elevate tabs under t
... Read moreop on right and left sides. use the heel of your hand to tap the back of the top forward. Once it moves you will need to use the pry bar to help pop it up out of the tab. When both sides are loose and the top is free. It will tilt back. There are slots on the top that the tabs on the washer slide into to hold the top up. CAUTION: the lid is hinged and loose so either have it supported when it’s back or use tape to secure it shut. 4. At the 4 corners you will see where the suspension rods attach into the plastic cups. Use a screwdriver to pry up the hook until you can grab it with a pair of pliers. Lift the hook until it clears the plastic puck, remove the puck then let the hook fall into the hole. 5. If possible set a flashlight so you can see down to the bottom attach point of the suspension rods attach. Grab the rod about half way down the shaft, the push down. The assembly will break loose and drop to the bottom, then you can slide the rod out and remove it. NOTE: THE SPRING IS STRONG. WHEN YOU REMOVE THE ROD, THE TUB WILL NOT BE SUPPORTED AT THAT POINT, SO YOU WILL ALSO HAVE THE WEIGHT OF THE TUB TO CONTEND WITH WHEN YOU INSTALL THE NEW ROD. 6. Make sure the new rod assembly has the black retainer positioned on top of the spring and the white retainer is about 6” above. 7. Hold the new rod so you can put the bottom with the spring back into the plastic cup. Once it’s in, give the rod a tug to seat the spring in the holder. keep holding the rod. Grab the zip tie loop you made earlier. Place it on the top hook of the hook then hold the rod by the zip tie. Feed the tie through the top hole, insert the screwdriver through the zip tie and set over the hole to hold the rod in position. Get the holder cup assembly (outer ring and inner bracket). 8. Hold the zip tie, let it back through the hole, while holding it, position the outer cup, then pull the zip tie back through the hole, insert the center bracket watching the position so the stem clears the rod, then lift the zip tie and position the hook over the bracket. At this point you can either cut the zip tie and pull it out or pry up the hook on the rod until you can slip off the zip tie. 9. Let the rod seat into the cup bracket. I orient the hook so it faces outside. The first rod is in. 10. Repeat doing 1 rod at a time. Be prepared to bruise your arm reaching down into the washer as it’s close quarters. The spring is strong and the tub is heavy so you need some arm strength to do this with one arm. It isn’t difficult and you’ll do better on each successive rod. 11. When all the rods are in and set, ease the top back down, align the tabs, check the side tabs that they didn’t bend (if they did just bent them back in), make sure the top is out of the tabs, then shove the front to reset the top. 12. Reattach the 4 sheet metal screws to the top, plug it it and test.