















MGS5875BDB Maytag Range - Instructions
Keep searches simple. Use keywords, e.g. "leaking", "pump", "broken" or "fit".
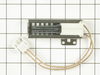
My oven wouldn't light.
I located the igniter element, and remove the two screws that hold it in place. I then went around to the back of the oven and located the wire, and disconnected it. Then I pulled it out through the oven and removed it. I then replaced it with the new element; pushed the wires through to back of the stove and plugged it in. With that done, I screwed the new igniter element into place. I then put my oven back together; pushed it back into place and turned the gas back on. And presto! my oven lights like new again. I saved myself the costly repairman visit, and the job was easy.
Parts Used:
-
Anna from Valparaiso, IN
-
Difficulty Level:Really Easy
-
Total Repair Time:15 - 30 mins
-
Tools:Nutdriver
6 of 7 people
found this instruction helpful.
Was this instruction helpful to you?
Thank you for voting!
light bulb in water ice freezer door went bad
I didn't. Don't know how to get to light bulb to change it for this specific model
Parts Used:

-
Carl from RIVERSIDE, CA
-
Difficulty Level:Very Difficult
-
Total Repair Time:More than 2 hours
-
Tools:Screw drivers
8 of 14 people
found this instruction helpful.
Was this instruction helpful to you?
Thank you for voting!
inner glass on oven door cracked.
Repair was very simple. Took the door apart in layers, replaced the glass and put everything else back. it took longer to clean the stove than it did to actually take it apart and put it back together. guess i didnt need to be that much of a clean freak!
Parts Used:

-
valerie from lanoka harbor, NJ
-
Difficulty Level:Really Easy
-
Total Repair Time:30 - 60 mins
-
Tools:Pliers, Screw drivers
6 of 8 people
found this instruction helpful.
Was this instruction helpful to you?
Thank you for voting!
Oven took way too long to preheat . Emitted strong gas odor.
I first matched the symptom (very long preheat time/gas odor) with the most likely problem (faulty oven gas igniter). I then wrote the model # and Googled gas oven repair and got to your website. I then located the faulty part within about 5 clicks and proceeded to order the exact part within another 5 or so clicks. I received my order from PartSelest in 2 days and had the oven working with the new igniter in about 10 minutes....Then it dawned on me---"Hey, I should be a Maytag Repair Man."
Thanks for the prompt delivery and the correct installation instructions. I will absolutely use your service again. (Not too soon, I hope !)
Thanks for the prompt delivery and the correct installation instructions. I will absolutely use your service again. (Not too soon, I hope !)
Parts Used:
-
Patrick from Las Vegas, NV
-
Difficulty Level:Really Easy
-
Total Repair Time:Less than 15 mins
-
Tools:Nutdriver
6 of 8 people
found this instruction helpful.
Was this instruction helpful to you?
Thank you for voting!
Stove wouldn't stay lit and would fire unless the gas was turned on the range top .
Removed the drawer and the flash plate underneath .
Unplugged the igniter then opened the & removed the over door . Lifted the bottom plate to expose the burner and igniter . Undo the 2 screws holding the igniter in place . Replace the igniter and reach underneath and plug the wire connecters together . Place all the proper things in their place .. and it was finished ...
The biggest snag I ran into was the one of the 2 screws stripped out when when taken things apart .. but I have taps and found a few new screws and replaced them ......
Quite easy fix .. don't a pay repair man to do it .... !!
Unplugged the igniter then opened the & removed the over door . Lifted the bottom plate to expose the burner and igniter . Undo the 2 screws holding the igniter in place . Replace the igniter and reach underneath and plug the wire connecters together . Place all the proper things in their place .. and it was finished ...
The biggest snag I ran into was the one of the 2 screws stripped out when when taken things apart .. but I have taps and found a few new screws and replaced them ......
Quite easy fix .. don't a pay repair man to do it .... !!
Parts Used:
-
Allen from Swengel, PA
-
Difficulty Level:Easy
-
Total Repair Time:15 - 30 mins
-
Tools:Nutdriver, Pliers, Screw drivers, Wrench set
6 of 8 people
found this instruction helpful.
Was this instruction helpful to you?
Thank you for voting!
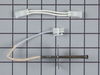
Oven did not heat up.
First I changed the temperature sensor and when it didn’t get hot I Also changed the igniter. Fired right up.
Parts Used:
-
NICHOLAD from NANUET, NY
-
Difficulty Level:Very Easy
-
Total Repair Time:30 - 60 mins
-
Tools:Screw drivers
5 of 5 people
found this instruction helpful.
Was this instruction helpful to you?
Thank you for voting!
Faulty bulb receptacle
Unplugged the stove and removed the back panel, disconnected the wires from the old receptacle, removed it, inserted the new receptacle, connected the wires, put the back panel of the stove on, plugged in the stove and then checked to see if the bulb was now burning. Success!
Parts Used:

-
Kenneth from Lynchburg, VA
-
Difficulty Level:Really Easy
-
Total Repair Time:15 - 30 mins
-
Tools:Screw drivers
10 of 20 people
found this instruction helpful.
Was this instruction helpful to you?
Thank you for voting!
replaced broken handle on oven door
The plastic attachment on the oven door handle broke on one side, and of course the whole handle had to be replaced. I attempted first to super-glue the broken piece, but naturally, that didn't work. I found the necessary piece very easily thru PartSelect.com's web page, and had the replacement piece within a couple days. The most difficult part of the whole operation was figuring out how to remove the old handle. Once that was done, the replacement took approximately 15 minutes. Thanks PartSelect.
Parts Used:
-
Larry from DeLeon Springs, FL
-
Difficulty Level:Really Easy
-
Total Repair Time:15 - 30 mins
-
Tools:Screw drivers
6 of 9 people
found this instruction helpful.
Was this instruction helpful to you?
Thank you for voting!
Glass on inside of oven door cracked
I took the oven door apart, pulled out the broken fragments of glass and replaced it with the new glass. I should have taken notes as I took the door apart because it was a bit tricky to remember how all the pieces fit back together.
I was very impressed with how quickly the parts were shipped and the quality of the packing materials to protect the glass as it was shipped.
I was very impressed with how quickly the parts were shipped and the quality of the packing materials to protect the glass as it was shipped.
Parts Used:
-
Tim from Athens, OH
-
Difficulty Level:A Bit Difficult
-
Total Repair Time:30 - 60 mins
-
Tools:Screw drivers
5 of 6 people
found this instruction helpful.
Was this instruction helpful to you?
Thank you for voting!
Variable oven heat and Ignitor. problems
moved stove away from the wall, Disconnected power, Removed 2 screws on the access panel and removed panel. Disconnected qwick release conections on heat sensor and ignitor, Removed oven door and burner cover to expose ignitor, removed 2 screws to remove ignitor and replaced ignitor. Removed 2 screws and removed sensor, replaced sensor. Reconnected qwick conects on sensor and ignitor. Replaced oven door, burner cover and access panel and checked out. Checks OK !
Parts Used:
-
Floyd from Kenai, AK
-
Difficulty Level:Really Easy
-
Total Repair Time:30 - 60 mins
-
Tools:Screw drivers
5 of 6 people
found this instruction helpful.
Was this instruction helpful to you?
Thank you for voting!
Oven would not maintain temperature
So simple! I really had no idea what the problem was. I found the PartsSelect site, read the comments from fellow Maytag double oven owners, diagnosed the problem as the sensor and ordered the part. It arrived in only two days! We removed the back of the stove, pulled the old sensor through, plugged the new one in and YAY the oven is like new. I have to admit most of the repair time involved sweeping up the dog hair that had accumulated under the stove.
Parts Used:
-
KATHY from PLEASANT GAP, PA
-
Difficulty Level:Really Easy
-
Total Repair Time:Less than 15 mins
-
Tools:Screw drivers
5 of 7 people
found this instruction helpful.
Was this instruction helpful to you?
Thank you for voting!
Door gasket was hard and brittle from baked-on grease - heat leaking around door
Waited for my husband to do it, but when he didn't, I tried it. Very simple! Just pulled the old gasket out of the pinch pin holes in the door, then replaced it. Tuck the one end into the hole at the bottom of the door, then match up the little pinch pins on the gasket with the holes in the door - matches up perfectly! Be sure to tuck in each of pinch pins till they sort of "snap" into each hole. Took me 5 minutes, tops. Works great now, no more lost heat around the edge of the door.
Parts Used:

-
Harlen from Spring Creek, NV
-
Difficulty Level:Really Easy
-
Total Repair Time:Less than 15 mins
4 of 5 people
found this instruction helpful.
Was this instruction helpful to you?
Thank you for voting!
Needed to replace the oven door gasket/seal
Removed door from oven by pulling up at the first stop point after opening the door. Removed the outer shell by removing 5 screws. Disassembled the inner door by removing 6 screws. Be careful with the insulation blanket (fits in a molded portion of the inner door). Glass windows can be removed (for cleaning) via a couple screws. Old gasket/seal is held in-place via spring-clips; just squeezed each clip, pushed each thru their respective holes, and pulled off the worn-out gasket. New gasket snapped in-place by pushing the clips thru the respective holes. Reverse the process to reassemble the door. You can do this job in 15-20 minutes. Took us longer because it took some elbow-grease (and patience) to clean the crud off the glass windows.
Parts Used:
-
Daniel from Katy, TX
-
Difficulty Level:Easy
-
Total Repair Time:30 - 60 mins
-
Tools:Pliers, Screw drivers
4 of 5 people
found this instruction helpful.
Was this instruction helpful to you?
Thank you for voting!
oven wont heat up
it was actually pretty easy, it took about 20 minutes to fix, i had to unscrew the bottom portion of the oven to get to the Igniter on the bottom, then unscrew the Igniter, take off the old pice, and snap the new one in, put it all back together, and that was about it, i had dinner done by the time my husband got home from work. thanks
Parts Used:
-
Crystal from Tonawanda, NY
-
Difficulty Level:Really Easy
-
Total Repair Time:15 - 30 mins
-
Tools:Screw drivers
4 of 5 people
found this instruction helpful.
Was this instruction helpful to you?
Thank you for voting!
oven would not come to set heat
slide out stove remove rear cover (6 screws) to access sensor plug . remove two screws from inside oven area and remove part,replace in reverse order.
Parts Used:
-
Ralph from Portsmouth, NH
-
Difficulty Level:Really Easy
-
Total Repair Time:Less than 15 mins
-
Tools:Screw drivers
4 of 5 people
found this instruction helpful.
Was this instruction helpful to you?
Thank you for voting!