















MEF352BFWA Frigidaire Range - Instructions
Keep searches simple. Use keywords, e.g. "leaking", "pump", "broken" or "fit".
Couldn't find replacement trays locally. Part Select was very helpful and prompt in shipping.
Just placed the chrome bowl trays in place and was good to go. They look very nice.
Parts Used:

-
Rosemary from St. Albans, ME
-
Difficulty Level:Really Easy
-
Total Repair Time:Less than 15 mins
5 of 7 people
found this instruction helpful.
Was this instruction helpful to you?
Thank you for voting!
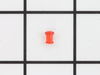
Lenses wore down and broke off making the actual indicator lights fall down behind the control panel since the lights connect to the lens.
Pulled stove out and unplugged it.
Used a Phillips screwdriver to take the back cover off of the control panel.
Each of the 7 lights connects to the red Indicator Light Lens via a slide clamp which is attached to the front of the light assembly. All you have to do is slide the lens into the hole from the outside of the control panel. Then with your other hand, pust the light assembly into the back of the lens and slide it to lock it in place. Repeat with the others.
Replace back cover.
Plug stove back in and slide back into place.
There are you tube videos out there to help you.
Used a Phillips screwdriver to take the back cover off of the control panel.
Each of the 7 lights connects to the red Indicator Light Lens via a slide clamp which is attached to the front of the light assembly. All you have to do is slide the lens into the hole from the outside of the control panel. Then with your other hand, pust the light assembly into the back of the lens and slide it to lock it in place. Repeat with the others.
Replace back cover.
Plug stove back in and slide back into place.
There are you tube videos out there to help you.
Parts Used:
-
Charles from OMAHA, NE
-
Difficulty Level:Really Easy
-
Total Repair Time:15 - 30 mins
-
Tools:Screw drivers
4 of 4 people
found this instruction helpful.
Was this instruction helpful to you?
Thank you for voting!
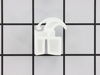
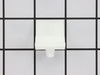
Broken door glide
snapped the new piece of plastic in its place and ta da, its fixed.
Parts Used:
-
Michael from Signal Hill, CA
-
Difficulty Level:Really Easy
-
Total Repair Time:Less than 15 mins
4 of 5 people
found this instruction helpful.
Was this instruction helpful to you?
Thank you for voting!
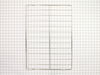
replacing oven racks
The replacement racks were spot on and the service was outstanding. had the racks in 2 days. Happy Happy Joy Joy! :)
Parts Used:
-
Lawrence from Elmira, NY
-
Difficulty Level:Really Easy
-
Total Repair Time:Less than 15 mins
4 of 5 people
found this instruction helpful.
Was this instruction helpful to you?
Thank you for voting!
Bottom burner wouldn’t heat
-
cynthia from SEBRING, FL
-
Difficulty Level:Really Easy
-
Total Repair Time:Less than 15 mins
-
Tools:Screw drivers, Wrench (Adjustable)
5 of 8 people
found this instruction helpful.
Was this instruction helpful to you?
Thank you for voting!
oven baking element burnt into
my husband did the repair.He unplugged the stove removed the element and installed the new element.plugged the stove in and checked operation of element.Stove works great
Parts Used:
-
Teresa from Marengo, OH
-
Difficulty Level:Really Easy
-
Total Repair Time:Less than 15 mins
-
Tools:Nutdriver, Socket set
4 of 5 people
found this instruction helpful.
Was this instruction helpful to you?
Thank you for voting!
Old racks had melted plastic on them.
-
James from PAINESVILLE, OH
-
Difficulty Level:Very Easy
-
Total Repair Time:Less than 15 mins
4 of 5 people
found this instruction helpful.
Was this instruction helpful to you?
Thank you for voting!
Drawer Glide Was Broken
Took the drawer out, snapped the new glide in place, and replaced the drawer. Installation was simple with no tools required.
Parts Used:
-
Karen from Yuma, AZ
-
Difficulty Level:Very Easy
-
Total Repair Time:Less than 15 mins
3 of 3 people
found this instruction helpful.
Was this instruction helpful to you?
Thank you for voting!
Broken glass inside door of oven
First took apart oven door. then took out broken glass and replaced with new glass.Put everything back together done.
Parts Used:

-
Janice from Brooklyn, NY
-
Difficulty Level:Really Easy
-
Total Repair Time:30 - 60 mins
-
Tools:Screw drivers, Wrench (Adjustable)
6 of 12 people
found this instruction helpful.
Was this instruction helpful to you?
Thank you for voting!
Bake element began burning itself up.
Originally I had anticipated a major problem requiring the removal of the back of the range and perhaps the necessity of employing the services of a repairman ($$!). Fortunately I waited for the arrival of the replacement element, which, upon inspection, was not configured to go through to the back of the range. What a relief!
The hardest part of the repair was finding the correct nutdriver (5/16"). Removal of the damaged element was simply backing out the two retaining screws inside the oven and pulling the element out far enough to expose the clips to the wire. Pulling them apart was easy enough, and then the element I disposed of immediately.
Reverse of removal of the old element was the installation of the new: Reconnect the clips to the element, push the wires back into the insulation, re-inserting the two retaining screws and tightening them gently.
The final step was to plug the range 220 cord into the outlet. Testing whether the element was functional was a breeze; the oven and the range elements worked perfectly.
The hardest part of the repair was finding the correct nutdriver (5/16"). Removal of the damaged element was simply backing out the two retaining screws inside the oven and pulling the element out far enough to expose the clips to the wire. Pulling them apart was easy enough, and then the element I disposed of immediately.
Reverse of removal of the old element was the installation of the new: Reconnect the clips to the element, push the wires back into the insulation, re-inserting the two retaining screws and tightening them gently.
The final step was to plug the range 220 cord into the outlet. Testing whether the element was functional was a breeze; the oven and the range elements worked perfectly.
Parts Used:
-
Don L from La Grande, OR
-
Difficulty Level:Really Easy
-
Total Repair Time:15 - 30 mins
-
Tools:Nutdriver
3 of 3 people
found this instruction helpful.
Was this instruction helpful to you?
Thank you for voting!
Right rear burner not working properly
After a brief discussion with CS about the electric stove part was shipped it arrived and I proceeded to install I found it needed to be installed sideways not up & down like the old one. The terminals did not line up so I put the black lead first and the purple lead last in doing that I burned out the switch??? was not easy to install as the video showed his switch matched each wire? My installation was sideways??
Parts Used:
-
Dante from SOUTHOLD, NY
-
Difficulty Level:Difficult
-
Total Repair Time:30 - 60 mins
-
Tools:Nutdriver, Pliers, Screw drivers
3 of 3 people
found this instruction helpful.
Was this instruction helpful to you?
Thank you for voting!
my burners would just heat up solid red even when i had controls turned down to 2 or 3. i would have to turn controls off and back on, then they still would just go back to glowing red
This was my first time ever working with electrical issues. My husband is not physically able to do repairs now. Very easy fix. Just viewed video repair instructions and it went exactly as instructed. Within 45 minutes, I had my stove repaired and cleaned and back in working order!! Great results. My range is working perfectly again and Mama is happy!!
Parts Used:
-
Leota from AUXVASSE, MO
-
Difficulty Level:Really Easy
-
Total Repair Time:30 - 60 mins
-
Tools:Nutdriver, Pliers, Screw drivers
3 of 3 people
found this instruction helpful.
Was this instruction helpful to you?
Thank you for voting!
Burnt out baking element
Removed the back panel, disconnected the terminals and removed the old one and installed the new one.
Parts Used:
-
Joseph from HAMPTON, VA
-
Difficulty Level:Really Easy
-
Total Repair Time:15 - 30 mins
-
Tools:Nutdriver
3 of 3 people
found this instruction helpful.
Was this instruction helpful to you?
Thank you for voting!
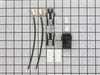
Element would not heat up
I couldn't explain how to do the job any better than your instructional video does. As long as you follow the video instructions you should have no problems.
Parts Used:
-
david from BUCKEYE, AZ
-
Difficulty Level:Very Easy
-
Total Repair Time:15 - 30 mins
-
Tools:Nutdriver, Pliers, Screw drivers
3 of 3 people
found this instruction helpful.
Was this instruction helpful to you?
Thank you for voting!
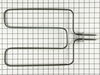
Broiler element burned out
Just took the old one out & put the new one in . Just a few screws to remove & put them back when replacing to new broil element , and were back up and cooking :)
Parts Used:
-
Trisha from Shelbyville, TN
-
Difficulty Level:Very Easy
-
Total Repair Time:30 - 60 mins
-
Tools:Screw drivers
3 of 3 people
found this instruction helpful.
Was this instruction helpful to you?
Thank you for voting!