















MEF305PBDD Frigidaire Range - Instructions
Keep searches simple. Use keywords, e.g. "leaking", "pump", "broken" or "fit".
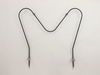
oven Bake Element burned up and broke
this bake element has two special Hex style screws, securing it in place, but a nut driver worked just as well. remove the baking racks, and then loosen the two hex screws. slowly pull the element out of the back wall and then disconnect the electric leads. reinstall by doing then the opposite action. could not have be simpler.
Parts Used:
-
Robert from Hopkinsville, KY
-
Difficulty Level:Really Easy
-
Total Repair Time:Less than 15 mins
-
Tools:Nutdriver
2 of 3 people
found this instruction helpful.
Was this instruction helpful to you?
Thank you for voting!
bake element burnt out
I looked for the proper part on this site. I was even able to find a video on how to install the part. It was great to see the step-by-step directions and tools needed. I ordered the part. It came quickly so that I was able to get my oven repaired before my kids came home for spring break. The only problem I had was the old screws were really stuck on. I used some WD-40 and they were still quite stuck. I learned that by gently going back and forth with the nut driver, rather than just trying to turn in the correct direction, that the screws came out quite easily. I felt so proud to be able to fix my own stove and save money in the process! Very satisfying for a single mom. Couldn't have done it without the video directions.
Parts Used:
-
Kim from Union Grove, WI
-
Difficulty Level:Really Easy
-
Total Repair Time:15 - 30 mins
-
Tools:Nutdriver
2 of 3 people
found this instruction helpful.
Was this instruction helpful to you?
Thank you for voting!
Bottom bake element went bad
Remove the 2 nuts holding the element in place. Pull the element out slightly to expose the wires. each side of the element has a wire. Slide the wires off. Replace new element. attach wires and pu the 2 screws back in the element holders.
Parts Used:
-
James from Martinsburg, WV
-
Difficulty Level:Really Easy
-
Total Repair Time:Less than 15 mins
-
Tools:Nutdriver
2 of 3 people
found this instruction helpful.
Was this instruction helpful to you?
Thank you for voting!
Oven lower element broke
Take the screws out of the inside of oven for the element and slide the oven away from way and remove the back and insert the element to the clips and screw the back of the oven back together and plug in again and push back in place. Very easy for my husband to repair.
Parts Used:
-
Peggy from Owensville, MO
-
Difficulty Level:Really Easy
-
Total Repair Time:Less than 15 mins
-
Tools:Screw drivers
2 of 3 people
found this instruction helpful.
Was this instruction helpful to you?
Thank you for voting!
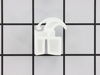
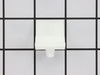
Broken right side parts for lower over storage drawer.
Sat on floor, pulled drawer out, inserted new clips, remounted door, stood up, high-fives myself.
Parts Used:
-
Ty from Baltimore, MD
-
Difficulty Level:Easy
-
Total Repair Time:Less than 15 mins
-
Tools:Screw drivers
2 of 3 people
found this instruction helpful.
Was this instruction helpful to you?
Thank you for voting!
burned element !
-
BILLY from JACKSON, MS
-
Difficulty Level:Very Easy
-
Total Repair Time:Less than 15 mins
-
Tools:Screw drivers
1 person
found this instruction helpful.
Was this instruction helpful to you?
Thank you for voting!
bake element burned through in one spot; oven would not heat
-
carol from LAUREL, MD
-
Difficulty Level:Very Easy
-
Total Repair Time:Less than 15 mins
-
Tools:Screw drivers
1 person
found this instruction helpful.
Was this instruction helpful to you?
Thank you for voting!
bake element had stopped working
My husband had recently moved out of our house so I was very nervous about trying this repair myself but it was actually very easy!!I ordered the part on Monday, it arrived on Wednesday and Wednesday night I was baking dinner in the oven!!
Parts Used:
-
lynne from pelham, NH
-
Difficulty Level:Easy
-
Total Repair Time:Less than 15 mins
-
Tools:Pliers, Socket set
1 person
found this instruction helpful.
Was this instruction helpful to you?
Thank you for voting!
Fried baking element
Unplugged stove, removed screws holding element In place. Pulled element forward exposing electrical ends. Removed connectors, re- connected ends to new element. Pushed element back into holes and reconnected the screws. Plug stove back in.
Parts Used:
-
Jeff from wilmington, DE
-
Difficulty Level:Really Easy
-
Total Repair Time:Less than 15 mins
-
Tools:Nutdriver
1 person
found this instruction helpful.
Was this instruction helpful to you?
Thank you for voting!
Broken element
Simple installation took 2 minutes to do...pop on the connectors, screw each end into back of oven...DONE.
Parts Used:
-
Steven from ROCKVILLE, MD
-
Difficulty Level:Very Easy
-
Total Repair Time:Less than 15 mins
-
Tools:Socket set
1 person
found this instruction helpful.
Was this instruction helpful to you?
Thank you for voting!
bake element broken
turn off power to oven at breaker box
remove screws holding bake element in
pulls wires off old element
put wires on new element
put the screws back in
turn the power back on
remove screws holding bake element in
pulls wires off old element
put wires on new element
put the screws back in
turn the power back on
Parts Used:
-
Michael from Browns Mills, NJ
-
Difficulty Level:Really Easy
-
Total Repair Time:Less than 15 mins
-
Tools:Screw drivers
1 person
found this instruction helpful.
Was this instruction helpful to you?
Thank you for voting!
oven wouldn't heat
I removed the 2 screws, making sure not to drop the wires attached. Took off old wires ,then put new wires on new element, screwed it back into place and it was working. sooooo easy!!
Parts Used:
-
Rosemary from Oak Park, MI
-
Difficulty Level:Really Easy
-
Total Repair Time:Less than 15 mins
-
Tools:Nutdriver
1 person
found this instruction helpful.
Was this instruction helpful to you?
Thank you for voting!
oven not heating
slid the old one out and slid the new one in.turned the unit on and it works
Parts Used:
-
janet*hubbard from Old Town, FL
-
Difficulty Level:Really Easy
-
Total Repair Time:Less than 15 mins
-
Tools:Screw drivers
1 person
found this instruction helpful.
Was this instruction helpful to you?
Thank you for voting!
Oven element broke in three!
First I gave my roommate (an engineer) a screwdriver to remove the two screws that held the element in place. Then before I could hit the switch for the circuit breaker, he nearly fried himself by trying to take out the element! He gave up helping me after that.
Then I turned off the circuit, pulled the oven out and unplugged it, removed the racks from the oven, removed the two screws that hold in the element, and lifted up each side of the element and pulled each piece out. Unfortunately, they were a little stuck in back.
So I pulled out the oven, unscrewed the 6 or 8 screws that held up the back panel, and pulled the back panel off. I disconnected the two wires clipped to the element and pulled the old element out by lifting up and pulling them out. I then put in the new bake element, clipped the wires back on, put the oven's back panel on and screwed it in place, and then screwed the bake element back in with those two screws. Easy - a
Then I turned off the circuit, pulled the oven out and unplugged it, removed the racks from the oven, removed the two screws that hold in the element, and lifted up each side of the element and pulled each piece out. Unfortunately, they were a little stuck in back.
So I pulled out the oven, unscrewed the 6 or 8 screws that held up the back panel, and pulled the back panel off. I disconnected the two wires clipped to the element and pulled the old element out by lifting up and pulling them out. I then put in the new bake element, clipped the wires back on, put the oven's back panel on and screwed it in place, and then screwed the bake element back in with those two screws. Easy - a
Parts Used:
-
Keri from Raleigh, NC
-
Difficulty Level:Easy
-
Total Repair Time:15 - 30 mins
-
Tools:Nutdriver, Screw drivers
1 person
found this instruction helpful.
Was this instruction helpful to you?
Thank you for voting!
Defective element
Very easy. Remove two screws, pull element forward, remove two wires, install wires on new element, push backward and reinstall the screws. Done!!!
Parts Used:
-
lee from LEES SUMMIT, MO
-
Difficulty Level:Very Easy
-
Total Repair Time:15 - 30 mins
-
Tools:Nutdriver
1 person
found this instruction helpful.
Was this instruction helpful to you?
Thank you for voting!