















MEF300PXWC Frigidaire Range - Instructions
Keep searches simple. Use keywords, e.g. "leaking", "pump", "broken" or "fit".
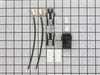
replaced terminal block for element
-
Donna from UNION, OR
-
Difficulty Level:Really Easy
-
Total Repair Time:30 - 60 mins
-
Tools:Screw drivers
1 person
found this instruction helpful.
Was this instruction helpful to you?
Thank you for voting!
went good
-
Ralph from SISSETON, SD
-
Difficulty Level:Really Easy
-
Total Repair Time:30 - 60 mins
-
Tools:Nutdriver
1 person
found this instruction helpful.
Was this instruction helpful to you?
Thank you for voting!
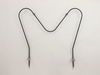
oven not heating up
ordered new heating element, arrived promptly as expected, compared new heating element to old one and it matched in size only diameter a little different, removed two sheet metal screws holding element in place and pulled out element to expose conductors and removed them with screwdriver. Installed conductors on new heating element slid into holes and installed screws, turned power back on(first step is to turn off power) turned on oven to preheat and she worked like a new one. Thank you PartSelect. Saved me a bundle,
Parts Used:
-
raymond from irvine, CA
-
Difficulty Level:Really Easy
-
Total Repair Time:Less than 15 mins
-
Tools:Nutdriver, Screw drivers
1 person
found this instruction helpful.
Was this instruction helpful to you?
Thank you for voting!
Oven would not heat up-
Disconnected the main electrical plug from the wall for the oven..
Used a nut driver to remove the two screws that held the heating elementin place.
Pulled the element out so I could remove the two wire terminals.
Installation of the new heating element was fairly basic..Oven is working great..
Used a nut driver to remove the two screws that held the heating elementin place.
Pulled the element out so I could remove the two wire terminals.
Installation of the new heating element was fairly basic..Oven is working great..
Parts Used:
-
Charles from Hagerstown, MD
-
Difficulty Level:Easy
-
Total Repair Time:Less than 15 mins
-
Tools:Nutdriver, Pliers
1 person
found this instruction helpful.
Was this instruction helpful to you?
Thank you for voting!
Original Elememt went bad
The directions have been stated many time and they are quite simple. Take out the two screws, pull the element so the wire connections come through into the oven. Disconnect the element at the wire connectors and replace. This is a dirt easy job.
The only real area for a potential problem is pulling the wire connectors through into the oven. As long as you pull slow and from the back - right next to the whole, you will be fine. Take the connectors off carefully and you're golden. Easy job.
The only real area for a potential problem is pulling the wire connectors through into the oven. As long as you pull slow and from the back - right next to the whole, you will be fine. Take the connectors off carefully and you're golden. Easy job.
Parts Used:
-
Steve from Orefield, PA
-
Difficulty Level:Really Easy
-
Total Repair Time:Less than 15 mins
-
Tools:Nutdriver, Screw drivers
1 person
found this instruction helpful.
Was this instruction helpful to you?
Thank you for voting!
Bake Element quit heating
Unplug the oven, open the door, take the screws out of the back wall that hold the small brackets which hold the element. Pull the element out of the wall, and pull a little of the wires with it to grasp easily. There are square nut screws, so you need the appropriate tool. Unplug the old element from the wires, and plug the new one in. Screw everything back together! This was a very easy fix!
Parts Used:
-
Robynn from St. Louis Park, MN
-
Difficulty Level:Really Easy
-
Total Repair Time:Less than 15 mins
-
Tools:Nutdriver, Screw drivers, Socket set
1 person
found this instruction helpful.
Was this instruction helpful to you?
Thank you for voting!
Oven element burnt in several places
Just followed the same instructions that the other people did when replacing this element. Was very easy to replace . Just turned off the power , rwemoved the two nuts , pulled the wires out about 3 inches and unpluged old one and pluged in the new one, replaced the nuts and volia ,DONE
Parts Used:
-
Larry from Cowgill, MO
-
Difficulty Level:Really Easy
-
Total Repair Time:Less than 15 mins
-
Tools:Nutdriver
1 person
found this instruction helpful.
Was this instruction helpful to you?
Thank you for voting!
baking element out
removed the two screws pulled the wires out sliped the connections from the old element and connected the new one .
Parts Used:
-
PAUL from FRANKLIN, NC
-
Difficulty Level:Really Easy
-
Total Repair Time:15 - 30 mins
-
Tools:Screw drivers
1 person
found this instruction helpful.
Was this instruction helpful to you?
Thank you for voting!
My baking element went out in my over, it started on fire.
Very quick and easy fix. Used a nut driver to unscrew the bolts. Pulled it out and disconnected the two wires. I was very happy with the wonderful service we received from Partselect.com. I ordered the part Sunday evening and the part was here Tuesday by noon. I payed regular shipping charges. What a pleasant surprise!
Parts Used:
-
lori from Vermillion, SD
-
Difficulty Level:Really Easy
-
Total Repair Time:Less than 15 mins
-
Tools:Nutdriver
1 person
found this instruction helpful.
Was this instruction helpful to you?
Thank you for voting!
Baking element burned out
The element went out on a Wednesday. We ordered the part the next day. We received it the following Tuesday (Mon. was a holiday). My 16 yr. old son replaced the part within 15 minutes. It was a piece of cake-actually it was a pizza!!
First and foremost we turned off the breaker, a very important thing to remember!! Then he removed the two screws that hold the element in place. He then pulled the element out about 3 inches and disconnected the two wires...and reconnected the new ones and put screws back in. Voila!! Ours was stillll under warranty, but we would have had to pay the service call and labor costs. Our do it yourself was much cheaper and faster!!
First and foremost we turned off the breaker, a very important thing to remember!! Then he removed the two screws that hold the element in place. He then pulled the element out about 3 inches and disconnected the two wires...and reconnected the new ones and put screws back in. Voila!! Ours was stillll under warranty, but we would have had to pay the service call and labor costs. Our do it yourself was much cheaper and faster!!
Parts Used:
-
Richard from Aiken, SC
-
Difficulty Level:Really Easy
-
Total Repair Time:Less than 15 mins
-
Tools:Nutdriver
1 person
found this instruction helpful.
Was this instruction helpful to you?
Thank you for voting!
oven wouldn't heat
using a nut driver I removed to two screws that were holding the element in place. Then simply disconnected each wire. Removed the old element and plug the new wires onto the new element. Reinstalled the two screws and everything works fine
Parts Used:
-
Michael from Goddard, KS
-
Difficulty Level:Really Easy
-
Total Repair Time:Less than 15 mins
-
Tools:Nutdriver
1 person
found this instruction helpful.
Was this instruction helpful to you?
Thank you for voting!
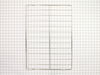
Needed an additional rack
-
Gary from Darragh, PA
-
Difficulty Level:Really Easy
-
Total Repair Time:Less than 15 mins
1 person
found this instruction helpful.
Was this instruction helpful to you?
Thank you for voting!
Bottom oven element was burnt out
Unscrewed 2 screws, used pliers to pull off push on terminals attached to element . Slide terminals back onto new element and replaced screws. EASY
Parts Used:
-
Sherry from JAMES STORE, VA
-
Difficulty Level:Very Easy
-
Total Repair Time:Less than 15 mins
-
Tools:Nutdriver, Pliers
1 person
found this instruction helpful.
Was this instruction helpful to you?
Thank you for voting!
It burned out
The new part was shipped and recieved very fast.
I removed the old one and installed the new one going by how I took the old one out. It was simple to do even for a 75 year old lady.. Thanks.
I removed the old one and installed the new one going by how I took the old one out. It was simple to do even for a 75 year old lady.. Thanks.
Parts Used:
-
Lorene from Lewiston, ID
-
Difficulty Level:Easy
-
Total Repair Time:15 - 30 mins
-
Tools:Socket set
1 person
found this instruction helpful.
Was this instruction helpful to you?
Thank you for voting!
Replace the bake element
Had to remove the old element and had problems with the element shorted on the quick disconnect. After having my son unplug the appliance and cutting the quick connect off. My son then installed a new quick disconnect and the bake element.
Parts Used:
-
Michael from Fort Worth, TX
-
Difficulty Level:Easy
-
Total Repair Time:15 - 30 mins
-
Tools:Screw drivers
1 person
found this instruction helpful.
Was this instruction helpful to you?
Thank you for voting!