















MDB7709AWB2 Maytag Dishwasher - Instructions
Keep searches simple. Use keywords, e.g. "leaking", "pump", "broken" or "fit".
old hose possible leakage
-
Fred from Kernersville, NC
-
Difficulty Level:Really Easy
-
Total Repair Time:Less than 15 mins
-
Tools:Nutdriver, Pliers, Screw drivers
8 of 13 people
found this instruction helpful.
Was this instruction helpful to you?
Thank you for voting!
Dishwasher would not drain. Pump was jammed with broken glass .
Turn off breaker to dishwasher.
Remove lower basket.
Drain any water using a wet vac.
Remove bottom cover plate. Should be 2 plastic screws using flat head screwdriver.
Should be able to reach pump. Turn counter clockwise to remove.
Disconnect plug wire on pump.
Install new pump by turning clock wise.
Reattach wire plug.
Run a wash cycle with empty dishwasher and check for leaks.
Replace cover plate.
Done.
Remove lower basket.
Drain any water using a wet vac.
Remove bottom cover plate. Should be 2 plastic screws using flat head screwdriver.
Should be able to reach pump. Turn counter clockwise to remove.
Disconnect plug wire on pump.
Install new pump by turning clock wise.
Reattach wire plug.
Run a wash cycle with empty dishwasher and check for leaks.
Replace cover plate.
Done.
Parts Used:
-
Thomas from WEST WARWICK, RI
-
Difficulty Level:Really Easy
-
Total Repair Time:Less than 15 mins
-
Tools:Screw drivers
6 of 7 people
found this instruction helpful.
Was this instruction helpful to you?
Thank you for voting!
Broken Mounting bracket

-
Roy from HIGGINSVILLE, MO
-
Difficulty Level:Really Easy
-
Total Repair Time:15 - 30 mins
-
Tools:Screw drivers
8 of 14 people
found this instruction helpful.
Was this instruction helpful to you?
Thank you for voting!
Soap and drying agent dispenser not working
I followed an excellent video on youtube which shows how to do it step by step: Dishwasher Dispenser Assembly (part #WPW10605015) - How To Replace
Parts Used:
-
David from GARDEN CITY, NY
-
Difficulty Level:Really Easy
-
Total Repair Time:15 - 30 mins
-
Tools:Nutdriver, Screw drivers
5 of 5 people
found this instruction helpful.
Was this instruction helpful to you?
Thank you for voting!
lack of water flow
removed rack
removed one screw
removed old seal
installed new seal
installed screw
removed one screw
removed old seal
installed new seal
installed screw
Parts Used:

-
Geoff from Avon, CT
-
Difficulty Level:Really Easy
-
Total Repair Time:30 - 60 mins
-
Tools:Screw drivers
6 of 8 people
found this instruction helpful.
Was this instruction helpful to you?
Thank you for voting!
washer filled in when off..
-
Bruce from GRANDVIEW, MO
-
Difficulty Level:Very Easy
-
Total Repair Time:30 - 60 mins
-
Tools:Nutdriver, Pliers
9 of 17 people
found this instruction helpful.
Was this instruction helpful to you?
Thank you for voting!
The Dishwasher had a no power symptom
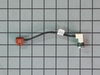
I researched the internet about this symptom on the Kenmore Elite Dishwasher and I found lots of people with the same problem. Everyone fixed it by replacing the Bi-Metal Fuse. I removed the old fuse and tested continuity and it was indeed bad. Once the new fuse arrived I tested continuity and it of course worked as expected, so that was a nice wipe of the brow. The new Bi-Metal Fuse came with a nice instruction manual. I also used a video from YouTube to help with the repair as well, but the included instructions were enough. The only thing that was not clear was the best way to attach the new wire since it was quite a bit longer than what was orginially there. So I ended up just folding it up and putting everything back together and it worked just fine. This repair was very easy as long as you are OK with cutting and stripping wires in a somewhat confined space and not being too worried that you might mess it up for good... :)
Parts Used:
-
Robert from Westminster, CO
-
Difficulty Level:Easy
-
Total Repair Time:30 - 60 mins
-
Tools:Screw drivers
7 of 11 people
found this instruction helpful.
Was this instruction helpful to you?
Thank you for voting!
Door just fell down
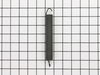
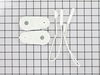
Hardest part was pulling dishwasher away from cabinet, making sure to not disturb water and drain line. I replaced both door springs which are on the two sides and attached to the dishwasher frame towards the back. This necessiatated pulling the dishwasher about 2/3 out of cabinet. After attaching both springs to frame, replacing the balance kit was a breeze .One screw to remove and then replace with new pulley unit. Attach the supplied cord with attached fittings to spring and then around two pulleys and mounting point on frame. Done . Push dishwasher back into cabinet, reattach two screws to underside of counter. Probably did not require new springs as they seem heavy duty and were not broken upon examination but ordered them also and replaced just in case. Most problem would be with broken cord in balance link kit
Parts Used:
-
James from PUNTA GORDA, FL
-
Difficulty Level:Really Easy
-
Total Repair Time:30 - 60 mins
-
Tools:Nutdriver, Pliers
5 of 5 people
found this instruction helpful.
Was this instruction helpful to you?
Thank you for voting!
Drain hose broken.
Removed the old hose, after loosing metal looking rings. Installed new hose ad finally tight firmly the looking rings, using wrench and socket.
Parts Used:
-
Giorgio from Savannah, GA
-
Difficulty Level:Easy
-
Total Repair Time:15 - 30 mins
-
Tools:Screw drivers, Socket set, Wrench set
8 of 14 people
found this instruction helpful.
Was this instruction helpful to you?
Thank you for voting!
One of the old stops broke

-
Dwight from KENT, WA
-
Difficulty Level:Very Easy
-
Total Repair Time:Less than 15 mins
6 of 8 people
found this instruction helpful.
Was this instruction helpful to you?
Thank you for voting!
Door spring broke-Door falls down
Remove the mounting screws that hold the dishwasher under the counter top. Remove dust cover plates at the bottom of the machine. The machine will have to be pulled out, so turn off the water to the machine. Usually under the kitchen sink. Disconnect water supply and push it out of the way so the dishwasher can be pulled out. Pull machine out enough so you have access to the door cables and springs. The door will have to be in the closed(up) position to do the repair. Usually only one side is broken. Start with the broken side and copy the working side when installing new parts. Then repair the working side. To get the working side apart just pull on the spring and disconnect it from the cable. Do the reverse to reinstall.
Parts Used:
-
Peter from JERICHO, NY
-
Difficulty Level:Easy
-
Total Repair Time:15 - 30 mins
-
Tools:Screw drivers, Socket set, Wrench (Adjustable)
6 of 8 people
found this instruction helpful.
Was this instruction helpful to you?
Thank you for voting!
The Spinner at the top of the dishwasher came off and would not stay on.
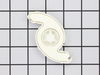
First of all I appreciate the instructions provided by this site when I selected the part I needed! The installation was so easy. I popped the end caps off of the top rack guides and removed the top rack. I reach in and popped the clips holding the top sprayer bar and gently pulled down on the sprayer bar enough to place the spinner button in the top of the sprayer bar. Then pressed the spinner on the bottom of the sprayer bar into the button I place in the top of the sprayer bar and reattached the sprayer bar to the clips. Put the top rack back on the guides and replaced the guide caps and it was finished. Easy fix thanks to this site great instructions!
Parts Used:
-
Ronald from SARATOGA SPGS, UT
-
Difficulty Level:Very Easy
-
Total Repair Time:Less than 15 mins
5 of 5 people
found this instruction helpful.
Was this instruction helpful to you?
Thank you for voting!
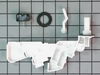
replaced float switch and door links
Replacing the float switch was fairly easy and straight forward. removed old using adjustable wrench and replaced.
Replacing the door links was not difficult except I needed to pull the dishwasher out and had to disconnect the water line.
reconnecting the water line was the time consuming and frustrating part. Once that was hooked up and tested, i pushed the dishwasher back in place and all is good again.
Replacing the door links was not difficult except I needed to pull the dishwasher out and had to disconnect the water line.
reconnecting the water line was the time consuming and frustrating part. Once that was hooked up and tested, i pushed the dishwasher back in place and all is good again.
Parts Used:
-
Scott from Wantagh, NY
-
Difficulty Level:A Bit Difficult
-
Total Repair Time:More than 2 hours
-
Tools:Pliers, Screw drivers, Wrench (Adjustable)
7 of 11 people
found this instruction helpful.
Was this instruction helpful to you?
Thank you for voting!
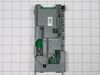
No start
Replaced fuse: no result
Replaced electronic control board: no result.
Replaced front control with buttons: fixed.
Three tries, three times waiting for parts but the result was good.
Replaced electronic control board: no result.
Replaced front control with buttons: fixed.
Three tries, three times waiting for parts but the result was good.
Parts Used:
-
John from HENRICO, VA
-
Difficulty Level:A Bit Difficult
-
Total Repair Time:More than 2 hours
5 of 5 people
found this instruction helpful.
Was this instruction helpful to you?
Thank you for voting!
pump not working
Looked on you-tube and it was so easy. Pump on bottom right. unplug pump and do a halfway turn. Plug the new one up and place the pump on, and turn halfway and its on. START your dishwasher
Parts Used:
-
Lois from HUDSON, NC
-
Difficulty Level:Easy
-
Total Repair Time:Less than 15 mins
-
Tools:Screw drivers
5 of 6 people
found this instruction helpful.
Was this instruction helpful to you?
Thank you for voting!