















MBR2256KES4 Maytag Refrigerator - Instructions
Keep searches simple. Use keywords, e.g. "leaking", "pump", "broken" or "fit".
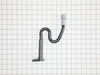
Water not draining to pan. It caused an ice build up under the freezer draw
Remove the grate at the back of the refrigerator. Remove the existing drawn tube. Replace the exiting drain tube with the updated drain tube. Check to see if water was draining properly. Replace the grate. Sit back and have a beer.
Parts Used:
-
Rich from WINSTED, CT
-
Difficulty Level:Very Easy
-
Total Repair Time:Less than 15 mins
-
Tools:Nutdriver, Pliers, Screw drivers
3 of 4 people
found this instruction helpful.
Was this instruction helpful to you?
Thank you for voting!
Crisper pan cracked
You remove the white frame from around the old pan by popping it off from the bottom being careful not to break it. Install it on the new pan using the reverse procedures. Popping it on starting at the bottom. Very easy
Parts Used:

-
Patrick from KELSO, WA
-
Difficulty Level:Very Easy
-
Total Repair Time:Less than 15 mins
3 of 4 people
found this instruction helpful.
Was this instruction helpful to you?
Thank you for voting!
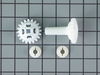
Boyfriends freezer door wouldn’t shut completely
I got really tired of taking food out covered in icicles and stabbing a huge block of ice out of the bottom. Turns out all he needed was a little wheel with cogs and I looked up the sticker model number on this site and clicked the part of the fridge. So simple, wish I would’ve done it sooner.
Parts Used:
-
Megan from NORFOLK, VA
-
Difficulty Level:Really Easy
-
Total Repair Time:Less than 15 mins
3 of 4 people
found this instruction helpful.
Was this instruction helpful to you?
Thank you for voting!
Light switch wasn't working.. As I would close the door I would notice our frig light wasn't going off...
I simply removed the old switch by gently pulling down on the old switch with a screwdriver. When it was about half way out I just gently pulled down on the old switch and it popped out... I removed the two connectors attached to the old switch by pulling on the connectors with a pliers...I tried using my fingers but wasn't able to pull the connectors off so I used pliers. It worked perfectly.. When pulling off the old connectors, make sure you attach the new switch to the same tabs on the new switch... It was very easy to do and took under 5 mins.....The light switch works perfect....P.S. You should unplug the frig while making the connection just in case....Safety first....!!!
Parts Used:

-
David from Hemet, CA
-
Difficulty Level:Really Easy
-
Total Repair Time:Less than 15 mins
-
Tools:Pliers, Screw drivers
3 of 4 people
found this instruction helpful.
Was this instruction helpful to you?
Thank you for voting!
Refrigerator light would not stay on. Water dispenser would not dispense unless the refrigerator light was on.
My non mechanical husband used a flat edged screwdriver to pry out the broken switch. Then it was a matter of reconnecting to small wires and popping the switch back in place....voila, life has been great ever since. ;)
Parts Used:
-
INEZ from RIALTO, CA
-
Difficulty Level:Really Easy
-
Total Repair Time:15 - 30 mins
-
Tools:Screw drivers
3 of 4 people
found this instruction helpful.
Was this instruction helpful to you?
Thank you for voting!
defective light switch
inserted a knife between the switch and the plastic interior in order to pop the switch out.
then took off the 2 wires on the old switch put them on the new switch and reinserted the switch into the plastic interior.
then took off the 2 wires on the old switch put them on the new switch and reinserted the switch into the plastic interior.
Parts Used:
-
THOMAS from WILLARD, OH
-
Difficulty Level:Really Easy
-
Total Repair Time:Less than 15 mins
3 of 4 people
found this instruction helpful.
Was this instruction helpful to you?
Thank you for voting!
changed the light bulb still would not work so I figured it was the switch sure enough.
I took a chance and ordered a switch that is next to the top of the door. looked for how to remove it easily done in ten minutes works fine last long time.
Parts Used:
-
anthony from HAVELOCK, NC
-
Difficulty Level:Really Easy
-
Total Repair Time:15 - 30 mins
3 of 4 people
found this instruction helpful.
Was this instruction helpful to you?
Thank you for voting!
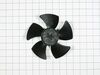
I had a loose fitting old condensor fan blade on my new motor.
I made a temporary repair by drilling the old blade plastic hub and put a small screw in it to hold it on to the shaft until the new blade arrived. The new blade came in within the two days I needed before Thanksgiving. I removed the old and pushed on the new. There were 8 screws on the back guard and two to hold the motor on. It was a snap.
Thank you PartSelect.com The wife is very, very happy now, we had 51 coming over for Thanksgiving. :)
Thank you PartSelect.com The wife is very, very happy now, we had 51 coming over for Thanksgiving. :)
Parts Used:
-
Roger from SMITHFIELD, RI
-
Difficulty Level:Very Easy
-
Total Repair Time:Less than 15 mins
-
Tools:Nutdriver
3 of 4 people
found this instruction helpful.
Was this instruction helpful to you?
Thank you for voting!
The refrigerator stopped running
I was told to order the run capacitor and the technician thought it would repair the refrigerator; but it did not. The appliance technician had to take the run capacitor off and install what he called a "hard start" and the refrigerator is operating right now.
Parts Used:

-
Barbara H. from South Hill, VA
-
Difficulty Level:Easy
-
Total Repair Time:1- 2 hours
-
Tools:Screw drivers
4 of 7 people
found this instruction helpful.
Was this instruction helpful to you?
Thank you for voting!
Freezer not defrosting and making fridge run warm.
Super simple following the instruction video you posted. Thanks!
Parts Used:

-
Brent from PRESCOTT, AZ
-
Difficulty Level:Really Easy
-
Total Repair Time:30 - 60 mins
-
Tools:Nutdriver
2 of 2 people
found this instruction helpful.
Was this instruction helpful to you?
Thank you for voting!
the freezer and refrigerator number would lower it self and eventually get to "-" and "-" essentially shutting it self off!!
I replaced the Control Board...
the two boards need to be installed first . than plug in the connectors
(refrigerator was unplugged of course.!) i plugged in the connectors first. and had to disconnect them. install the boards first. than plug in the electrical connectors.. strange for a day or two it still did not work properly and than one day. it started working ok 7 on the freezer and 3 on the refrigerator. I do not know why..
the two boards need to be installed first . than plug in the connectors
(refrigerator was unplugged of course.!) i plugged in the connectors first. and had to disconnect them. install the boards first. than plug in the electrical connectors.. strange for a day or two it still did not work properly and than one day. it started working ok 7 on the freezer and 3 on the refrigerator. I do not know why..
Parts Used:
-
Marc from SEASIDE, CA
-
Difficulty Level:A Bit Difficult
-
Total Repair Time:30 - 60 mins
-
Tools:Screw drivers
2 of 2 people
found this instruction helpful.
Was this instruction helpful to you?
Thank you for voting!
ICE BUILD UP AT BOTTOM OF FREEZER
-
Gerald from COLORADO SPGS, CO
-
Difficulty Level:Really Easy
-
Total Repair Time:30 - 60 mins
3 of 5 people
found this instruction helpful.
Was this instruction helpful to you?
Thank you for voting!
Freezer cold ; fridge warm . Freezer not defrosting.
Unplugged fridge
Pulled light cover off
Used screwdrivers to press in on tabs holding control board cover.
Unplug wiring harnesses.
Snapped board in two.
Install in cover
Reattach wires
Done
Pulled light cover off
Used screwdrivers to press in on tabs holding control board cover.
Unplug wiring harnesses.
Snapped board in two.
Install in cover
Reattach wires
Done
Parts Used:
-
Tim from Oxford, MA
-
Difficulty Level:Really Easy
-
Total Repair Time:1- 2 hours
-
Tools:Screw drivers
2 of 2 people
found this instruction helpful.
Was this instruction helpful to you?
Thank you for voting!
Empty box sent with no part!!!! No customer service help because of covid
No product was sent in the box for the shaft I received an empty box from them cannot perform any repairs because I got no product from this company. Called customer service said due to Covid no customer service available when online and receive no customer service no refund no product no help
Parts Used:

-
Jeffery from MIDLOTHIAN, VA
-
Difficulty Level:Very Difficult
-
Total Repair Time:More than 2 hours
2 of 2 people
found this instruction helpful.
Was this instruction helpful to you?
Thank you for voting!
Plastic bar between drawers cracked on the end
Removed glass shelf and inserted plastic running bar for drawers
Parts Used:

-
Geraldine from LANOKA HARBOR, NJ
-
Difficulty Level:Very Easy
-
Total Repair Time:Less than 15 mins
2 of 2 people
found this instruction helpful.
Was this instruction helpful to you?
Thank you for voting!