















MAH14PDBEW Maytag Washer - Instructions
Keep searches simple. Use keywords, e.g. "leaking", "pump", "broken" or "fit".
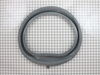
door boot seal broke
I am happy when PartSelect included the instruction video, so I completed my repair that easy. Thanks the PartSelect. Davis Dao
Parts Used:
-
Davis from Sacramento, CA
-
Difficulty Level:Easy
-
Total Repair Time:15 - 30 mins
-
Tools:Nutdriver, Pliers, Screw drivers
Was this instruction helpful to you?
Thank you for voting!
Rubber Boot between Tub and Door had a hole
When I looked up the part number, there was an installation video on the same page. I ordered the part then and there, and once it arrived, I put the iPad right on top of the machine and paused the video whenever I was doing the steps. It was TOO EASY!
Parts Used:
-
David from El Paso, TX
-
Difficulty Level:Really Easy
-
Total Repair Time:15 - 30 mins
-
Tools:Pliers, Screw drivers, Socket set
Was this instruction helpful to you?
Thank you for voting!
water leaking in the front of the machine
My 16 yr old son replaced the door boot. He said it was very easy although the wire was alittle tricky. But all in all it was very easy for him. Saved me alot of money.
Parts Used:
-
Susan from Mayville, MI
-
Difficulty Level:Really Easy
-
Total Repair Time:15 - 30 mins
-
Tools:Screw drivers
Was this instruction helpful to you?
Thank you for voting!
Water leaking from the rubber front door seal.
I follwoed the detailed instructions provided via the Part Select web page and instructional video. This information was very helpful. I printed the step by step paper instructions and had them available at the washer. They were very easy to understand. By doing this work myself I saved a $100.00 repair service call and installation cost and another $30.00 on parts. This resulted $130.00 ++ savings and 30 minutes of my time. Thanks for the great help and guidance!!
Parts Used:
-
William from Sewickley, PA
-
Difficulty Level:Easy
-
Total Repair Time:15 - 30 mins
-
Tools:Nutdriver, Pliers, Screw drivers, Socket set
Was this instruction helpful to you?
Thank you for voting!
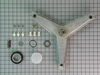
10 year old frontloader while spinning sounds like a jet engine, i should have fixed it sooner, after about 8 months it started banging too.
Followed the PartsSelect video for the seal replacement, which was step by step and spot on, I just had to add the bearing replacement part myself. Once it was dissembled I drove each bearing out by tapping them with the hammer and drift. My model had no bearing retainer ring. I did not remove the outer drum from the washer. Clean the aluminum hub real well, scrape it with a utility knife to remove corrosion, wipe with a solvent soaked rag, etc. I disagree with other methods ive seen while researching, like a wire brush in a drill, because you will remove aluminum material from the hub and the bearing wont fit as tightly as designed. tap in the rear bearing til fully seated. I did the rear first because gravity then held the spacer in place. Set the spacer in place, noting that one end is "flared" to a larger diameter, so it seats against the larger race of the front bearing. Align and start the front bearing in place. The spacer needs to align with the bearings so it bears against the inner races of the bearings. So to hold it in place I rolled up a piece of light cardstock, slid it thru the spacer and bearing, and as it "uncoiled" it aligned the spacer. Pretty well. I did have to tap the spacer a little with the drift after the bearings were in, but just a little. After that, back to the video for the seal and reassembly. Only other comment I have is to locate the bearings early. I ended up going to grainger for one and Napa for the other. And no one could seem to cross the "DU" part of the original NGK bearing. The DU means it just has seals on both sides. Pretty standard stuff. That could have been easier. Also hold off ordering extra parts. I have found PartsSelect is really quick getting stuff out. I ordered an inner drum because i heard from other research that that could cause the banging noise. My banging noise was from one bearing disinegrating and the balls breaking up inside the hub. Shipping the drum back cost 70. UPS wanted 160. So that could have gone better, but I didn't want to let the machine sit too long. Next time I'll let it sit a couple days.
Parts Used:


-
Harold from Niantic, CT
-
Difficulty Level:A Bit Difficult
-
Total Repair Time:More than 2 hours
-
Tools:Nutdriver, Screw drivers, Wrench set
Was this instruction helpful to you?
Thank you for voting!
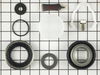
Bearings out on tub.
Removed tub replaced bearings. Put in new seal. Be aware drawing on instruction shows seal cup instaled from wrong side of seal. Other wise went well. Got bearings from McMaster Carr.
Parts Used:
-
Brian from Waterford, WI
-
Difficulty Level:A Bit Difficult
-
Total Repair Time:More than 2 hours
-
Tools:Nutdriver, Screw drivers, Wrench (Adjustable), Wrench set
Was this instruction helpful to you?
Thank you for voting!
Tub cover and seal was torn
Found the part on parts select, which also had a very helpful DIY repair video to replace the part. I followed the video step by step to fix the tub cover, and the washer is back to full working condition!!! I could not be happier with Partselect.com. Their easy appliance break down to find the exact part that is broken; but to also include a instructional video for that part was amazing.
Parts Used:
-
Howard from Syracuse, NY
-
Difficulty Level:Easy
-
Total Repair Time:30 - 60 mins
-
Tools:Nutdriver, Pliers, Screw drivers
Was this instruction helpful to you?
Thank you for voting!
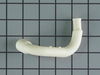
Increasing water leak
The machine had the old style boot drain hose with built-in bellows. The constant flexing of this tube caused a small crack in one of the bellows that gradually increased in size over time, causing water to leak into the bottom front part of the machine. Repair accomplished by removing the door (crosspoint screws), the retangular panel above the apron over the door, the apron above the door (5/16 socket), and the front lower panel (crosspoint screws). Pliers used to open the spring hose clamps, old leaky tube removed (re-use the rubber clearance washer that is on the tube). New tube installed easily, then panels reinstalled. 10 minutes total.
Parts Used:
-
James from Scotts Valley, CA
-
Difficulty Level:Easy
-
Total Repair Time:Less than 15 mins
-
Tools:Pliers, Screw drivers, Socket set
Was this instruction helpful to you?
Thank you for voting!
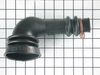
leak in tub to pump hose
removed front of washer. loosened two hose clamps. replaced hose. tightened clamps. replaced front cover.
Parts Used:
-
Philip from Parma, OH
-
Difficulty Level:Easy
-
Total Repair Time:15 - 30 mins
-
Tools:Screw drivers
Was this instruction helpful to you?
Thank you for voting!
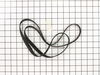
Started smelling rubber burning during spin cycle
I thought for sure the washer was toast! Thankfully, due to your website it was an easy 26.00 fix. Husband took care of the repair in about a half an hour. He did not encounter any problems with the fix and it's running like a charm!
Parts Used:
-
Lauraine from Kimberling City, MO
-
Difficulty Level:Easy
-
Total Repair Time:15 - 30 mins
-
Tools:Pliers, Screw drivers, Wrench (Adjustable)
Was this instruction helpful to you?
Thank you for voting!
wouldn't spin out all of the water.
Replaced parts then the door wouldn't unlock, so we called a repair man and he's replacing the control board and the wireing harness, it cost 394.85 but the machine is in good shape so it was cheaper than buying a new washer and dryer, because I want them to match & the dryers only 7 years old.
Parts Used:
-
MARILYN from SULLIVAN, OH
-
Difficulty Level:Really Easy
-
Total Repair Time:15 - 30 mins
-
Tools:Screw drivers
Was this instruction helpful to you?
Thank you for voting!
Would not go into spin mode
Removed 4 screws and door, lowered and removed front panel,removed screws holding locking tabs for the machine top, removed the four screws holding soap reservoir, lifted the top. Located under the lid and above the doorway I pulled out the wax motor retaineing clip with pliers and the wax motor, used pliers to remove the wire connectors, hooked them up to the new part and reassembled.
Parts Used:
-
Steven from El Cerrito, CA
-
Difficulty Level:Really Easy
-
Total Repair Time:15 - 30 mins
-
Tools:Pliers, Screw drivers, Socket set
Was this instruction helpful to you?
Thank you for voting!
Would not enter spin cycle. Found WAX Motor not cycling, 120VAC present when disconnected. Applied 120VAC dierectly cycled OK.
When I found the WAX motor would not cycle I applied 120VAC directly to the WAX motor and machine went into SPIN CYCLE as it should have. Stopped machine and ordered replacement Machine Control Board. Replaced the part and machine works perfectly.
Parts Used:
-
E T from Milton, WI
-
Difficulty Level:Easy
-
Total Repair Time:15 - 30 mins
-
Tools:Nutdriver, Screw drivers
Was this instruction helpful to you?
Thank you for voting!
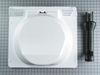
Water leak through door
I read the reviews from others fixing this same part, it didn't seem to difficult. It was not even hard at all. I installed the part and my washer does not leak at all. My Neptunes are old so I am very sure I will come back to buy parts here. I did install the hinges backwards at first, the didnt close so I had to take an extra five minutes to turn them around.
Parts Used:
-
Rob from Orem, UT
-
Difficulty Level:Really Easy
-
Total Repair Time:15 - 30 mins
-
Tools:Screw drivers
Was this instruction helpful to you?
Thank you for voting!
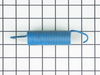
The washer wouldn't spin the water out of the clothes
First and foremost, disconnect the power before anything else, then remove the door, access panel, and front of the washer,I then detached the front of the rubber boot so I could remove the plastic panel that it attaches to, that exposes the springs, I then used a vice grip to remove the springs replacing them one at a time, I also replaced the struts in the rear of the machine which requires removing the rear panel, and I used a bottle jack to support the rear of the washer tub while I changed the struts, I changed the struts first which only helped a little, the springs made the job complete and the washer now completely wrings the clothes to a damp state that dries quickly.
Parts Used:
-
Doug from Pella, IA
-
Difficulty Level:A Bit Difficult
-
Total Repair Time:1- 2 hours
-
Tools:Nutdriver, Socket set
Was this instruction helpful to you?
Thank you for voting!