















LNC6749A77 Admiral Washer - Instructions
Keep searches simple. Use keywords, e.g. "leaking", "pump", "broken" or "fit".
washing machine was making alot of noise
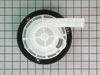
I found the water pump bearings were going bad from humidity. I replaced the pump with a new one and it runs quiet again.
Parts Used:
-
David from Boca Raton, FL
-
Difficulty Level:Easy
-
Total Repair Time:Less than 15 mins
-
Tools:Screw drivers, Wrench set
565 of 581 people
found this instruction helpful.
Was this instruction helpful to you?
Thank you for voting!
Load Grinding/Rubbing Noise in Rinse and Spin Cycles
First unplug the washer for the electrical outlet. You will need to tip the washer back to get to the bottom of the machine. There you will see the belt that drives the transmission and the water pump from the motor. Remove the belt and set it to the side. Then you will need to gain access to the top side of the machine by gently using a screwdriver to pry the front of the top up off the front panel on both sides then hinge it back out of the way. Use a nut driver to remove the two screws on the inside edge of the front panel and remove the front panel. Once the front panel is off you will see the water pump on the right hand side as you face the front of the machine. Remove the hose clamp on the water pump with the flat head screw driver or nut driver and use a pair of pliers to remove the compression clip on the water pump. Remove the 4 bolts holding the water pump in place. Reverse the entire process to put it back together. This job was very easy and I was only without a washer for 2 days because of partselect.com.
Parts Used:
-
Doug from Port Richey, FL
-
Difficulty Level:Really Easy
-
Total Repair Time:Less than 15 mins
-
Tools:Pliers, Screw drivers
139 of 155 people
found this instruction helpful.
Was this instruction helpful to you?
Thank you for voting!
Washer shakes violently during spin cycle
I used the instructions from others and modified them with tips and details based on my own experience:
1. Unplug the power, turn off the hot/cold water valves and disconnect the hot/cold water hoses and drain hose. Tip: plug the drain hose with some paper towels to keep the stale water from dripping on your floors.
2. Move the washer to an open area like a garage, and position it near a wall (or have a helper on hand who can help you prop up the washer top later). Tip: to simplify things, you’ll want to avoid removing the top completely. Removing the top completely involves removing the inlet water hose and all wires leading to the control panel and the door switch.
3. Lay the washer on its side and remove the drive belt from the bottom of the washer.
4. Place the washer upright again and remove the lower rear panel held by eight ¼” hex screws.
5. With the rear panel off, you will see a black drain hose that connects the tub to the pump. Remove the hose at the pump with a pair of pliers. The hose is just held on with a spring clamp.
6. Remove the front panel: pry the top off at 2 front hinge points with a flat head screwdriver. With the top up, remove two 5/16” hex screws holding the front panel and remove the front panel.
7. Remove suspension springs: To easily remove the suspension springs, you will need about 12 quarters (or nickels) for each spring. I hope I can describe this part clearly. For the removal of each spring, tilt the top of the tub away from you as far as you can in order to stretch out the spring. Now insert coins between the gaps in the spring coil, alternating the coins on each side of the coil to keep the spring coil straight. Then tilt the top of the tub back toward you to release the tension on the spring and you should now be able to easily unhook the spring from the tub. The coins keep the coil stretched out for re-installation later. Repeat for the other 5 coils. Note: Others have mentioned using a metal electrical box for this, but I can’t visualize it.
8. Now raise the washer top and prop it against the wall (or have a helper hold it vertical). Follow the small clear “water level” hose that runs from the control panel to the rear of the tub and disconnect it from the tub. It is just held by a small spring clamp.
9. Remove the tub assembly. Remember the position of the tub before you take it out. Place a couple of 4”x4”s (or equivalent) on the ground to support the edges of the washer tub when you turn it upside down. With the springs removed, the drive belt off, and the water level hose and drain hose detached, you should be able to simply lift the tub assembly out. Lay the tub upside down on the 4x4s.
10. Remove the snubber ring: There is no need to remove the flywheel if you have a small or fairly shallow socket (or an angled open end wrench). My small socket worked fine. As others have mentioned, remove the snubber ring by backing out the six 5/16” hex bolts that hold the snubber ring in place. Do not remove the bolts completely. The metal retaining plate is supposed to be under spring tension, but mine did not rise when I loosened the bolts, so I had to pry it up slightly with a flat screwdriver to form enough of a gap to insert the new snubber ring. Make sure the new snubber ring is seated evenly and re-tighten the 6 bolts.
11. Reinstall: Place tub back into the cabinet, reconnect the thin water level hose, reconnect the drain hose at the pump.
12. Spring re-installation: As you hook each spring to the tub, make sure the bottom of the spring is hooked properly to the bottom of the cabinet. Then tilt the top of the tub away from you to stretch the spring out in order to remove the coins. Then tilt it back toward you to remove the tension. Repeat for the other 5 springs.
13. Re-install the front panel and the rear panel and place the washer top back in place.
14. Lay the washer on its side to reinstall the drive belt.
15. Hook up your hot/cold water, drain hose, tur
1. Unplug the power, turn off the hot/cold water valves and disconnect the hot/cold water hoses and drain hose. Tip: plug the drain hose with some paper towels to keep the stale water from dripping on your floors.
2. Move the washer to an open area like a garage, and position it near a wall (or have a helper on hand who can help you prop up the washer top later). Tip: to simplify things, you’ll want to avoid removing the top completely. Removing the top completely involves removing the inlet water hose and all wires leading to the control panel and the door switch.
3. Lay the washer on its side and remove the drive belt from the bottom of the washer.
4. Place the washer upright again and remove the lower rear panel held by eight ¼” hex screws.
5. With the rear panel off, you will see a black drain hose that connects the tub to the pump. Remove the hose at the pump with a pair of pliers. The hose is just held on with a spring clamp.
6. Remove the front panel: pry the top off at 2 front hinge points with a flat head screwdriver. With the top up, remove two 5/16” hex screws holding the front panel and remove the front panel.
7. Remove suspension springs: To easily remove the suspension springs, you will need about 12 quarters (or nickels) for each spring. I hope I can describe this part clearly. For the removal of each spring, tilt the top of the tub away from you as far as you can in order to stretch out the spring. Now insert coins between the gaps in the spring coil, alternating the coins on each side of the coil to keep the spring coil straight. Then tilt the top of the tub back toward you to release the tension on the spring and you should now be able to easily unhook the spring from the tub. The coins keep the coil stretched out for re-installation later. Repeat for the other 5 coils. Note: Others have mentioned using a metal electrical box for this, but I can’t visualize it.
8. Now raise the washer top and prop it against the wall (or have a helper hold it vertical). Follow the small clear “water level” hose that runs from the control panel to the rear of the tub and disconnect it from the tub. It is just held by a small spring clamp.
9. Remove the tub assembly. Remember the position of the tub before you take it out. Place a couple of 4”x4”s (or equivalent) on the ground to support the edges of the washer tub when you turn it upside down. With the springs removed, the drive belt off, and the water level hose and drain hose detached, you should be able to simply lift the tub assembly out. Lay the tub upside down on the 4x4s.
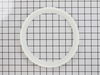
10. Remove the snubber ring: There is no need to remove the flywheel if you have a small or fairly shallow socket (or an angled open end wrench). My small socket worked fine. As others have mentioned, remove the snubber ring by backing out the six 5/16” hex bolts that hold the snubber ring in place. Do not remove the bolts completely. The metal retaining plate is supposed to be under spring tension, but mine did not rise when I loosened the bolts, so I had to pry it up slightly with a flat screwdriver to form enough of a gap to insert the new snubber ring. Make sure the new snubber ring is seated evenly and re-tighten the 6 bolts.
11. Reinstall: Place tub back into the cabinet, reconnect the thin water level hose, reconnect the drain hose at the pump.
12. Spring re-installation: As you hook each spring to the tub, make sure the bottom of the spring is hooked properly to the bottom of the cabinet. Then tilt the top of the tub away from you to stretch the spring out in order to remove the coins. Then tilt it back toward you to remove the tension. Repeat for the other 5 springs.
13. Re-install the front panel and the rear panel and place the washer top back in place.
14. Lay the washer on its side to reinstall the drive belt.
15. Hook up your hot/cold water, drain hose, tur
Parts Used:
-
Hank from Alpharetta, GA
-
Difficulty Level:Easy
-
Total Repair Time:1- 2 hours
-
Tools:Pliers, Socket set
37 of 42 people
found this instruction helpful.
Was this instruction helpful to you?
Thank you for voting!
Puddling on the floor. Water was leaking through the impeller bushing on the water pump
..First I sought the source of the water leak, by removing the louvered panel on the rear (4 nut headed screws hold it in place) and observed for water leaks during a wash cycle. This required that I re-position the washer and route the fill and drain hoses in order to stand behind the washer during its cycle to observe through the rear panel opening.
...There was no visible leakage of any of the hoses or connections but I could see the water puddle on the floor was coming from under the water pump located in the front corner.
...I wasn't able to peel the sides off the washer. I disconnected the rear hoses for hot and cold water and the drain hose. I removed the plate on the rear that orients the drain hose.
...I tilted the washer 90 degrees to its front using 2 x 4's to cushion the front so the machine would not be scratched.
....I removed the drive belt underneath. It was easy to remove by hand and did not require loosening screws on any of the pulleys.
...I disconnected the black exhaust hose from the tub with a screw driver and the white drain outlet hose with water pump pliers.
...I then reached into the front corner of the machine through the opening in the back and removed the water pump which is held in place by 3 nut head screws. I used a ratchet set to do this.
...I observed the water pump which is almost all molded plastic. The bushing area in the center attached to the impeller appeared to be wet and rusted. I assumed this to be the source of the water leak. I found the replacement on line at PartSelect site and ordered it. It was much cheaper at PartSelect then other sites.
....When the replacement pump arrived 2 days later , I compared it to the pump I removed. It matched physically including the pulley so then I installed it and re-assembled the washing machine in the reverse order from disassembly.
...I left the louvered panel off and observed the water flow for leaks during the first wash after re-assembly.
...There were no internal leaks and no puddling on the floor, so I replaced the louvered panel and put the washing machine back in place.
The water pump was a bit noisy during the 1st load
but otherwise the machine ran well. After the 1st load the pump is quiet and the machine runs just as it did before the puddling occurred. It is fine.
After having done this I can say, it was uncomfortable and cramped to reach in through the rear panel opening to remove and replace the water pump. But I could not find a way to lift the top of the machine easily so I could removed the side panels to have better access to the water pump and hoses. If anyone knows a way to do that without unplugging and removing the electronics panel, that would be useful information. Please post it.
It can be done the way I described here because I did it, but that may not be the easiest way if the side panels can be easily removed it would probably be an easier repair.
...There was no visible leakage of any of the hoses or connections but I could see the water puddle on the floor was coming from under the water pump located in the front corner.
...I wasn't able to peel the sides off the washer. I disconnected the rear hoses for hot and cold water and the drain hose. I removed the plate on the rear that orients the drain hose.
...I tilted the washer 90 degrees to its front using 2 x 4's to cushion the front so the machine would not be scratched.
....I removed the drive belt underneath. It was easy to remove by hand and did not require loosening screws on any of the pulleys.
...I disconnected the black exhaust hose from the tub with a screw driver and the white drain outlet hose with water pump pliers.
...I then reached into the front corner of the machine through the opening in the back and removed the water pump which is held in place by 3 nut head screws. I used a ratchet set to do this.
...I observed the water pump which is almost all molded plastic. The bushing area in the center attached to the impeller appeared to be wet and rusted. I assumed this to be the source of the water leak. I found the replacement on line at PartSelect site and ordered it. It was much cheaper at PartSelect then other sites.
....When the replacement pump arrived 2 days later , I compared it to the pump I removed. It matched physically including the pulley so then I installed it and re-assembled the washing machine in the reverse order from disassembly.
...I left the louvered panel off and observed the water flow for leaks during the first wash after re-assembly.
...There were no internal leaks and no puddling on the floor, so I replaced the louvered panel and put the washing machine back in place.
The water pump was a bit noisy during the 1st load
but otherwise the machine ran well. After the 1st load the pump is quiet and the machine runs just as it did before the puddling occurred. It is fine.
After having done this I can say, it was uncomfortable and cramped to reach in through the rear panel opening to remove and replace the water pump. But I could not find a way to lift the top of the machine easily so I could removed the side panels to have better access to the water pump and hoses. If anyone knows a way to do that without unplugging and removing the electronics panel, that would be useful information. Please post it.
It can be done the way I described here because I did it, but that may not be the easiest way if the side panels can be easily removed it would probably be an easier repair.
Parts Used:
-
Richard from Boyertown, PA
-
Difficulty Level:A Bit Difficult
-
Total Repair Time:1- 2 hours
-
Tools:Pliers, Screw drivers, Socket set
36 of 40 people
found this instruction helpful.
Was this instruction helpful to you?
Thank you for voting!
Washer Made Screeching noise on spin & Rinse
Unplugged Machine, Turned Off Water, Disconnected water and drain hoses. Let water run from hoses ino bucket.
Removed back plate where drain hose goes into back of machine. Used pliers to close the clamp holding to drain hose to remove it. I stuffed the exposed water pump opening with towels to keep water from spilling.
At this point I leaned the machine over on its front so the back of the machine was facing skyward. I placed a towel over the motor in case water spilled it would not get on the electrical components. I removed the belt on the bottom of the machine from the water pumps pully. I then removed the three screws mounting the pump to the bottom of the machine. I disconnected the other hose from the water pump that comes from the wash tank with the pliers. Once disconnected I stuffed the ends of both with towels to keep water from leaking out.
I took the new pump and connected the hose from the washer tub with pliers, mounted the pump back to the bottom of the tub with the three screws, replaced the belt, and reconnected the drain hose, and took the towel off the motor. I then replaced the back plate and set the machine upright. I connected all the hoses back up and plugged it in. It worked great. If you spill water on the motor you can dry it with a hair dryer.
Removed back plate where drain hose goes into back of machine. Used pliers to close the clamp holding to drain hose to remove it. I stuffed the exposed water pump opening with towels to keep water from spilling.
At this point I leaned the machine over on its front so the back of the machine was facing skyward. I placed a towel over the motor in case water spilled it would not get on the electrical components. I removed the belt on the bottom of the machine from the water pumps pully. I then removed the three screws mounting the pump to the bottom of the machine. I disconnected the other hose from the water pump that comes from the wash tank with the pliers. Once disconnected I stuffed the ends of both with towels to keep water from leaking out.
I took the new pump and connected the hose from the washer tub with pliers, mounted the pump back to the bottom of the tub with the three screws, replaced the belt, and reconnected the drain hose, and took the towel off the motor. I then replaced the back plate and set the machine upright. I connected all the hoses back up and plugged it in. It worked great. If you spill water on the motor you can dry it with a hair dryer.
Parts Used:
-
Michael from Elgin, SC
-
Difficulty Level:Really Easy
-
Total Repair Time:30 - 60 mins
-
Tools:Nutdriver, Pliers
34 of 37 people
found this instruction helpful.
Was this instruction helpful to you?
Thank you for voting!
Plastic pulley broke
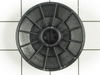
No one would sell me just the plastic pulley,they said that I had to buy the whole motor.160.00 dollars.I keep searching and found partselect.com and they had the pulley on line.I had my part in two days for about 12.00 dollars and it took about 5 min. to install.Just had to tap it lightly with small hammer to move it up the rod to fit in groves.Thank-you partsselect for being honest. BOB N.C.
Parts Used:
-
Nancy from Candler, AL
-
Difficulty Level:Easy
-
Total Repair Time:Less than 15 mins
29 of 29 people
found this instruction helpful.
Was this instruction helpful to you?
Thank you for voting!
slipping drive belt
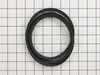
Tipped machine 45-degrees to reveal belt on bottom of machine. Used screwdriver to remove old belt which looked fine. Installed new belt (which arrived from PartSelect within 2-days) but it felt loose. Tried machine anyway and it works just fine. Easiest repair ever. Thanks, PartSelect!
Parts Used:
-
stephen from redondo beach, CA
-
Difficulty Level:Really Easy
-
Total Repair Time:Less than 15 mins
-
Tools:Screw drivers
25 of 31 people
found this instruction helpful.
Was this instruction helpful to you?
Thank you for voting!
replaced snubber ring and springs to stop unbalanced spinning
Move washer to area with plenty of room. I took mine out to the deck. take off front of cabinet remove back panel, remove old springs, (a bit hard) remove belt, lift out tub turn over and loosen screws do not remove!! remove old snubber and replace with new, Not bad. Put tub back in washer put on new springs(didn't think I'd ever get them on, not enough upperbody strength)Video would have been priceless!
reattach belt and panels put washer back in place. No noise upon spinning but I now have issues with the agitator, Need a new washer!
reattach belt and panels put washer back in place. No noise upon spinning but I now have issues with the agitator, Need a new washer!
Parts Used:
-
Kim from qPeachland, NC
-
Difficulty Level:A Bit Difficult
-
Total Repair Time:More than 2 hours
-
Tools:Nutdriver, Screw drivers
22 of 24 people
found this instruction helpful.
Was this instruction helpful to you?
Thank you for voting!
Water would leak out from the bottom of the washer
I used a putty knife to disengage the clips that attach the top of the washer to the front panel. The top will lay back without having to hold it however, I didn't trust it to stay up on it's own so I used a bungy cord and straped it onto a wire rack that hangs on the wall above my washer. Next I removed the two screws, one on each side, located on the inside of the front panel near the top of it. Then I gently pulled the front panel towards myself so that I could lift it off of the clips located at the bottom of the panel. The pump assembly is located at the front right corner inside of the washer. I disconnected the two hoses that run to the pump assembly and using my ratchet, I removed the 3 screws that hold the pump assembly in place. There is a belt on the bottom of the washer that goes around three pulleys, one of which is the pump assembly pulley. After I removed the pump assembly, I took the belt and laid it to the side. I then installed the new pump assembly. After I put everything back together, I gently tipped the washer over on it's side as far as I could and reinstalled the belt around all three pulleys. I started with the pulley on the left side and then the pulley in the middle and finally, the pump assembly pulley. I have washed a total of seven loads of laundry since I did the repair and have had no problems.
Parts Used:
-
Amanda from Lewisville, TX
-
Difficulty Level:A Bit Difficult
-
Total Repair Time:More than 2 hours
-
Tools:Pliers, Screw drivers, Socket set, Wrench (Adjustable)
22 of 24 people
found this instruction helpful.
Was this instruction helpful to you?
Thank you for voting!
Washer jumping all over the place even with a small load.
I checked out your other repair information and deided I could do this. Ordered the part and it as her several days before I expected it.
Ok, let's do this thing.
MAGIC TOOLS:
5/16" socket or wrench and #2 Phillips screwdriver and something to remove hose clamps - I recomend a 6" to 8" vice grips and a 6" to 8" plires.
1. Pulled the washer out in the middle of the floor and disconnected the hoses and removed the rear access cover, disconnected the pump hose, released the top using a 1/8' common screwdriver in that narrow space between the top and the front panel. Removed the 2 screws holding the front panel on and removed the front panel.
2. Disconnected fill level hose- toward the left rear side - turned the machine on it's side and walked the drive belt off, tipped it back up right and removed the 6 springs - be sure to note their orientation and location.
3. Lifted the whole assembly out of the top of the machine and set it upside down next to the machine.
4. Loosened the screws holding the snubber in place - NOTE I did not remove the screws - loosen them sequentially little by little untill you can get the snubber to come out. I did not remove the pulley as my Craftsman ratchet and standard - short - socket allowed me to get between the pulley and the screws to loosen them.
5. I removed the old well worn snubber, cleaned the area up and the new snubber actually fell into place and I retightened the screws in the reverse order until they were solid feeling.
6. I lifted the assembly back into the frame, reconnected the springs and the pump hose and the fill level hose. I reinstalled the front cover - AND HERE IS THE IMPORTANT PART!
7. You are so happy this is going so well that you forget to put the BELT back on before you hook up the hoses, so you have to unhook the hoses to put the belt back on and then rehook the hot and cold hoses and drain hose again.
8. Except for number 7 this is a piece of cake. My only concern is how often will I have to do this. The machine is only 8 years old.
Ok, let's do this thing.
MAGIC TOOLS:
5/16" socket or wrench and #2 Phillips screwdriver and something to remove hose clamps - I recomend a 6" to 8" vice grips and a 6" to 8" plires.
1. Pulled the washer out in the middle of the floor and disconnected the hoses and removed the rear access cover, disconnected the pump hose, released the top using a 1/8' common screwdriver in that narrow space between the top and the front panel. Removed the 2 screws holding the front panel on and removed the front panel.
2. Disconnected fill level hose- toward the left rear side - turned the machine on it's side and walked the drive belt off, tipped it back up right and removed the 6 springs - be sure to note their orientation and location.
3. Lifted the whole assembly out of the top of the machine and set it upside down next to the machine.
4. Loosened the screws holding the snubber in place - NOTE I did not remove the screws - loosen them sequentially little by little untill you can get the snubber to come out. I did not remove the pulley as my Craftsman ratchet and standard - short - socket allowed me to get between the pulley and the screws to loosen them.
5. I removed the old well worn snubber, cleaned the area up and the new snubber actually fell into place and I retightened the screws in the reverse order until they were solid feeling.
6. I lifted the assembly back into the frame, reconnected the springs and the pump hose and the fill level hose. I reinstalled the front cover - AND HERE IS THE IMPORTANT PART!
7. You are so happy this is going so well that you forget to put the BELT back on before you hook up the hoses, so you have to unhook the hoses to put the belt back on and then rehook the hot and cold hoses and drain hose again.
8. Except for number 7 this is a piece of cake. My only concern is how often will I have to do this. The machine is only 8 years old.
Parts Used:
-
Gary from Sioux City, IA
-
Difficulty Level:Easy
-
Total Repair Time:1- 2 hours
-
Tools:Screw drivers, Socket set
22 of 25 people
found this instruction helpful.
Was this instruction helpful to you?
Thank you for voting!
Water pump failed and was making loud screeching noises. Eventually, it bound up stopping the washer.
I unplugged the electric power cord and disconnected the two water hoses and the drain line from the wall. It was messy as water leaked from the disconnected hoses. I tilted the washer forward and leaned it against a bench for support. This exposed the bottom of the washer from the back. I removed the v-belt from the three pulleys. The motor mount was spring loaded making it easy to remove the v-belt from this pulley first. After removing the v-belt, I then removed the 4 screws to the small plate on the back of the washer to gain access to the water pump. I then removed the two water hoses from the water pump using vice grips to squeeze the clamps and slide them off of the hoses toward the water pump. After removing the two hoses (a little messy again), I removed the water pump by using a socket ratchet to loosen the four bolts. I replaced the water pump with the new pump and then reassembled everything in reverse order.
Parts Used:
-
Mark from Port Matilda, PA
-
Difficulty Level:Easy
-
Total Repair Time:15 - 30 mins
-
Tools:Pliers, Screw drivers, Socket set
21 of 25 people
found this instruction helpful.
Was this instruction helpful to you?
Thank you for voting!
Water overflowed from tub onto floor
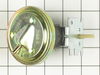
The problem was not in the switch but in the plastic hose from the tub to the switch. The hose was cracked and air/water leaked which therefore didn't activate the switch. I removed the top back cover to access the switch and released the hood of the machine, like a car, using a thin scaper to depress the spring loaded retaining clips. The hose was cracked at the tub just above the retainig clip. I bought new hosing at a local hardware store and replaced the switch to omit both of them as a future problem. Sell the tube with the switch as a package deal? Damage to tube may occur from violent, out of balance, spinning tub on spin cycle.
Parts Used:
-
Dan from Lombard, IL
-
Difficulty Level:Easy
-
Total Repair Time:30 - 60 mins
-
Tools:Pliers, Screw drivers
18 of 21 people
found this instruction helpful.
Was this instruction helpful to you?
Thank you for voting!
drive belt was squealing and slipping
I wasted time opening up the metal container for the washing machine, which was easier than expected. The top simply pops off with a little bit of prying with a screwdriver, then the front panel is held in place with two sheet metal screws. The front panel then lifts off and you can see the exterior case for the tub drive mechanism and motor. But, it wasn't obvious what was wrong until I tilted the entire unit backwards and saw the drive belt available directly under the machine and fully accessible without any tools. It was obvious, because there was a 1/8" worth of belt fragment dust under the machine. A new belt was all it needed and after I ordered it from PartSelect, I simply jimmied the old belt off the main pulley and put the new one on. It no longer squeals or slips. Hopefully, I gained another 5 years of life out of the washing machine.
Parts Used:
-
Kevin from North Plains, OR
-
Difficulty Level:Really Easy
-
Total Repair Time:Less than 15 mins
17 of 18 people
found this instruction helpful.
Was this instruction helpful to you?
Thank you for voting!
Washer made grinding noise then stopped working.
First I tipped the washing machine onto its front. I removed the belt on the bottom of the machine. Then I removed the screws that held the cover in place on the back of the machine. Next I removed the two hoses that were connected to the vertical pump using pliers to pinch the clamps. I then removed three screws that held the vertical pump in place. I took the new verticle pump with pulley and mounted it to the washer and putting the washer machine back together using the previous steps in reverse order.
Parts Used:
-
David from Honesdale, PA
-
Difficulty Level:Easy
-
Total Repair Time:Less than 15 mins
-
Tools:Nutdriver, Pliers
15 of 16 people
found this instruction helpful.
Was this instruction helpful to you?
Thank you for voting!
Making a lot of noise during wash and drain cycle.
The drain pump assembly was going bad. It eventually froze and burned the drive belt and motor pulley up. I replaced the drain pump by removing 3 screws. I replace the motor pulley and belt in about 5 minutes without removing any parts. Simple fix. Ran through 3 cycles and works perfectly. Thanks!
Parts Used:
-
James from New Braunfels, TX
-
Difficulty Level:Really Easy
-
Total Repair Time:Less than 15 mins
-
Tools:Socket set
14 of 15 people
found this instruction helpful.
Was this instruction helpful to you?
Thank you for voting!