















LDE5916ADE Maytag Dryer - Instructions
Keep searches simple. Use keywords, e.g. "leaking", "pump", "broken" or "fit".
loud noise from dryer
Removed the front panel by removing two front screws. Removed screws from front panel holding tumbler drum. Cleaned interior with a vacuum cleaner. (dryer is at least 16 years old). Removed what was left of rivets on damaged glides with a drill, and cleaned area well. Attached new glides with rivet gun, and also applied glue to make glide and cork more secure. Replaced belts, and decided to reverse drum due to damage to drum from allowing glides to deteriorate to the point of putting scratches on the drum itself, allowing the new glides to rest on drum where there was no damage at all. This process was easy, and fast. We did make one error however, in not noticing that with our model, that there were TWO glides to be replaced. Luckily a local repair shop had one more glide so the job could be done the same day. The dryer sounds like it did when it was brand new. Very quiet! The comments from other home repairs helped very much in clairifying any possible errors. Fast delivery of parts, and the extra help was great. Thanks!
Parts Used:
-
Eileen from Hillsborough, NJ
-
Difficulty Level:Really Easy
-
Total Repair Time:1- 2 hours
-
Tools:Screw drivers, Socket set
5 of 6 people
found this instruction helpful.
Was this instruction helpful to you?
Thank you for voting!
The dryer door latch was broken.
The replacement part just snapped into place. (The old part had fallen out) It took less than 30 seconds to do the repair.
Parts Used:

-
Jack from Memphis, TN
-
Difficulty Level:Really Easy
-
Total Repair Time:Less than 15 mins
5 of 7 people
found this instruction helpful.
Was this instruction helpful to you?
Thank you for voting!
Female End Of The Door Catch Broke
First I put the square female end iof the door catch kit nto the square hole as snug as I could. Then I gently pushed the door against the piece until I heard it click in to place. That's it!! Sooooo simple--
Parts Used:
-
Tara from North Canton, OH
-
Difficulty Level:Really Easy
-
Total Repair Time:Less than 15 mins
-
Tools:Screw drivers
4 of 4 people
found this instruction helpful.
Was this instruction helpful to you?
Thank you for voting!
Old lint filter had damaged screen

-
Brad from Georgetown, TX
-
Difficulty Level:Really Easy
-
Total Repair Time:Less than 15 mins
4 of 4 people
found this instruction helpful.
Was this instruction helpful to you?
Thank you for voting!
Buzzer didn't work
Unplug dryer--remove back panel of control console--swap out buzzer--cover back--plug in--good to go.
Parts Used:
-
Jack from Oro Valley, AZ
-
Difficulty Level:Really Easy
-
Total Repair Time:Less than 15 mins
-
Tools:Nutdriver, Screw drivers
5 of 7 people
found this instruction helpful.
Was this instruction helpful to you?
Thank you for voting!
Broken Catch
-
James from LARAMIE, WY
-
Difficulty Level:Very Easy
-
Total Repair Time:Less than 15 mins
-
Tools:Nutdriver, Screw drivers
4 of 4 people
found this instruction helpful.
Was this instruction helpful to you?
Thank you for voting!
Door would not stay shut
Took off the four screws to get to the female clip and used pliers to squeeze it out. Next was using pliers to pinch out the male connector and place the new one in.
Parts Used:
-
Eli from North Stonongton, CT
-
Difficulty Level:Really Easy
-
Total Repair Time:Less than 15 mins
-
Tools:Pliers, Screw drivers
4 of 4 people
found this instruction helpful.
Was this instruction helpful to you?
Thank you for voting!
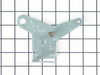
old was belt stretched and idler pulley gummed up, drum won't tumble a normal sized load
Replaced all the parts per the very good video provided on the website.
I recommend watching the video very closely several times. BE SURE THE BELT IS NOT IN THE DRUM'S GROOVE. The video mentions this very very briefly; I caught it on my third viewing. If your belt is not the correct location, it may still turn the drum for you - and eat the belt up in about an hour.
I recommend watching the video very closely several times. BE SURE THE BELT IS NOT IN THE DRUM'S GROOVE. The video mentions this very very briefly; I caught it on my third viewing. If your belt is not the correct location, it may still turn the drum for you - and eat the belt up in about an hour.
Parts Used:


-
William from ORANGEBURG, SC
-
Difficulty Level:A Bit Difficult
-
Total Repair Time:30 - 60 mins
-
Tools:Screw drivers, Socket set
4 of 4 people
found this instruction helpful.
Was this instruction helpful to you?
Thank you for voting!
Lint filter screen torn
-
M. Lyn from Arkansas City, KS
-
Difficulty Level:Really Easy
-
Total Repair Time:Less than 15 mins
4 of 4 people
found this instruction helpful.
Was this instruction helpful to you?
Thank you for voting!
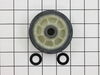
very noisy, not working properly
Took it apart according to the videos, replaced about all moving parts (almost). Put it back together and still made noise. It turned out to be the blower wheel. Ordered a new blower wheel and installed it. Works great and has mostly all new parts. The website was great!!
Parts Used:

-
Fred from Columbia Falls, MT
-
Difficulty Level:Easy
-
Total Repair Time:1- 2 hours
-
Tools:Nutdriver, Pliers, Screw drivers, Socket set
4 of 4 people
found this instruction helpful.
Was this instruction helpful to you?
Thank you for voting!
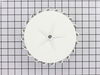
Blower fan came loose and broke
No manual on this so had to remove about 12 screws to figger out disassembly,after locating the right ones[front]the job was easy.Remove front plate,remove drum bearing,remove blower front cover,remove snap ring,remove broken fan,clean fan shaft,slide new fan onto shaft[there is a flat in the bore of new fan]instal fan retainer on stub of fan,reinstal snap ring,reinstal the rest of the parts,test drive system[all sat]The part was exactly as ordered,thanks,Jim Thompson
Parts Used:
-
jim from sierra vista, AZ
-
Difficulty Level:Really Easy
-
Total Repair Time:15 - 30 mins
-
Tools:Nutdriver, Screw drivers
4 of 4 people
found this instruction helpful.
Was this instruction helpful to you?
Thank you for voting!
Dryer tumbler belt broke.
I followed the videos on your website, but had to clean 30 years of dust and lint out in the process. Cleaning took the longest time.
Parts Used:
-
Robert from Fort Worth, TX
-
Difficulty Level:Easy
-
Total Repair Time:1- 2 hours
-
Tools:Nutdriver, Pliers, Screw drivers
6 of 10 people
found this instruction helpful.
Was this instruction helpful to you?
Thank you for voting!
Door wasn't staying closed
popped up top of dryer -- With pliers squeezed clips on inside of latch - - with screw driver pryed latch out -- just pused new latch in.......... Thanks to parts select for sending part sooo fast.. wife was happy.. Thanks, Dale
Parts Used:
-
Dale from Livingston, TX
-
Difficulty Level:Easy
-
Total Repair Time:Less than 15 mins
-
Tools:Pliers, Screw drivers
4 of 5 people
found this instruction helpful.
Was this instruction helpful to you?
Thank you for voting!
knob not working and would not turn off dryer
Wow it was the easiest thing I have ever done.. I am NOT a DIY person.. Company wanted $108.00 to do, it cost me less than $20.00 and 2 minutes.. I have told everyone I know!!! Thanks
Parts Used:




-
denise from lake worth, FL
-
Difficulty Level:Really Easy
-
Total Repair Time:Less than 15 mins
8 of 17 people
found this instruction helpful.
Was this instruction helpful to you?
Thank you for voting!
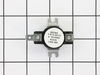
No Heat
Insure the double pole breaker in the breaker box is functioning properly.
Parts Used:
-
Mark from Napa, CA
-
Difficulty Level:Very Difficult
-
Total Repair Time:More than 2 hours
-
Tools:Nutdriver, Screw drivers
5 of 8 people
found this instruction helpful.
Was this instruction helpful to you?
Thank you for voting!