















L3527XRB Norge Range - Instructions
Keep searches simple. Use keywords, e.g. "leaking", "pump", "broken" or "fit".
Bake Element Melted
Unplugged stove, unscrewed element pulled element out about 3 inces and disconnected element. Took model of stove looked on line for part. PartSelect had the best price and easiest web site to order part. Ordered part about 4pm and received part in 2 days. Took element out of box plug into connections and screwed the element back in. Plugged stove in and worked perfect.
Parts Used:
-
Bert from S. Easton, MA
-
Difficulty Level:Easy
-
Total Repair Time:Less than 15 mins
-
Tools:Screw drivers
1 person
found this instruction helpful.
Was this instruction helpful to you?
Thank you for voting!
bakeing element caught fire.
First I turned off power to the range at the fuse box (very important-The last time I didn't do this and ended up paying a repairman $150.00 to replace the damaged connectors). I removed the two screws that hold the element in place. I then pulled the element out about 3 inches and disconnected the two wires. I then connected the new element, pushed the element back in and replaced the screws. Turned the power back on and tested the element. The whole job took about 30 minutes because I had trouble disconnecting the old element. I used the flat end of the scrapper to push against the connector while I pulled the element out. Normally it would take only about 15 minutes.
Parts Used:
-
Leticia from Sunnyvale, CA
-
Difficulty Level:Really Easy
-
Total Repair Time:Less than 15 mins
1 person
found this instruction helpful.
Was this instruction helpful to you?
Thank you for voting!
fireworks in the oven. Burned completely in two.
My husband has moved out of state for his job. I am left here with the children until the house sells. This is the first time I have ever had to do any oven repair. I had excellent and fast service - my part came right away. I took out the 2 screws holding the element in place, pulled the element out, disconnected the old element, connected the new one, pushed it back in, and replaced the screws. No problem at all. I was a little nervous turning it all back on, but it is working perfectly!
Parts Used:
-
Shelly from Allentown, PA
-
Difficulty Level:Really Easy
-
Total Repair Time:Less than 15 mins
-
Tools:Screw drivers
1 person
found this instruction helpful.
Was this instruction helpful to you?
Thank you for voting!
The element was completely gone.
Turned off power, removed 2 screws, un-hooked the connections, them put in the new element in reverse order.
Parts Used:
-
Hudson from Cockeysville, MD
-
Difficulty Level:Really Easy
-
Total Repair Time:Less than 15 mins
-
Tools:Screw drivers
1 person
found this instruction helpful.
Was this instruction helpful to you?
Thank you for voting!
My oven door seal had dried rotted
I took pliers to get the old one off, and popped the new one back in its place, and it fit perfect.
Parts Used:
-
Anita from ELKTON, VA
-
Difficulty Level:Really Easy
-
Total Repair Time:15 - 30 mins
-
Tools:Pliers
1 person
found this instruction helpful.
Was this instruction helpful to you?
Thank you for voting!
Old seal breaking off oven door. Oven not baking food well, wasting heat and fuel.
Used pliers to remove clips and old seal. Snap in new seal. DONE! Less than 5 mins.
Parts Used:
-
Mz from COLUMBIA, ME
-
Difficulty Level:Very Easy
-
Total Repair Time:Less than 15 mins
-
Tools:Pliers
1 person
found this instruction helpful.
Was this instruction helpful to you?
Thank you for voting!
One of the broiler drawer guides broke
All I had to do was pull the drawer out and screw on the new part! Awesome experience...and it was so easy to find the part on the website, everything is very clear and with pictures to ensure where the part belongs...who could ask for more?
Parts Used:
-
Jeri from NEW RICHMOND, OH
-
Difficulty Level:Very Easy
-
Total Repair Time:Less than 15 mins
-
Tools:Screw drivers
1 person
found this instruction helpful.
Was this instruction helpful to you?
Thank you for voting!
lens light was broken and missing.
Removed the cooktop using screwdriver. Pushed lens-light into cooktop hole.It was difficult to do and was where I spent most of my time. Next time I will spray bottom of lens- light with silicon so it goes in easier. I stood cooktop up on its side and inserted the red light assembly onto the lens-light. Reinstalled cooktop
and turned electrical power on.
and turned electrical power on.
Parts Used:

-
Allan from Rolla, MO
-
Difficulty Level:A Bit Difficult
-
Total Repair Time:15 - 30 mins
-
Tools:Screw drivers
1 person
found this instruction helpful.
Was this instruction helpful to you?
Thank you for voting!
Lower burner not heating:
Ordered element and recieved in two days(yea). Removed back cover from unit. Removed two wire slide on wire clips. Then went inside oven cavity and removed two screws holding element intact. The element slid out. Installed element, re-installed two screws to hold element intact. Attached wire clips back on to element, re-attached back cover. Plugged unit back in and it worked perfectly. Eazy-peezy lemon squeezy.
John
Johnny on the Spot Home Repairs
Fishers, Indiana 317-997-3600
John
Johnny on the Spot Home Repairs
Fishers, Indiana 317-997-3600
Parts Used:
-
John from Fishers, IN
-
Difficulty Level:Easy
-
Total Repair Time:15 - 30 mins
-
Tools:Screw drivers
1 person
found this instruction helpful.
Was this instruction helpful to you?
Thank you for voting!
Element burn out. Would not heat
Turn Circuit breaker off.Open the Oven door removed the 2 screws to the top surface. Disconnect the wire harness mark and remove the wires from the Old Element, removed the screws holding the element to top surface, Remove element replace with new element. Install wires, install screws, reconnect wire harness reposition surface. Reinstall screws and turn Circuit breaker power back on. Done and Done
Parts Used:
-
Dennis from AIKEN, SC
-
Difficulty Level:Very Easy
-
Total Repair Time:15 - 30 mins
-
Tools:Nutdriver
1 person
found this instruction helpful.
Was this instruction helpful to you?
Thank you for voting!
Replaced Burned-out Cooktop Element
Exact fit, but read the instructions! Male connectors on element are labeled 1A 1B 2A 2C, very faintly etched in the ceramic. Even though the old and new elements look the same (and I took photos to aid installation), the connector locations are different -- 1A on the old element is where 2B on the new one is, etc. Used included extension wire for one that would not reach with the new configuration and everything works perfectly.
Parts Used:
-
Seth from Old Orchard Beach, ME
-
Difficulty Level:Easy
-
Total Repair Time:15 - 30 mins
-
Tools:Nutdriver
1 person
found this instruction helpful.
Was this instruction helpful to you?
Thank you for voting!
The bake oven element burned out
Removed two screws and disconnected the element. Reconnected the new element and reinstalled the screws
Parts Used:
-
Robert from LEXINGTON, MA
-
Difficulty Level:Very Easy
-
Total Repair Time:15 - 30 mins
-
Tools:Screw drivers
1 person
found this instruction helpful.
Was this instruction helpful to you?
Thank you for voting!
Replace the lower oven element
Unplug the 220 cord..remove rear metal back ( 7-8 Ph/screws)... disconnect the red & yellow connectors from the back of the lower element. Remove-the-lift-off Oven door. Remove the two Ph/screws (one on either end of the element) At the very rear of the oven. Install the new element and reverse the about to reassemble.
Parts Used:
-
Tom from ROCKTON, IL
-
Difficulty Level:Really Easy
-
Total Repair Time:30 - 60 mins
-
Tools:Screw drivers
1 person
found this instruction helpful.
Was this instruction helpful to you?
Thank you for voting!
original fixture required bulb - this fixture (all-in-one) was great
Pulled range out from cabinet-wall to get to back side, everthing was clearly exposed tlhen. Just a matter of installing new fixture, putting back on, reconnected power source - put range back in proper place.
Parts Used:

-
wesley from ODENVILLE, AL
-
Difficulty Level:Really Easy
-
Total Repair Time:30 - 60 mins
-
Tools:Pliers, Screw drivers
1 person
found this instruction helpful.
Was this instruction helpful to you?
Thank you for voting!
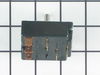
selector switch not smooth and no heat on element
un-plug device from outlet for safety first and then remover all top panel after screws lower two side small screws. actually is not selector problem. It was burner switch problem for 6 inches element.
Parts Used:
-
TUONG from ALBANY, NY
-
Difficulty Level:Really Easy
-
Total Repair Time:30 - 60 mins
-
Tools:Pliers, Screw drivers
1 person
found this instruction helpful.
Was this instruction helpful to you?
Thank you for voting!