















KUDI01ILSS0 Whirlpool Dishwasher - Instructions
Keep searches simple. Use keywords, e.g. "leaking", "pump", "broken" or "fit".
No power to dishwasher. Quit mid-cycle.
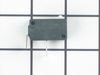
Pulled front panel and replaced door switch. Extremely easy but did not fix the problem.
Parts Used:
-
Jon from Bend, OR
-
Difficulty Level:Really Easy
-
Total Repair Time:Less than 15 mins
-
Tools:Screw drivers
8 of 12 people
found this instruction helpful.
Was this instruction helpful to you?
Thank you for voting!
The door spring link broke.
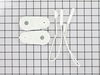
Unplug dishwasher and slide it out from under cabinet. Remove old broken link (a heavy string between two plastic parts) and replace with new one. Slide dishwasher back and plug it in. Very easy and no tools required.
Parts Used:
-
Martin from Discovery Bay, CA
-
Difficulty Level:Really Easy
-
Total Repair Time:Less than 15 mins
7 of 9 people
found this instruction helpful.
Was this instruction helpful to you?
Thank you for voting!
Kids loved to make squeaky sounds opening and closing the doors, finally snapped the door balance link on one side.
1) clear out the dishwasher
2) remove unit securing screws from top or sides of DW and cabinetry near the top or under the counter top
3) gently pull the dishwasher from the cabinetry about 20" is plenty, mind the connecting hoses and electrical connection
4) close the door! pull back the insulation from the area of the hinge and photograph both sides - this will save you the pain of going online
5) you will see the cord, the tensioning wheel assembly and the door balance spring on both sides
6) with the door closed to relieve tension on the cord, remove the cord from the balance spring - this can be done w/o tools at this point
7) remove the 5/16" screw from the plastic tensioning wheels and remove the tensioners, cord - leave the springs in place if not replacing them
8) install the door end of the cord to its hook on the hinge, install the new tensioning wheel assembly, install the old 5/16" self tapping screw through the lower wheel and into the outer hole in the frame
9) thread the cord from the door over the upper wheel and lower wheel. the lower wheel has cord retaining tabs to hold the cord on the assembly
10) hook the eye end of the cord to the balance spring and you are finished with the first side - repeat operations for the other side, reposition the insulation and slide the washer back in its cavity - do not forget to reinstall the stabilizing screws in the upper washer frame
11) you've done it!
12) have a cuppa and do your second washer that hasn't failed yet - it will soon.
2) remove unit securing screws from top or sides of DW and cabinetry near the top or under the counter top
3) gently pull the dishwasher from the cabinetry about 20" is plenty, mind the connecting hoses and electrical connection
4) close the door! pull back the insulation from the area of the hinge and photograph both sides - this will save you the pain of going online
5) you will see the cord, the tensioning wheel assembly and the door balance spring on both sides
6) with the door closed to relieve tension on the cord, remove the cord from the balance spring - this can be done w/o tools at this point
7) remove the 5/16" screw from the plastic tensioning wheels and remove the tensioners, cord - leave the springs in place if not replacing them
8) install the door end of the cord to its hook on the hinge, install the new tensioning wheel assembly, install the old 5/16" self tapping screw through the lower wheel and into the outer hole in the frame
9) thread the cord from the door over the upper wheel and lower wheel. the lower wheel has cord retaining tabs to hold the cord on the assembly
10) hook the eye end of the cord to the balance spring and you are finished with the first side - repeat operations for the other side, reposition the insulation and slide the washer back in its cavity - do not forget to reinstall the stabilizing screws in the upper washer frame
11) you've done it!
12) have a cuppa and do your second washer that hasn't failed yet - it will soon.
Parts Used:
-
Robert from GOLDEN, CO
-
Difficulty Level:Really Easy
-
Total Repair Time:15 - 30 mins
-
Tools:Nutdriver, Screw drivers
6 of 6 people
found this instruction helpful.
Was this instruction helpful to you?
Thank you for voting!
broken handle
The repair would have been really easy if the parts replaced had come all in one...When you order a replacement handle they do not include the 2 small springs....
the springs are a bit hard to get on, but once they were in place everything went well. You need 2 people to assemble it.
One to hold the door and the guts of the electronics, and the other to install the handle.
the springs are a bit hard to get on, but once they were in place everything went well. You need 2 people to assemble it.
One to hold the door and the guts of the electronics, and the other to install the handle.
Parts Used:

-
Lore from Sunland, CA
-
Difficulty Level:Easy
-
Total Repair Time:15 - 30 mins
6 of 6 people
found this instruction helpful.
Was this instruction helpful to you?
Thank you for voting!
Dishwasher door leaked
Just removed the old seal and followed the instructions that came with the new one. Since the old one didn't have any adhesive on it ,I didn't use the adhesice on the new one. Problem solved!
Parts Used:
-
Edward from Tucson, AZ
-
Difficulty Level:Easy
-
Total Repair Time:Less than 15 mins
6 of 7 people
found this instruction helpful.
Was this instruction helpful to you?
Thank you for voting!
Couldn't find the part anywhere, but...
PartSelect found the right part for me on the first try. I had scoured the web looking for this particular drying agent cap. Even Sears said I'd have to order the entire dispenser assembly - $$$!
PartSelect found just the cap I needed at a much better price.
Fantastic service. Shipping was faster than promised. I can't say enough good things about them!
PartSelect found just the cap I needed at a much better price.
Fantastic service. Shipping was faster than promised. I can't say enough good things about them!
Parts Used:

-
Brian from Marion, IA
-
Difficulty Level:Really Easy
-
Total Repair Time:Less than 15 mins
9 of 16 people
found this instruction helpful.
Was this instruction helpful to you?
Thank you for voting!
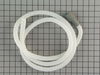
old hose possible leakage
-
Fred from Kernersville, NC
-
Difficulty Level:Really Easy
-
Total Repair Time:Less than 15 mins
-
Tools:Nutdriver, Pliers, Screw drivers
8 of 13 people
found this instruction helpful.
Was this instruction helpful to you?
Thank you for voting!
front seal on the old pump failed causing the front bearing to get wet repeatedly and fail
Removed required hardware and dishwasher from undercounter mount. Turned dishwasher on its front and removed the old motor. Installed the new motor and tested for function. Installed once test was successful.
Parts Used:

-
lisa from columbus, NE
-
Difficulty Level:Easy
-
Total Repair Time:30 - 60 mins
-
Tools:Screw drivers, Socket set, Wrench set
6 of 7 people
found this instruction helpful.
Was this instruction helpful to you?
Thank you for voting!
Door spring broke-Door falls down
Remove 2 screws on lower baseplate. Remove 2 screws that hold dishwasher inside cabinet( may be attached to counter top or side cabinets). Turn off water supply to dishwasher. Remove any connections such as water supply, electrical connection, or waste water line that prevent dishwasher from being pulled out about 3/4 of the way. With the dishwasher door closed, remove broken parts and replace with new parts. Pull on spring to make final connection of nylon cable. Reverse the above instructions for re-installing the machine.
Parts Used:
-
Peter from JERICHO, NY
-
Difficulty Level:Easy
-
Total Repair Time:15 - 30 mins
-
Tools:Screw drivers, Socket set, Wrench set
6 of 7 people
found this instruction helpful.
Was this instruction helpful to you?
Thank you for voting!
The motor was too loud
I took the unit apart to find out what was making the loud noise and found the seal on the main pump had been leaking ito the bearing on the motor.
Parts Used:
-
Conelis from Eclectic, AL
-
Difficulty Level:A Bit Difficult
-
Total Repair Time:30 - 60 mins
-
Tools:Nutdriver, Screw drivers, Wrench (Adjustable)
6 of 7 people
found this instruction helpful.
Was this instruction helpful to you?
Thank you for voting!
One of the old stops broke

-
Dwight from KENT, WA
-
Difficulty Level:Very Easy
-
Total Repair Time:Less than 15 mins
6 of 8 people
found this instruction helpful.
Was this instruction helpful to you?
Thank you for voting!
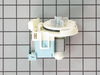
After clean cycle, water was left behind
After researching the issue, it pointed to either a clogged hose or a bad pump. I cleaning the hose, verifying that there was no clog by using baking soda, vinegar and water. It would work, once maybe twice, then the water would sit again. I checked the line again, no issues. I purchased a new pump. The installation of the pump was easy, only to discover that this did NOT solve my problem. I am now considering a new dishwasher or purchasing a new $150 motor. It sucks not being able to send the parts back.
Parts Used:
-
Mikel from Gaithersburg, MD
-
Difficulty Level:Really Easy
-
Total Repair Time:15 - 30 mins
9 of 17 people
found this instruction helpful.
Was this instruction helpful to you?
Thank you for voting!
Drain hose broken.
Removed the old hose, after loosing metal looking rings. Installed new hose ad finally tight firmly the looking rings, using wrench and socket.
Parts Used:
-
Giorgio from Savannah, GA
-
Difficulty Level:Easy
-
Total Repair Time:15 - 30 mins
-
Tools:Screw drivers, Socket set, Wrench set
8 of 14 people
found this instruction helpful.
Was this instruction helpful to you?
Thank you for voting!
lack of water flow
removed rack
removed one screw
removed old seal
installed new seal
installed screw
removed one screw
removed old seal
installed new seal
installed screw
Parts Used:

-
Geoff from Avon, CT
-
Difficulty Level:Really Easy
-
Total Repair Time:30 - 60 mins
-
Tools:Screw drivers
6 of 8 people
found this instruction helpful.
Was this instruction helpful to you?
Thank you for voting!
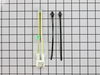
unit would'nt even turn on
first things first. troubleshoot.... unit wont run. no l.e.d.s at all. Opened front panel and first thing I see is a thermal cutout mounted outside of printed circuit board. After using a multimeter to check for continuity, used a set of alligator clips with a common lead, thus bypassing thermal cutout. Viola, she worked. Ordered part after finding site with google search. Part was delivered in two days.
Parts Used:
-
DEBORAH from NEW MILFORD, CT
-
Difficulty Level:Easy
-
Total Repair Time:15 - 30 mins
-
Tools:Nutdriver
6 of 8 people
found this instruction helpful.
Was this instruction helpful to you?
Thank you for voting!