















KEYE750VAL0 KitchenAid Dryer - Instructions
Keep searches simple. Use keywords, e.g. "leaking", "pump", "broken" or "fit".
No Gas Heat
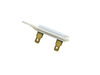
I did what any novice would have done. I took the entire thing apart to get to the gas jet. I did not know about the thermal fuse until I got to the schematic behind the timer and controls. I was a tech back in the 70's and 80's and only worked on electric dryers. Back then I would remove the heater core and twist the coils together to save money. So I had no idea how a gas dryer heating unit worked. So now any one that reads this. You do not have to take the dryer completely apart, I did that for all of you. Just replace the thermal fuse on the back of the unit by unplugging that wires and removing the screws! It looks like a long white piece of plastic with 2 wires to it. You will find this under the full metal shield on the back of the unit. This should be about a 1 hour repair at the most!
Parts Used:
-
Debra from Springfield, PA
-
Difficulty Level:Very Difficult
-
Total Repair Time:More than 2 hours
-
Tools:Nutdriver
4 of 5 people
found this instruction helpful.
Was this instruction helpful to you?
Thank you for voting!
Clothes getting torn
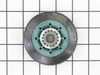
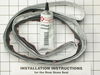
Removed the drum from the machine. This involved taking the dryer almost completely apart. However, it wasn't that difficult. The hardest thing was remembering where everything went to put it back together. So far so good. Replaced the read drum seal as this was the most likely cause of the problem. The rollers were replaced too since that was a possible cause and the machine would be apart anyway.
Parts Used:

-
Eric from Spring, TX
-
Difficulty Level:A Bit Difficult
-
Total Repair Time:30 - 60 mins
-
Tools:Screw drivers, Socket set
9 of 20 people
found this instruction helpful.
Was this instruction helpful to you?
Thank you for voting!
old seal was disintegrating
As the instructions say: first remove the drum. In the case of my dryer the drum is supported by two rollers on the back panel and the opening in the front panel. Remove the front panel and the drum almost falls out.
Replacing the seal was easy . Just tear out the old seal, lightly sand the rear lip, stretch the new seal over it, being sure the stitching is oriented properly, and then squeeze adhesive from the supplied tube between the seal and the drum lip.
In putting the dryer back together I couldn't figure out how to thread the belt. I suggest that people attempting this repair take digital pictures of the inside of the appliance before disassembling it.
A very good experience and I prolonged the life of the dryer a good ten more years.
Replacing the seal was easy . Just tear out the old seal, lightly sand the rear lip, stretch the new seal over it, being sure the stitching is oriented properly, and then squeeze adhesive from the supplied tube between the seal and the drum lip.
In putting the dryer back together I couldn't figure out how to thread the belt. I suggest that people attempting this repair take digital pictures of the inside of the appliance before disassembling it.
A very good experience and I prolonged the life of the dryer a good ten more years.
Parts Used:
-
Mike from Vancouver, WA
-
Difficulty Level:A Bit Difficult
-
Total Repair Time:1- 2 hours
-
Tools:Nutdriver, Screw drivers
4 of 5 people
found this instruction helpful.
Was this instruction helpful to you?
Thank you for voting!
Clothes Not Drying Good
Cut power off , till over dryer, take bsce cover off, remove screw fron heating element pull out, vac all dirt up put new one in replace cover cut power bace on
Parts Used:

-
RONALD W from CARSON, VA
-
Difficulty Level:Really Easy
-
Total Repair Time:15 - 30 mins
-
Tools:Screw drivers, Socket set
7 of 14 people
found this instruction helpful.
Was this instruction helpful to you?
Thank you for voting!
Whirlpool Gas dryer, run but no heat
I simply removed the rear panal of the dryer. Removed the two wires from the fuse at the rear of the dryer. Attached an OEM meter across the two fuse connections and had no continuity. Ordered a new fuse and recieved it in 2.5 days.Replaced the fuse,reconnected the wires and replaced the rear panal. Started dryer and it now blows hot air and runs like new. I can't say enough about PartSelect. Great diagnosis using their website, the delivery was fast and I recieved the correct part at a good price. Very satisfied, Thanks PartSelect. Fred F
Parts Used:
-
Fred from Macomb, MI
-
Difficulty Level:Really Easy
-
Total Repair Time:Less than 15 mins
-
Tools:Nutdriver
4 of 5 people
found this instruction helpful.
Was this instruction helpful to you?
Thank you for voting!
Roller Berings were worn out - replaced both
Watched Video - very helpful in repair Maytag Dryer working like new now Thanks for your guidance in my repair
Parts Used:
-
Gregory from COCOA, FL
-
Difficulty Level:Easy
-
Total Repair Time:30 - 60 mins
-
Tools:Pliers, Screw drivers, Socket set
4 of 5 people
found this instruction helpful.
Was this instruction helpful to you?
Thank you for voting!
My old dryer drum had become noisy and loose and prone to getting stuck while running.
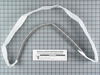
I replaced the front seal and bearing, split ring bearing and rear seal. It was technically pretty easy. The thing to do is watch the videos provided by PartsSelect AND go to Youtube and watch a couple of others. Once you see several guys do the job and look over your own machine, it all becomes obvious. Some tips: Work cleanly, you will be dealing with dryer dust and shredded gasket material. Use a vacuum and put down newspaper or a drop cloth. While you have it apart, clean the inside of the machine, and check the other moving parts (eg, rear bearing and drive belt). The glue for the rear drum seal is runny and dries fast so work reasonably quickly. I held the seal on with clothes pins and binder clips and glued about a foot of seal at a time. Everything else goes on easily. They dryer is like a new machine-good for another 30 years.
Parts Used:

-
Ed from SEBEKA, MN
-
Difficulty Level:Easy
-
Total Repair Time:1- 2 hours
-
Tools:Nutdriver, Screw drivers
4 of 6 people
found this instruction helpful.
Was this instruction helpful to you?
Thank you for voting!
Making a racket.
Took the top off and then front off and drum out . Replaced Drum roller and shaft support bolts.
Parts Used:
-
Carl from MARION, KY
-
Difficulty Level:Really Easy
-
Total Repair Time:More than 2 hours
-
Tools:Nutdriver, Pliers, Screw drivers, Socket set
3 of 3 people
found this instruction helpful.
Was this instruction helpful to you?
Thank you for voting!
Dryer Drum Belt Broken
I opted to remove front, top and back panels. This is best done with dryer laying on it's back so drum remains in position. Hold panels and pieces in place with masking tape (2") You should block up the dryer so you don't damage the gas pipe. I opted to total shop vac out the piece and lubricate the rollers and tension pulley. I made more in change than the belt cost!
Overall an easy repair. Belt came with diagram for easy threading the belt.
Overall an easy repair. Belt came with diagram for easy threading the belt.
Parts Used:

-
george s from las vegas, NV
-
Difficulty Level:Really Easy
-
Total Repair Time:30 - 60 mins
-
Tools:Nutdriver, Screw drivers
3 of 3 people
found this instruction helpful.
Was this instruction helpful to you?
Thank you for voting!
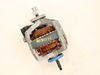
Mother was frozen up
-
Dan from SYRACUSE, UT
-
Difficulty Level:Really Easy
-
Total Repair Time:30 - 60 mins
-
Tools:Nutdriver, Screw drivers, Socket set, Wrench (Adjustable)
3 of 3 people
found this instruction helpful.
Was this instruction helpful to you?
Thank you for voting!
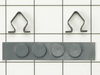
the dryer would not turn on
The first step was to check the electrical supply to make sure I had power 120 volt. I unplugged the dryer and turned off the gas supply and turned the dryer around so I could have access to the back panel removed panel to access the wiring harness and safety thermostats. All switches and wire checked good with my ohmmeter .I pulled off the front kick panel and checked the electrical schematic and found the door switch was in the circuit to check it I had to lift up the top and pop out the front to access the door switch checked switch and found it defective. Replaced switch vacuumed out dryer and vent reassembled dryer and all worked good.
Parts Used:

-
Warren from PHILADELPHIA, PA
-
Difficulty Level:A Bit Difficult
-
Total Repair Time:30 - 60 mins
-
Tools:Nutdriver, Pliers, Screw drivers, Wrench (Adjustable), Wrench set
4 of 6 people
found this instruction helpful.
Was this instruction helpful to you?
Thank you for voting!
i exchange thermal fuse
-
Greg from HANOVER PARK, IL
-
Difficulty Level:Really Easy
-
Total Repair Time:30 - 60 mins
5 of 9 people
found this instruction helpful.
Was this instruction helpful to you?
Thank you for voting!
Dryer would not start!
Unplug unit first.
Took the front cover off the front of dryer below the door.
Took the front cover off the front of dryer below the door.
Parts Used:
-
Manny from ODESSA, TX
-
Difficulty Level:Really Easy
-
Total Repair Time:Less than 15 mins
-
Tools:Socket set
5 of 9 people
found this instruction helpful.
Was this instruction helpful to you?
Thank you for voting!
Start and then kick out.
Two Phillips screws, and 2 5/16 bolts and the dryer is open for this repair. Remove the drum and note the placement of the drive belt. Then using a pipe wrench grab the rear plastic fan housing, at the rear of the motor shaft, and turn the front of the motor shaft CLOCKWISE. If the Fan is ceased (as it was in my case) you will need to use locking vice grips (at least 3 or 4 between the fan blades to stop the fan blades from turning on the rear shaft.) while your turning the front of the motor's shaft. If done properly, you should have about 25-30 turns before the motor is free for replacement.
Once this is accomplished, mounting the new motor back into the dryer is a simple matter of reversing your steps. But keep note of the belt placement and the motor wiring placement before starting.
Once this is accomplished, mounting the new motor back into the dryer is a simple matter of reversing your steps. But keep note of the belt placement and the motor wiring placement before starting.
Parts Used:
-
PHILLIP from AUSTIN, MN
-
Difficulty Level:A Bit Difficult
-
Total Repair Time:15 - 30 mins
-
Tools:Nutdriver, Screw drivers, Wrench (Adjustable), Wrench set
5 of 9 people
found this instruction helpful.
Was this instruction helpful to you?
Thank you for voting!
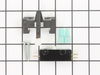
Dryer would not run
There are two screws that hold the switch in place. And two wires connected to the switch. The most difficult part of replacement is to place the new switch and hold it in place to reinstall the mounting screws. The space to work in is limited unless you remove the front panel from the dryer, which I opted not to do.
Parts Used:
-
james from york, PA
-
Difficulty Level:A Bit Difficult
-
Total Repair Time:15 - 30 mins
-
Tools:Nutdriver, Pliers, Screw drivers
4 of 6 people
found this instruction helpful.
Was this instruction helpful to you?
Thank you for voting!