Your coupon for will be reflected when you check out!
✖
Your coupon for
✖
Hello!
You're visiting the PartSelect site in U.S.
Would you like to shop on the Canadian site?
Stay on this site
Go to Canadian site
✖
Model Number Locations
1Select Category Type
Select Category Type
2Select Product Type
Select Product Type
3Select {MODEL} Type
Select {MODEL} Type
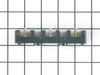
Sample Model Number Tags
Model numbers can be made up of numbers (1005400, for example) or a combination of letters and numbers (LAT1000AAE). The model number will most likely appear on either a paper sticker or a metal plate. Your appliance's model number tag may look similar to the sample model number tags shown here (model number highlighted in yellow):
Model has been saved to My Models. If you're not signed in, your lists are available on this device and will expire within 30 days.
Model has been saved to My Models.
This bottle of non-abrasive cooktop cleaner breaks down and gets rid of the hardest baked-on stains and residue without causing any harm to your appliance. The bottle is 10 oz and does not require a l...
Use this scraper for your ceramic/glass cooktop. It has a retractable blade and is an all-purpose tool for cooktops, mirrors, windows and tile. Use it to also remove paint, paper, dirt, stickers and more.
This dual radiant surface element delivers 1200 and 2500 watts of power to the cooktop, offering flexible heating options for various cookware sizes. Designed for electric ranges, it allows users to s...
Took 2 screws under front edge of smooth top. Unscrewed ground wire from back of smooth top unit. Unplugged 2 wire bundles, from back. Took bad element out , put in new one. Put back together. About 10 min's tops. Easy peasy.
really easy! Removed 2 screws under the glass top at the front, access from the open oven door, then removed the ground wire, removed the stove top, took the element holder off,( 2 screws)and replaced with new element, 30 minutes. I ordered the part and came within 18 hrs of ordering it, fantastic experience.
Lift the cooktop out of it's inset in the counter top, flip it upside down and lay it on towels to protect the cooking surface. There is a raised rectangular panel that covers the switches located about the center front of the bottom. Remove this panel with a small nut driver to expose the switches. Now, locate the dead switch and place a
... Read more strip of masking tape pointing to it and lapping around the edge so it can be seen when the unit is flipped back upright. Flip cook top back upright. Locate the correct switch by observing the masking tape. There are two small, short-threaded, phillips screws holding the switch in place. They must be accessed from the knob hole (remove rubber grommet)and at a slight angle. There is very little room to extract the screws...this is where I used the magnet to magnitize the tip of a small screw driver. Once the screw is free of the threaded hole, lift it with the magnetized screwdriver out through the knob hole. The switch will fall out easily when the two screws are removed. If you drop one of the screws inside the stove top, don't panic, I was able to shake the cook top and retrieve the screw. Now, flip the top back upside down. Using a pair of pliers remove each wire one at a time from the bad switch and connect it to the same terminal on the new switch...this way there can be no mistakes. Be sure the rubber insulator removed from the bad switch and placed on the new one. Position it where the screw holes show through, then place the switch in position. Turn the top back over in the upright position but position it where you can reach underneath it with your left hand. You will have to hold the switch and maybe move it around slightly to aline the screw holes when replacing the screws. Take a screw on the end of the magnetized screwdriver and carefully insert it into the knob hole and into the switch bracket. once you get one started, the other will be easy. I don't recall the screw replacement being any problem, just that you have to handle the screws carefully, so as to not drop one inside the cook top. Now, flip the top back over and replace the cover over the switches and replace the top in it's cabinet. The job is complete, Oh, and don't forget to flip the stove's cirduit breaker BEFORE even touching the stove!


 Diagram and Parts List for KitchenAid Cooktop")


 – Part Number: WP74007840")