















KBRS22KVSS00 KitchenAid Refrigerator - Instructions
Keep searches simple. Use keywords, e.g. "leaking", "pump", "broken" or "fit".
Scratches in Surface
This product comes in a bottle with a brush like Liquid Paper. It goes on incredibly easy. A second coat might be needed. I wanted to prevent rust from setting in so I covered the scratches and dings. The paint is a little brighter since my washer is 10 years old but it still looks great.
Parts Used:
-
Michelle from Richardson, TX
-
Difficulty Level:Really Easy
-
Total Repair Time:Less than 15 mins
81 of 213 people
found this instruction helpful.
Was this instruction helpful to you?
Thank you for voting!
Our refrigerator was too cold as the thermistor seems to have gone
It was great. We replaced the thermistor A little difficult to get to the thermistor but once we found it five minutes. My refrigerator seems happy but we will monitor it and see.
Parts Used:
-
Ellen from SUN CITY WEST, AZ
-
Difficulty Level:Really Easy
-
Total Repair Time:15 - 30 mins
-
Tools:Screw drivers
19 of 29 people
found this instruction helpful.
Was this instruction helpful to you?
Thank you for voting!
Ice stripper broken on ice maker
I unplugged the fridge. Loosened the 2 top screws on the ice maker and removed the lower screw. I disconnected the wiring harness and removed the Ice maker. I removed the plastic timer cover in front. I then loosened the screws on the face of the ice maker and removed the broken ice stripper and replaced it with a new one. Re-tightened the screws on the face, installed the timer cover, plugged in the wiring harness, re-attached the ice maker. Plugged the fridge back in and walla, it was making ice in 30 minutes!
Parts Used:

-
Kenneth from New Braunfels, TX
-
Difficulty Level:Really Easy
-
Total Repair Time:Less than 15 mins
-
Tools:Screw drivers
17 of 24 people
found this instruction helpful.
Was this instruction helpful to you?
Thank you for voting!
Old Icemaker noisy and stopped making Ice
The old icemaker had a bad motor and would stall in the fill cycle causing my kitchen to flood on occasion.
The new one was so quiet, I thought it didn't work!
Anyway, one nutdriver and 5 minutes and I had the new one in there... It is so quiet, and I always have plenty of ice now!!!
Thanks!!!
The new one was so quiet, I thought it didn't work!
Anyway, one nutdriver and 5 minutes and I had the new one in there... It is so quiet, and I always have plenty of ice now!!!
Thanks!!!
Parts Used:
-
Daniel from Rhinelander, WI
-
Difficulty Level:Really Easy
-
Total Repair Time:Less than 15 mins
-
Tools:Nutdriver
18 of 28 people
found this instruction helpful.
Was this instruction helpful to you?
Thank you for voting!
center bar to hold crispers was broken
I was easily able to find the part using the online search. I order the part and it arrived in about two days. Installing the part meant pulling out the two crisper drawers, emptying the shelf above the crispers, removing two glass shelf plates, inserting the new part, replacing the glass plates, replacing the food on the shelf and sliding in the two crisper drawers. All in all, about 3 minutes.
Parts Used:

-
Robert from Evanston, IL
-
Difficulty Level:Really Easy
-
Total Repair Time:Less than 15 mins
13 of 14 people
found this instruction helpful.
Was this instruction helpful to you?
Thank you for voting!
light inside fridge was flickering and clicking
tested bulb good ,replaced door switch first(least expensive)then ordered light socket and circuitboard.If clicking sound is heard replace circuitboard first to save on return shipping because the switch and socket where ok
Parts Used:

-
bill from escondido, CA
-
Difficulty Level:Easy
-
Total Repair Time:15 - 30 mins
-
Tools:Nutdriver
20 of 35 people
found this instruction helpful.
Was this instruction helpful to you?
Thank you for voting!
Broken cup water fill on ice maker
I called the local Amana repair man, wanted $150 for a new ice maker because they could not get the part I needed. Found Partsselect.com and the part cost $17 with shipping. They saved me over $100. The repair was very easy too, just removed a couple of screws.
Thanks,
Matt
Thanks,
Matt
Parts Used:

-
Matthew from Aurora, CO
-
Difficulty Level:Easy
-
Total Repair Time:15 - 30 mins
-
Tools:Nutdriver, Screw drivers
13 of 15 people
found this instruction helpful.
Was this instruction helpful to you?
Thank you for voting!
No Water Dispensing
4-Screws 3 plactic hoses to remove pull 3 tubes out and instol new part last then 15 min. Making shure is no leaks. Easy
Parts Used:
-
LOUIE from WESLEY CHAPEL, FL
-
Difficulty Level:Easy
-
Total Repair Time:15 - 30 mins
-
Tools:Nutdriver
13 of 15 people
found this instruction helpful.
Was this instruction helpful to you?
Thank you for voting!
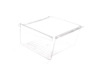
didn't shut crisper pan and cracked pan with refrig door
-
Karen from Ontario, NY
-
Difficulty Level:Really Easy
-
Total Repair Time:Less than 15 mins
13 of 16 people
found this instruction helpful.
Was this instruction helpful to you?
Thank you for voting!
Replace freezer door gasket
Removed door from slide bars with small nutdriver, pulled old gasket out of retaining slot, cleaned slot & area around it, pressed new gasket into place with fingers, relatively easy. Used hair dryer to make sure gasket was formed properly and contacted fridge unit eavenly.
Parts Used:

-
Thaddeus from PHILA, PA
-
Difficulty Level:Easy
-
Total Repair Time:30 - 60 mins
-
Tools:Nutdriver
12 of 13 people
found this instruction helpful.
Was this instruction helpful to you?
Thank you for voting!
Refrigerator section wasn't getting cold.
To keep from having to pay the appliance repairman $100.00 for a diagnostic fee I just started replacing parts that were known for causing this problem. First I replaced the compressor switch and capacitor that didn't work so then I replaced the damper controller then I replaced the control board then I saw that the evaporator fan wasn't spinning so I replaced the evaporator fan motor and the bimetal defrost thermostat. That was the problem I wish I would have checked that first. But it works like new now.
Parts Used:

-
Edward from Muncie, IN
-
Difficulty Level:A Bit Difficult
-
Total Repair Time:1- 2 hours
-
Tools:Nutdriver, Pliers, Screw drivers, Socket set
12 of 15 people
found this instruction helpful.
Was this instruction helpful to you?
Thank you for voting!
Water would not dispense
First turned off the water at the valve. Next I undid the 5 screws holding the plate that holds the pump. Next disconnected the power connectors, then the water lines. Next undid the screw holding the pump, removed pump. Next, mounted the new pump to the plate, this was tricky because it has to fit kind of upside down, so you have to wrangle it into the proper position then align the screw hole. Next, secured it to the plate with the screw, re-connected the water lines, then the power. Before mounting it back to the fridge, I tested to see if it worked, well, it didn't. My heart sank. I re-checked all connections, I redid the entire process, disconnected and re-connected and still did not work. I researched the problem online and someone posted maybe the water filter might be clogged or defective. So I removed the water filter and put the stop plug in, and it worked perfectly. I went and exchanged the filter and plugged it in and still had the same problem. I am now suspecting the filter receptacle is the fault, but we will do without that for the time being. But the pressure is much better so changing the pump was still necessary. All in all a very interesting repair. I learned a lot about how the system works and now I need to replace the damper, it is very noisy.
Parts Used:
-
Emile from Oceanside, CA
-
Difficulty Level:A Bit Difficult
-
Total Repair Time:1- 2 hours
-
Tools:Nutdriver, Pliers
11 of 13 people
found this instruction helpful.
Was this instruction helpful to you?
Thank you for voting!
Refrigerator Ice Maker stopped making ice.
(1) Removed the three screws which attached the ice maker to the freezing compartmnet wall in refrigerator; (2) Disconnected the power to the old ice maker; (3) Removed the old ice maker from the freezing compartment of the refrigerator; (4) Took the white front cover off of the old ice maker; (5) Disconnected the wiring harness from the old ice maker; (6) Removed the "ice making-stop arm" from the old ice maker; (7) Placed the items taken from old ice maker on to the new ice maker; (8) Reconnected the new ice maker to the power; (9) Placed the new ice maker in the proper position in freezing compartment of refrigerator and replaced the three screws. JOB DONE!
Parts Used:
-
Harold from Oakton, VA
-
Difficulty Level:Really Easy
-
Total Repair Time:15 - 30 mins
-
Tools:Nutdriver
18 of 34 people
found this instruction helpful.
Was this instruction helpful to you?
Thank you for voting!
Ladder hooks and center crisper rail broken
I removed the crisper drawers, glass shelf, and frame assembly to install the ladder hook. Before reinstalling the glass shelf on top of the crisper frame, I installed the center crisper rail.
Thank goodness for websites like this!
Thank goodness for websites like this!
Parts Used:
-
Martha from Janesville, WI
-
Difficulty Level:Really Easy
-
Total Repair Time:Less than 15 mins
12 of 16 people
found this instruction helpful.
Was this instruction helpful to you?
Thank you for voting!
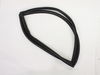
split gasket leading to condensation
This gasket is just friction fit into a molded groove. Easy to pull out and replace.
When I googled looking for how to.. all sites described unscrewing a keeper. None described that this (and maybe others) simply has the push-in design.
When I googled looking for how to.. all sites described unscrewing a keeper. None described that this (and maybe others) simply has the push-in design.
Parts Used:
-
Dan from Freeland, WA
-
Difficulty Level:Easy
-
Total Repair Time:Less than 15 mins
12 of 16 people
found this instruction helpful.
Was this instruction helpful to you?
Thank you for voting!