















KBRS22KGWH2 KitchenAid Refrigerator - Instructions
Keep searches simple. Use keywords, e.g. "leaking", "pump", "broken" or "fit".
replaced broken kickplate grill clips
hook on end of clip on back of grill. With that end firmly in place a screw driver on the other end of clip (inside ) & bump with your hand. total install time 60 seconds
Parts Used:
-
Lowry from DAWSONVILLE, GA
-
Difficulty Level:Really Easy
-
Total Repair Time:Less than 15 mins
-
Tools:Screw drivers
1 person
found this instruction helpful.
Was this instruction helpful to you?
Thank you for voting!
The fridge was running constantly. O
Once I removed the contents of the freezer I found ice on the inside back panel Removing the panel I found ice on the cooling coils and the defrost thermostat was bulged out where the wires were attached.I removed the panel with the nutdriver as shown in the video. I removed the ice maker connection and removed the panel from the freezer section. I then had to manually defrost the area with a heat gun. The ice had actually covered the Defrost Thermostat - which was bulging where the wires were attached.. The defrosting took the majority of the repair time - the actual Defrost Thermostat replacement only took about 20 minutes once I could get to it. I spliced the wire with a crimping tool as discussed in the video. Once all was defrosted I reversed the operation.Overall, a very simple part change out. The video was extremely helpful - if nothing else to mentally prepare me for the task.
Parts Used:
-
Edward from BILLERICA, MA
-
Difficulty Level:Very Easy
-
Total Repair Time:15 - 30 mins
-
Tools:Nutdriver
1 person
found this instruction helpful.
Was this instruction helpful to you?
Thank you for voting!
Fridge would warm above acceptable levels.
Talked to a bud who does this kind of work and he walked me thru the simple job. Also watched a you tube segment. Very easy job. Took off the front kick vent panel. Unscrewed the metal holder and unplugged old part, plugged new part in and put panel back on. Turned on unit and it is working like a charm. Got my fingers crossed just in case.
Parts Used:
-
Doug from BRANDON, MS
-
Difficulty Level:Really Easy
-
Total Repair Time:15 - 30 mins
-
Tools:Screw drivers
1 person
found this instruction helpful.
Was this instruction helpful to you?
Thank you for voting!
Referigerator section was warm, freezer cold
I removed the back cover in the freezer section by removing six screws. The entire coil, the thermostat and the lines were all iced over. I used a hairdryer to defrost everything. I removed the thermostat by uncoupling the connectors and unclipping it from the coil tubing. I found the thermostat was bulging and deformed. I jumped out the thermostat using an insulated clip lead. I taped it so it would not short to anything. I plugged the unit in, turned the unit to "1" and advanced the defrost timer to defrost. I could hear the water hissing on the coil. I ordered the thermostat. It arrived in 3 days. The new one had a different terminal. I cut off the matching one from the old part and used a scotch-lok to make the connection to the new part. I slapped it in, dressed the wires and replaced the cover. I noticed that when I advanced the timer after replacing the thermostat, it did not immediately come on. The thermostat has an operating temperature window. I checked it several days later and found no frost. Everything works great.
Parts Used:
-
Thomas from Hicksville, NY
-
Difficulty Level:Easy
-
Total Repair Time:Less than 15 mins
-
Tools:Nutdriver, Pliers
1 person
found this instruction helpful.
Was this instruction helpful to you?
Thank you for voting!
broken end caps
snapped the new ones on the aluminum bar and inserted into the freezer
Parts Used:

-
Patrick from Narragansett, RI
-
Difficulty Level:Really Easy
-
Total Repair Time:Less than 15 mins
1 person
found this instruction helpful.
Was this instruction helpful to you?
Thank you for voting!
We thought the water valve was bad, but it wasn't The problem was the ice maker. We sent the valve back for a refund, and in addition there was no valve available that replaced the old one.
Took the ice maker out with three screws hving turned water off and unplugging fridge. Put a new one back in with the three screws. plugged fridge back in and turned water on. All done and everthing worked fine.
Ronald Stonis
Ronald Stonis
Parts Used:
-
Ronald from CONCORD, NH
-
Difficulty Level:Very Easy
-
Total Repair Time:15 - 30 mins
-
Tools:Nutdriver, Screw drivers
1 person
found this instruction helpful.
Was this instruction helpful to you?
Thank you for voting!
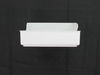
I needed a larger ice pan for the freezer.
I took out the old one and put in the new one. For some reason the repair story associated with the ice bucket had nothing to do with ice buckets.
Parts Used:
-
Dorothy from Westford, MA
-
Difficulty Level:Really Easy
-
Total Repair Time:Less than 15 mins
1 person
found this instruction helpful.
Was this instruction helpful to you?
Thank you for voting!
Freezer Cold But Frig Warm
This is easy. Remove lower vent in front of frig to change timer. Unplug and put new one in. . . . 10 Min. To change the thermostat remove food, take off back panel, defrost ice with hairdryer and locate thermostat (to the right above coil) remove old thermostat from connectors and replace with new. One connector needs to be spliced cause it does not match. No problem just use old connector and splice and seal with shrink tubing to prevent moisture from connection. In jersey repair guy charges you 100. 00 Bucks to just walk in the door. . . Forget that. Works fine
Parts Used:
-
ROBERT from LONG VALLEY, NJ
-
Difficulty Level:Easy
-
Total Repair Time:15 - 30 mins
-
Tools:Nutdriver
2 of 4 people
found this instruction helpful.
Was this instruction helpful to you?
Thank you for voting!
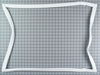
Freezer dripping - old gasket
First let me say the part arrived much faster than I anticipated! I was able to use the box (cardboard) the part came in to cover the freezer while the door was being worked on. I did not remove the door, but did remove all the screws that held the door inner part that the gasket fits around. Like another person wrote, my insulation in the door was frozen. I took that out and put new insulation in. I then fit the gasket around it and then screwed it back on. I have an electric screw driver and without the bit, it fit these hex screws perfectly, so I was able to unscrew and screw quickly.
Unfortunately, I realized the cause for the dripping was due to a faulty defrost thermostat. I'm guessing that part will arrive tomorrow. We did need a new gasket, however, so I don't regret it.
Unfortunately, I realized the cause for the dripping was due to a faulty defrost thermostat. I'm guessing that part will arrive tomorrow. We did need a new gasket, however, so I don't regret it.
Parts Used:
-
Royce from Allen, TX
-
Difficulty Level:Easy
-
Total Repair Time:15 - 30 mins
-
Tools:Nutdriver
1 person
found this instruction helpful.
Was this instruction helpful to you?
Thank you for voting!
Refrigerator warm
First of all let me say I can't believe I fixed it! And I can thank this website for it, they also had my part at my front door in less than 24 hours. I am so amazed! I am a stay at home Mom, and because my husband is always off with the military I knew the job was up to me to fix. And because times are tough we certainly couldn't afford a repairman. After reading many stories here about the same problem I had, I diagnosed what was wrong with my refrigerator. The defrost thermostat was faulty. First thing to do was turn off the refrig and then unplug it. I then emptied the bottom freezer, used a screwdriver to remove back panel wall. Lo and behold the coils were covered with ice. I defrosted the freezer using a blow dryer, also had to empty the drip pan in the back. when it got full of water. ANd because there is no way to remove the drip pan, I actually got a small air hose from my son's old fish tank(clean one) and then siphoned the water into a pot, took all of 10 minutes! I then used needle nose pliers to remove the bad defrost thermostat from the refrig's wiring.The defrost thermostat which had a bulge in it so knew I was on the right path. I looked at the new defrost thermostat and they had different ends on it then the one I just removed, and I remember reading what another member did, and that was to cut off the connecting caps, strip the wires , use electrical tape to join them and use a crimping tool to place the old caps on to the new defrost thermostat .I then inserted the thermostat to the freezer's wiring. Hope that makes sense to everyone. WEll, everything is running great! Thank-You Part Select, you saved me lots of money!
Parts Used:
-
Caren from Marlboro, NY
-
Difficulty Level:Easy
-
Total Repair Time:15 - 30 mins
-
Tools:Screw drivers
1 person
found this instruction helpful.
Was this instruction helpful to you?
Thank you for voting!
frig. missing door bushing.
I had to cut a groove in the bushing to put the elec. wires through it, & then just remove the hinge, put the bushing in & replace the hing.
Parts Used:
-
tim from mayfield village, OH
-
Difficulty Level:A Bit Difficult
-
Total Repair Time:15 - 30 mins
1 person
found this instruction helpful.
Was this instruction helpful to you?
Thank you for voting!
refrigerator was warm, freezer was normal/cold.
Removed the cover to the timer, 2 nut screws. Easy. Then emptied freezer, and took off back plate with nut driver. Replaced thermostat. 2 wire plugs that were easy to complete. Left back off, let thermostat normalize temperature, then switched to defrost setting. Worked like a charm.
Parts Used:
-
Jeffrey from Wausau, WI
-
Difficulty Level:Really Easy
-
Total Repair Time:30 - 60 mins
-
Tools:Nutdriver
1 person
found this instruction helpful.
Was this instruction helpful to you?
Thank you for voting!
freezer would not defrost
remove ice maker vent and back piece. Unclip defrost thermostat and unplug. Plug new thermostat in and clip to element, reattach back piece, vent and ice maker. Is a tight fit getting icemaker out, there are 3 screws 2 on top and one on bottom.
Parts Used:
-
Robert from Cherokee Village, AR
-
Difficulty Level:Easy
-
Total Repair Time:15 - 30 mins
-
Tools:Nutdriver
1 person
found this instruction helpful.
Was this instruction helpful to you?
Thank you for voting!
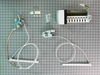
Icemaker not installed in refrigerator
I followed the instructions for the installation of the icemaker and its connection to the house water supply.
Parts Used:
-
Lionel from Watertown, NY
-
Difficulty Level:Really Easy
-
Total Repair Time:1- 2 hours
-
Tools:Nutdriver, Pliers, Screw drivers, Wrench set
4 of 10 people
found this instruction helpful.
Was this instruction helpful to you?
Thank you for voting!
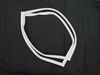
GASKET DEFORMED will not set properly, air leakes
Watch video. Very helpful, followed instructions went in fairly easy. Gasket deformed, used hair dryer could not get to set straight. WAIST of TIME and MONEY. I wouldn’t recommended buying one of these twisted gaskets, buy a new fridge which is what I’m doing tomorrow.
Parts Used:
-
peter from New Bedford, MA
-
Difficulty Level:Easy
-
Total Repair Time:1- 2 hours
-
Tools:Socket set
1 person
found this instruction helpful.
Was this instruction helpful to you?
Thank you for voting!