















KBRS22EVMS1 KitchenAid Refrigerator - Instructions
Keep searches simple. Use keywords, e.g. "leaking", "pump", "broken" or "fit".
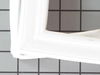
Freezer Compartment Gasket Replacement
My freezer compartment gasket was torn and needed replacement. This was on a bottom freezer Kenmore refrigerator. I couldn't find directions for how to take the freezer compartment door off, and figuring out how was the hardest part. Here are the instructions:
1. At least 24 hours prior to starting, remove the gasket from the packaging and lay it out in a warm area, to allow the creases to come out.
2. Unplug the refrigerator.
3. You will have to take BOTH doors off, so put at least the freezer compartment contents in a cooler so they don't thaw. Also remove all items from the refrigerator and freezer door.
4. Remove the refrigerator door first - remove the plastic cover from the top hinge, then remove the 3 metal screws holding the hinge in place. Lift the door up, and it will come right off. Set it aside.
5. Now remove the freezer door - there is one bolt head, for the top hinge pin. Remove it, and lift the door up and put it down on a table.
6. Towards the center, pull up on the old gasket, and use a pair of diagonal cutters to cut it in half. It will take a few cuts, but eventually you will get it out and cut in half. Then remove the old gasket.
7. The new gasket simply presses in. Start at two diagonal corners, then press the other two corners in, then do the straight sections.
8. Now replace the freezer door, then the refrigerator door, plug in the refrigerator, and put the contents back in.
1. At least 24 hours prior to starting, remove the gasket from the packaging and lay it out in a warm area, to allow the creases to come out.
2. Unplug the refrigerator.
3. You will have to take BOTH doors off, so put at least the freezer compartment contents in a cooler so they don't thaw. Also remove all items from the refrigerator and freezer door.
4. Remove the refrigerator door first - remove the plastic cover from the top hinge, then remove the 3 metal screws holding the hinge in place. Lift the door up, and it will come right off. Set it aside.
5. Now remove the freezer door - there is one bolt head, for the top hinge pin. Remove it, and lift the door up and put it down on a table.
6. Towards the center, pull up on the old gasket, and use a pair of diagonal cutters to cut it in half. It will take a few cuts, but eventually you will get it out and cut in half. Then remove the old gasket.
7. The new gasket simply presses in. Start at two diagonal corners, then press the other two corners in, then do the straight sections.
8. Now replace the freezer door, then the refrigerator door, plug in the refrigerator, and put the contents back in.
Parts Used:
-
John from ATLANTIC BCH, FL
-
Difficulty Level:A Bit Difficult
-
Total Repair Time:30 - 60 mins
-
Tools:Nutdriver
3 of 3 people
found this instruction helpful.
Was this instruction helpful to you?
Thank you for voting!
Raplaced switch
Repair went well,took about five to ten minutes to disconnect the power from the fridge removed the defective switch installed the new one ,reconnected the power,,,and Let there be light and there was light!
Parts Used:

-
Winston A from Brooklyn, NY
-
Difficulty Level:Really Easy
-
Total Repair Time:Less than 15 mins
-
Tools:Pliers
5 of 9 people
found this instruction helpful.
Was this instruction helpful to you?
Thank you for voting!
Old fill tube was blocked
Cut old fill tube into pieces, removed and replaced with new tube. Extremely easy.
Parts Used:
-
David from VESTAL, NY
-
Difficulty Level:Very Easy
-
Total Repair Time:15 - 30 mins
-
Tools:Pliers
3 of 3 people
found this instruction helpful.
Was this instruction helpful to you?
Thank you for voting!
Ice Maker stopped making ice.
Unplug power to refridg/freezer. Removed the screw in rt. rear bottom of ice maker to remove. After removing slightly, unplug pigtail. Remove ice maker completely. Remove large square cover from left side to expose motor. Remove screws to remove motor. Replce with new. Replace ice maker to freezer, plug pigtail back in, put screw back in rt rear bottom, plug refridg/freezer back into power source. Ice was making in about 2 1/2 hours.
Parts Used:
-
Martin from Palm Coast, FL
-
Difficulty Level:Really Easy
-
Total Repair Time:15 - 30 mins
-
Tools:Screw drivers, Socket set
3 of 3 people
found this instruction helpful.
Was this instruction helpful to you?
Thank you for voting!
noise damper motor rattle
Very easy to fix . It was harder to empty the contents out or the refrigerator than to repair . The diagrams on this site were very helpful in identified the part. and it was delivered in 5 days.
Parts Used:
-
JOSEPH from LTL EGG HBR, NJ
-
Difficulty Level:Very Easy
-
Total Repair Time:Less than 15 mins
-
Tools:Screw drivers
3 of 3 people
found this instruction helpful.
Was this instruction helpful to you?
Thank you for voting!
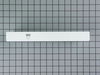
Broken center crisper rail
Total time 10 minutes. 9 minutes to clear out the food and 1 minute to install the part. Installation was self evident and could have been done blindfolded. Part just snapped in.
Parts Used:
-
Allan from Tucson, AZ
-
Difficulty Level:Very Easy
-
Total Repair Time:Less than 15 mins
3 of 3 people
found this instruction helpful.
Was this instruction helpful to you?
Thank you for voting!
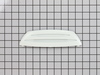
Broken clips on old part
-
Rose from OCOEE, FL
-
Difficulty Level:Really Easy
-
Total Repair Time:Less than 15 mins
3 of 3 people
found this instruction helpful.
Was this instruction helpful to you?
Thank you for voting!
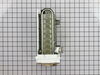
Ice maker stopped making ice
Remove 1 screw under ice maker. Gently pull downwards to unhook ice maker. Disconnected 4 pin wire connector. Remove and set aside the cover and wire loop you will need on new ice maker. Reverse the steps to install new maker. Once new ice maker is installed you will have to wait 2-4 hours for ice. There is a thermostat that will need to reach 10 degrees F to operate.
Parts Used:
-
Daniel from DAVISBURG, MI
-
Difficulty Level:Really Easy
-
Total Repair Time:Less than 15 mins
-
Tools:Nutdriver, Screw drivers
3 of 3 people
found this instruction helpful.
Was this instruction helpful to you?
Thank you for voting!
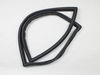
Door Gasket had a tear in it.
To repair the problem,I ordered a new gasket. Once I received the gasket, I laid it flat on the floors and hot the blow dryer and blow out the creases in the gasket. I then took off the door by removing the four screws from the door and rest the door on the table. I then removed the old gasket and replaced it with the new one. It took about 15 minutes. My frig. Stop freezing up.
Parts Used:
-
Ida Mae from MEDLEY, FL
-
Difficulty Level:Very Easy
-
Total Repair Time:15 - 30 mins
-
Tools:Screw drivers
3 of 3 people
found this instruction helpful.
Was this instruction helpful to you?
Thank you for voting!
Parts ordered on Sun Arrived Tues (local stores closed)
Talking with the service tech and youtube video it was a snap... Saved a service repair and a 25% parts mark up..
Parts Used:
-
David from Blairsville, GA
-
Difficulty Level:Really Easy
-
Total Repair Time:15 - 30 mins
-
Tools:Screw drivers
3 of 3 people
found this instruction helpful.
Was this instruction helpful to you?
Thank you for voting!
Both pieces were broken.
Just replaced old with new. The glass shelf was good so just moved it to the new pieces. Everything fit perfectly, thank you.
Parts Used:
-
Karen from Riverside, CA
-
Difficulty Level:Very Easy
-
Total Repair Time:15 - 30 mins
3 of 3 people
found this instruction helpful.
Was this instruction helpful to you?
Thank you for voting!
Ice maker not producing ice
The parts were very easy to replace, however I am still without ice and cannot figure out why. I have ohm tested the contol unit and everything works fine, I am able to jump it and turn on the motor and water fill valve. Any suggestions?...
Parts Used:
-
frank from NORTHRIDGE, CA
-
Difficulty Level:Very Easy
-
Total Repair Time:15 - 30 mins
-
Tools:Nutdriver
3 of 3 people
found this instruction helpful.
Was this instruction helpful to you?
Thank you for voting!
Freezer freezing up. Frost everywhere.
Old gasket pulled of easily with no tools. New gasket was placed on floor and heated with blow dryer to straighten. Then installed new gasket by pressing in with my hands. Noticed that the old gasket was hard and not flexible. All was great. Fit perfectly. No frost after a week. Happy.
Parts Used:
-
Daniel from LAKE CITY, FL
-
Difficulty Level:Very Easy
-
Total Repair Time:Less than 15 mins
3 of 3 people
found this instruction helpful.
Was this instruction helpful to you?
Thank you for voting!
lights wouldn't come on/work in refrigerator
Referencing the info/schematics you have on your website, I unscrewed/unattached top-front panel (carefully), from behind the panel you have to detach the wires (2) from the switch, pushed "in" the switch to remove, put in new switch and attach wires to test BEFORE remounting panel. Tada!! Thank you PartSelect! You saved me at least $80...would have been at least $100 to have a repair person come to the house!
Parts Used:
-
Jane from Albuquerque, NM
-
Difficulty Level:Easy
-
Total Repair Time:15 - 30 mins
-
Tools:Pliers, Screw drivers, Socket set
4 of 6 people
found this instruction helpful.
Was this instruction helpful to you?
Thank you for voting!
Evaporator motor failed.
Remove lower freezer door from mounting frame (4 screws). Remove inner shelving and shelving brackets, Total of six screws, three on each side on lower brackets and 4 screws, 2 on each side on upper brackets. Remove ice cube maker (4 screws). Remove thermometer frame from back cover and slide thermometer out of frame. Remove 4 screws from back cover and remove cover. Slide thermometer through hole in back cover. Remove 4 screws from evaporator motor housing. Gently pull plastic fan off of motor shaft. Remove motor from housing and install new motor. Reinstall all parts in the order removed.
Parts Used:

-
Richard from Circle, MT
-
Difficulty Level:Easy
-
Total Repair Time:30 - 60 mins
-
Tools:Nutdriver
3 of 3 people
found this instruction helpful.
Was this instruction helpful to you?
Thank you for voting!