Your coupon for will be reflected when you check out!
✖
Your coupon for
✖
Hello!
You're visiting the PartSelect site in U.S.
Would you like to shop on the Canadian site?
Stay on this site
Go to Canadian site
✖
Model Number Locations
1Select Category Type
Select Category Type
2Select Product Type
Select Product Type
3Select {MODEL} Type
Select {MODEL} Type
Sample Model Number Tags
Model numbers can be made up of numbers (1005400, for example) or a combination of letters and numbers (LAT1000AAE). The model number will most likely appear on either a paper sticker or a metal plate. Your appliance's model number tag may look similar to the sample model number tags shown here (model number highlighted in yellow):
JVM7195RW1SS General Electric Microwave - Overview
Save your modelModel Saved!
Save your model for later to make things easier.
Model has been saved to My Models. If you're not signed in, your lists are available on this device and will expire within 30 days.
Model has been saved to My Models.
We know your home runs smoothly when all your appliances are in top shape. That's why we've got the Milwaukee Switch Assembly just for you. This essential part helps efficiently power on and off your ...
This is the replacement damper bracket for your microwave. It is made of plastic and is approximately 11 inches wide and 3 inches long. The damper bracket attaches to the outer cabinet and directs air...
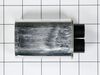
This mounting plate, also known as a bracket, is crucial for keeping your microwave mounted to the wall, when placed above the stove. This OEM part is sold separately from the screws that are needed t...
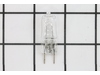
This part is the replacement high-voltage diode for your microwave. It is approximately 3 inches long and is sold individually. The high voltage diode is an electrical current control device inside yo...
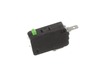
This switch monitor interlock is a critical safety component designed to ensure proper communication between the microwave door latch and the control board. When functioning correctly, it confirms tha...
This grease filter is a genuine OEM replacement part that is compatible with various models of microwave. It has dimensions of 7.5 inches by 5 inches and it is made of durable aluminum mesh material. ...
This microwave vent damper assembly helps control airflow by directing exhaust out of the kitchen and preventing outside air, smoke, or odors from flowing back in when the fan is off. Made from durabl...
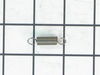
This capacitor delivers the electrical boost required for motors to start and operate efficiently. Proper capacitance reduces strain on motor components and helps prevent startup failures or inconsist...
Introducing GE's charcoal air filter, specially designed to keep your GE microwave smelling fresh and free of cooking odors. Measuring 2-1/2 inches by 11 inches, this highly effective filter actively ...
$61.38
In Stock
Order now and your part arrives by Apr 9
Questions And Answers for JVM7195RW1SS
Be the first to ask our experts a question about this model!
✖
Ask a Question
Ask our experts a question on this model and we'll respond as soon as we can.
First I disconnected the power and opened the door. Then I removed the top screws holding the top vent louvers, then removed the screw at the top of the touch pad. The touch pad removes by sliding up slightly then tilting top out. I unscrewed two screws holding the door latch assembly. Press the tab to remove and replace switch. Reco
... Read morennect wires, reseat latch mount by placing top bracket tab in place first, allign and secure with screws. Reseat touch pad by placing bottom tabs in first, tilt forward and press up to seat top tabs, secure with top screw. Secure vent louver screws, plug in and watch your microwave work again.
Remove microwave outer cover. Turn on side & locate the upper & lower door switches. Better to replace in pairs even if one is ok. Remove the wire harness to each switch. Then replace switch and re connect the wire harness. Re attach outer cover and test to see if that solved the problem. If so then well done!!
I followed the generic trouble shooting directions on the web site. It suggested either diode, capacitor and/or magnetron. I test each. All tested OK except diode. It was supposed to measure open in one direction and appox 200k ohms in the other direction. My diode measured open in both directions (tried multiple times, multiple sett
... Read moreings). I replaced the diode. The order process was great and it shipped immediately. I knew I was in trouble when I measured the new diode and it too was open in both directions. It was easy to install but unfortunately no joy - did not solve the problem. At this point it is likely cheaper just to buy a new one