















JVM1490CD03 General Electric Microwave - Instructions
Keep searches simple. Use keywords, e.g. "leaking", "pump", "broken" or "fit".
Replacement of Magnetron
I UNPLUGGED the microwave and removed the cover, using a phillips and a Torx screwdriver for the machine screws. I set these screws aside, so as not to confuse them with the later encountered screws. I photographed the magnetron to assure proper placement of the 6 phillips machine screws involved in reassembly (marking the the locations on the old magnetron would do as well. I marked the old magnetron "old", to avoid later confusion. I removed the two screws holding the shields to the magnetron. I removed 3 of the 4 screws holding the magnetron to the microwave, leaving one of the top screws. I held the magnetron securely and removed the last screw, pulling out a the part of the magnetron that penetrated the microwave. I installed the new magnetron in reverse order. One problem I encountered was locating one of the six screws, which had been pulled into the old magnetron by magnetism.
Parts Used:
-
Benjamin from Anchorage, AK
-
Difficulty Level:Really Easy
-
Total Repair Time:15 - 30 mins
-
Tools:Screw drivers
0 of 1 people
found this instruction helpful.
Was this instruction helpful to you?
Thank you for voting!
no heat
unplug the unit then pull down , lot of screws are on top. open the cover . you could see the parts that need to replace on the right hand side (heavy side). disconnect wires then test the parts that need to replace by a tester to make sure that it's really broke .then unscrew part and replace .
Parts Used:
-
Nelia from Streamwood, IL
-
Difficulty Level:Really Easy
-
Total Repair Time:30 - 60 mins
-
Tools:Nutdriver, Screw drivers
0 of 1 people
found this instruction helpful.
Was this instruction helpful to you?
Thank you for voting!
No heat

-
Edwin from New York, NY
-
Difficulty Level:Really Easy
-
Total Repair Time:15 - 30 mins
-
Tools:Screw drivers
0 of 1 people
found this instruction helpful.
Was this instruction helpful to you?
Thank you for voting!
install new latch and spring in door
removed key pad then removed latch assembly and replaced it with new latch assembly.
Parts Used:
-
Clifford from Springfield, VA
-
Difficulty Level:A Bit Difficult
-
Total Repair Time:15 - 30 mins
-
Tools:Pliers, Screw drivers
3 of 10 people
found this instruction helpful.
Was this instruction helpful to you?
Thank you for voting!
Microwave portion did not work, Halogen lights and fans did.
The primary door latch switch contacts were not closing properly. I broke the latch bracket while removing the switch. It is only a plastic clip that holds the switch in place. I replaced the switch and bracket. The Advantium now works in all modes.
Parts Used:
-
Gary from Mahopac, NY
-
Difficulty Level:Really Easy
-
Total Repair Time:15 - 30 mins
-
Tools:Pliers, Screw drivers
Was this instruction helpful to you?
Thank you for voting!
Broker door handle
Actually, my brother did repair and I helped. The hardest part was getting the black liner inside the door pried loose. We managed after prying gently with a screw driver to pop it off. That was the most time consuming part.
Parts Used:
-
Rachel from Mitchellville, MD
-
Difficulty Level:A Bit Difficult
-
Total Repair Time:15 - 30 mins
-
Tools:Pliers, Screw drivers
Was this instruction helpful to you?
Thank you for voting!
broken door latch assembly (I broke it!)
I had left the door to the microwave open and turned around and hit the door latch assembly with my arm, sanpping off the bottom latch hook. In an effort to take apart the latch assembly it was necessary to take off the door choke cover and in doing so I sanpped a few of the plastic tabs that hold it in place. Undismayed, I then went online, found PartSelect, ordered the replacement parts, received them in three days and in fifteen minutes fixed both of them. The diagrams on the site made it easy to find what I needed and ordering the parts was easy. Thanks PartSelect-my wife is happy again!!!
Parts Used:
-
David from Little Falls, NJ
-
Difficulty Level:Really Easy
-
Total Repair Time:15 - 30 mins
-
Tools:Pliers, Screw drivers
Was this instruction helpful to you?
Thank you for voting!
broken latch hook
Removed. Inside frame with putty knife replace new latch attach spring and line up notch of latch in slots. That was the most difficult part replace inside frame. Done!
Parts Used:
-
David from Pittsburgh, PA
-
Difficulty Level:Easy
-
Total Repair Time:15 - 30 mins
Was this instruction helpful to you?
Thank you for voting!
Rack Bracket Holder Broken
Take the pliers and place a tight grip on the broken rack bracket, twist toward front of microwave until loose, pop out and by hand insert new rack bracket, twist toward the back of microwave until fully in place. One side was slightly harder than the other taking off and replacing rack bracket.
Parts Used:
-
Alaska Division of Forestry from Soldotna, AK
-
Difficulty Level:Easy
-
Total Repair Time:15 - 30 mins
-
Tools:Pliers
Was this instruction helpful to you?
Thank you for voting!
Microwave would turn on ,BUT turn table would not turn and oven would not heat.
Took off cover , unpluged switches , took off switch assy, off/on test hooped and howlered for about 5 mins .Then laughed about other sites said could get those switches. Just wanted to say I LOVE Partselect. Super fast del , great price. JUST AWSOME!!!!!!!!!!!!!!!!!!!!!!!!!!!!
Parts Used:
-
Earl from New Philidelphia, OH
-
Difficulty Level:Easy
-
Total Repair Time:15 - 30 mins
-
Tools:Screw drivers
Was this instruction helpful to you?
Thank you for voting!
microwavehandle fastening screws broken off plastic door handle
ordered matching handle on internet. Pried black plastic panel off inside of door--PLASTIC TABS HOLDING PANEL BREAK OFF EASILY AND MAY KEEP PANEL PERMANENTLY LOOSE--good luck! Metal frame holding window glass pried off of front of microwave(AGAIN PLASTIC TABS HOLD IT AND CAN BREAKOFF) use small wedges to pry tabs up and off metal frame. Remove screws holding handle, screw on new handle (very firmly) and assemble in reverse order.
Parts Used:
-
Ted M from Olympia, WA
-
Difficulty Level:Difficult
-
Total Repair Time:30 - 60 mins
Was this instruction helpful to you?
Thank you for voting!
microwave just stopped working
First unplugged the microwave, took top grill off, took control panel off, took wires off and used color coded tape to make sure they went back in right places, took fuse out and replaced it and put every thing back and it all worked fine and to top it off my wife did it all. So it was pretty easy.
Parts Used:
-
James from Fall Branch, TN
-
Difficulty Level:Easy
-
Total Repair Time:30 - 60 mins
-
Tools:Pliers, Screw drivers
Was this instruction helpful to you?
Thank you for voting!
Bottom door latch was broken. Microwave was dead.
Read instructions and viewed video. Project would have been very difficult without the instructions and video. Step 1 removed vent grill at top to microwave, by removing two scres. Step 2 removed microwave door by lifting. Step 3 used a one inch plaster knife to separate the plastic interior cover of the door. The video was most helpful. Use the thin blade of the plaster knife to locate snap locations of the plastic cover. Step 4 removed broken latch by applying slight pressure to the outside. Observed the attachment of the 'spring'. Step 5 installed new latch and spring. Step 6 reinstalled interior plastic cover. Step 7 install door. Step 8 install vent cover with two screws. Step 9 test unit.
Parts Used:
-
James from Severn, MD
-
Difficulty Level:A Bit Difficult
-
Total Repair Time:30 - 60 mins
-
Tools:Screw drivers
Was this instruction helpful to you?
Thank you for voting!
Could not be turned on
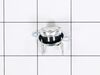
Removed outer cover and then replaced the T. C. O. located on the left upper side if the unit. Replaced outer cover, tested oven. Oven operates normally.
Parts Used:
-
Remer from Dothan, AL
-
Difficulty Level:Really Easy
-
Total Repair Time:1- 2 hours
-
Tools:Screw drivers
Was this instruction helpful to you?
Thank you for voting!
Timer operated normally, but the microwave did not heat water or cook food.
Our GE Profile Advantium 120 Series Over-the-Range Microwave stopped working. We called GE Service. The first available appointment was two weeks after our call. The technician charged $99, gave us a form stating that the Magnetron and Diode Cable as defective and quoting an additional price of $362 to furnish and install these parts. He said that it would be another two weeks before he could do the work. Instead I ordered the parts from you and had them within two days. The parts you furnished were identical to the original parts in our unit. They arrived within two days. I installed the parts without removing the microwave from the wall. The most difficult part was inserting the magnetron mounting screws into openings in the rather tight space available. I was able to do this by using plastic pacaging tape to hold the screws onto the end of a short Phillip screw, Prior to iserting each screw I pushed it through the sticky side of a piece of packaging tape. I then folded the sticky surface over the shank of the screw. Once a screw was seated, but before it was fully tightened, I used needle nose pliers to pull off the tape. The unit now functions perfectly.
Parts Used:
-
Peter from Severna Park, MD
-
Difficulty Level:Difficult
-
Total Repair Time:More than 2 hours
-
Tools:Pliers, Screw drivers
Was this instruction helpful to you?
Thank you for voting!