















JTP86WFW General Electric Range - Instructions
Keep searches simple. Use keywords, e.g. "leaking", "pump", "broken" or "fit".
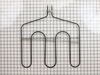
Lower Oven Broiler Stopped Working
Turned power off to oven
Unscrewed broiler nuts (total of 4)
Pulled Broiler out from back of stove
Disconnected wires
Reconnected wire
Remounted broiler and replaced bolts
Turned power back on
Unscrewed broiler nuts (total of 4)
Pulled Broiler out from back of stove
Disconnected wires
Reconnected wire
Remounted broiler and replaced bolts
Turned power back on
Parts Used:
-
Frank from PARKER, CO
-
Difficulty Level:Really Easy
-
Total Repair Time:30 - 60 mins
-
Tools:Nutdriver, Pliers
1 person
found this instruction helpful.
Was this instruction helpful to you?
Thank you for voting!
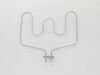
Heating element was completely broken.
Removed old element with a socket wrench. Replaced new element with socket wrench. Pretty easy!
Parts Used:
-
George from FREDERICKSBRG, VA
-
Difficulty Level:Really Easy
-
Total Repair Time:30 - 60 mins
-
Tools:Socket set
1 person
found this instruction helpful.
Was this instruction helpful to you?
Thank you for voting!
Top oven not keeping baking temperature
Used a nut driver to remove element the insulation was tight and pulled the wires off before they came out of the oven. I made a small hook out of a coat hanger and pulled the wires through the opening.
Parts Used:
-
Donald from BUFORD, GA
-
Difficulty Level:Easy
-
Total Repair Time:Less than 15 mins
-
Tools:Nutdriver
1 person
found this instruction helpful.
Was this instruction helpful to you?
Thank you for voting!
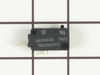
Microwave would run when door was opened, tripped breaker, wouldn't run at times, door opening and close would help/hurt operation
The breaker was tripped but fuse was ok on testing. I kept the fuse for possible future repairs. To access door switches and fuse on this model JVM1850CF001, remove 2 phillips screws at top. Then slide the grill to the left (toward hinges) about 1 cm and it should easily come off forwardly. Remove phillips screw underneath grill attaching the main panel. Lift the panel 1 cm and it will easily come off forwardly - I let it hang by the electrical cords. Now you can see/discharge capacitor(s). Remove 2 star screws inside door to loosen/remove/access door switch frame. 3 switches are held in the frame by plastic tabs - one tab per switch. One is primary and 2 are secondary door switches. I removed each switch one at a time by lifting tab, pulled off the electrical connector and filed the male metal connection on each switch. I replaced the switch with a loose button (loose and didn't click as crisply compared to the other switches) with a new secondary door switch. It was the lower secondary switch. Worked like a charm after that.
Parts Used:

-
Mark from FORT COLLINS, CO
-
Difficulty Level:Easy
-
Total Repair Time:30 - 60 mins
-
Tools:Pliers, Screw drivers
1 person
found this instruction helpful.
Was this instruction helpful to you?
Thank you for voting!
Oven quit heating
Disconnected power, removed two screws from bracket. Unplugged old element, installed new element and replaced screws in bracket. Restored power and back in business!
Parts Used:
-
LARRY from MOSELLE, MS
-
Difficulty Level:Really Easy
-
Total Repair Time:15 - 30 mins
-
Tools:Socket set
1 person
found this instruction helpful.
Was this instruction helpful to you?
Thank you for voting!
Change bulb

-
Louis from LEAGUE CITY, TX
-
Difficulty Level:Really Easy
-
Total Repair Time:30 - 60 mins
-
Tools:Nutdriver
3 of 8 people
found this instruction helpful.
Was this instruction helpful to you?
Thank you for voting!
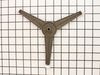
The roller guide broke where it fits over the turning mechanism.
removed the glass turning plate. removed the broken roller guide. replaced with the new one. I am very happy with not only the ease of fixing the problem, but how quickly I got the replacement part. I will use PartSelect again!!! And I will tell my friends.
Parts Used:
-
Sheri from Sugar Land, TX
-
Difficulty Level:Really Easy
-
Total Repair Time:Less than 15 mins
1 of 2 people
found this instruction helpful.
Was this instruction helpful to you?
Thank you for voting!
lower bake element went out
basically unscrew two screws, unplug, plug new one in and screw the screws back in.
Parts Used:
-
Rachel from Maryland Heights, MO
-
Difficulty Level:Easy
-
Total Repair Time:Less than 15 mins
-
Tools:Socket set
2 of 5 people
found this instruction helpful.
Was this instruction helpful to you?
Thank you for voting!
microwave dish rotator hub broke
-
John from greensboro, NC
-
Difficulty Level:Really Easy
-
Total Repair Time:Less than 15 mins
2 of 5 people
found this instruction helpful.
Was this instruction helpful to you?
Thank you for voting!
While on self clean, the bake element began to burn
First I removed the two screws that hold the element in place. I then pulled the element out about 3 inches and disconnected the two wires. I plugged in the new element and proceeded to clean the oven which is what I was doing when the problem occured.
Parts Used:
-
Scott from Troy, MO
-
Difficulty Level:Really Easy
-
Total Repair Time:Less than 15 mins
-
Tools:Nutdriver
2 of 6 people
found this instruction helpful.
Was this instruction helpful to you?
Thank you for voting!
time would count down but unit would not run & heat.
remove cover, unplug secondary door switch (top switch)
remove switch from holder, install new switch, plug in wires, replace cover, very easy. door switches are a common problem
with microwave ovens.
remove switch from holder, install new switch, plug in wires, replace cover, very easy. door switches are a common problem
with microwave ovens.
Parts Used:
-
Bill from Shawnee, OK
-
Difficulty Level:Really Easy
-
Total Repair Time:15 - 30 mins
-
Tools:Screw drivers
2 of 6 people
found this instruction helpful.
Was this instruction helpful to you?
Thank you for voting!
No heat.
-
Mack from Jacksonville, FL
-
Difficulty Level:Really Easy
-
Total Repair Time:Less than 15 mins
-
Tools:Pliers, Screw drivers
0 of 1 people
found this instruction helpful.
Was this instruction helpful to you?
Thank you for voting!
No heat
-
Edwin from New York, NY
-
Difficulty Level:Really Easy
-
Total Repair Time:15 - 30 mins
-
Tools:Screw drivers
0 of 1 people
found this instruction helpful.
Was this instruction helpful to you?
Thank you for voting!
oven wouldn't heat
remove cover-unplug wires from secondary switch-remove switch-snap in new switch-plug in wires-replace cover-works great. very easy to do.
Parts Used:
-
Bill from Shawnee, OK
-
Difficulty Level:Really Easy
-
Total Repair Time:15 - 30 mins
-
Tools:Screw drivers
3 of 12 people
found this instruction helpful.
Was this instruction helpful to you?
Thank you for voting!
broken switch
This was a wall mounted oven. Turned off breaker. Pulled panel off by removing 6 screws. Pulled connectors off old switch. Removed old switch. Just a friction fit. I used my jack knife to get it moving. Pushed in the new switch and connected wires. (just push on tabs) Put panel back together and turned on breaker. Done, easy.
Parts Used:
-
Bob from Marcy, NY
-
Difficulty Level:Easy
-
Total Repair Time:15 - 30 mins
-
Tools:Screw drivers
Was this instruction helpful to you?
Thank you for voting!