















JT3500DF6WW General Electric Wall Oven - Instructions
Keep searches simple. Use keywords, e.g. "leaking", "pump", "broken" or "fit".
Error code F96
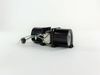
Very straight forward repair except for removal of the fan mount plate. There are 4 sheet metal screws, 2 of which are obvious and shown in the appliance diagrams, and 2 of which are neither on the appliance diagram nor obvious. These screws are beneath the motor assembly and oriented with the heads between the mounting plate and the top of the oven - about a 3/8 inch gap. Removal was accomplished using a 1/4 inch open end wrench strictly by feel as there is no sight line. Not all that challenging, but still a pain. On reassembly, these screws were reversed so that the head is now on the top of the plate and more accessible.
Parts Used:

-
john from ASHEVILLE, NC
-
Difficulty Level:A Bit Difficult
-
Total Repair Time:30 - 60 mins
-
Tools:Nutdriver, Pliers
4 of 4 people
found this instruction helpful.
Was this instruction helpful to you?
Thank you for voting!
Burnt Smell
Unplugged the Range and removed the two screws holding down the cook top. You do not need to remove the vent chamber at the rear of the range since the top lifts up about 4 inches. This should be enough room to get your hand onto the plug going to the door switch. Pull off the plug and remove the swich. Pop in the new one, put on the plug, reinstall the two screws and you are done!
Read the thread on "burnt smell" and DO NOT assume it is a burned out element. Follow your nose!!
Read the thread on "burnt smell" and DO NOT assume it is a burned out element. Follow your nose!!
Parts Used:

-
Eugene from Hilton Head, SC
-
Difficulty Level:Really Easy
-
Total Repair Time:Less than 15 mins
-
Tools:Nutdriver
8 of 17 people
found this instruction helpful.
Was this instruction helpful to you?
Thank you for voting!
Burnt out lamp bulb
Remove oven light lens cover, remove the bulb and replace it with a new one.
Parts Used:

-
Carl from MENIFEE, CA
-
Difficulty Level:Really Easy
-
Total Repair Time:Less than 15 mins
5 of 15 people
found this instruction helpful.
Was this instruction helpful to you?
Thank you for voting!
Went well.
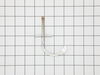
Changed the Temperature Sensor as you suggested, but the problem of 40 minutes to reach a temperature of 375 degrees F. remained the same.
Parts Used:
-
Salih Hindas / from SPRNGFLD GDNS, NY
-
Difficulty Level:Really Easy
-
Total Repair Time:15 - 30 mins
-
Tools:Screw drivers
2 of 6 people
found this instruction helpful.
Was this instruction helpful to you?
Thank you for voting!