















JSS27G4J2 General Electric Range - Instructions
Keep searches simple. Use keywords, e.g. "leaking", "pump", "broken" or "fit".
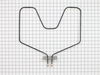
Baking element no longer worked.
Removed 4 screw nuts and replaced with new baking element using same 4 screw nuts. Real easy job.
Parts Used:
-
Stanley from Cave Creek, AZ
-
Difficulty Level:Really Easy
-
Total Repair Time:15 - 30 mins
-
Tools:Nutdriver
1 person
found this instruction helpful.
Was this instruction helpful to you?
Thank you for voting!
Bottom Bake Element had burnt into/split
Very easy and simple/ After making sure power supply was off, removed socket screws in back plate of element, slid old element out, attached new element and replaced/tightened socket screws on plate and new element. Power on, oven on .. heated quickly and nicely. Used oven several times since ... no problems.
Parts Used:
-
Miranda from UNION GROVE, NC
-
Difficulty Level:Really Easy
-
Total Repair Time:Less than 15 mins
-
Tools:Socket set
1 person
found this instruction helpful.
Was this instruction helpful to you?
Thank you for voting!
The bake element burned in half.
First I turned the power off to the oven/stove at the breaker box in the basement. Then I took the back plate off. Then I removed the two screws holding the wires onto the damaged element. Then I removed the two screws holding the element to the inside rear of the oven. Then I pulled the old element out and replaced it with the new element. I replaced the two screws that hold the element to the inside of the oven. Then I replaced the wires on the element where it protruded at the back of the oven. I put the back plate back on, slide the oven back in place and turned the power back on at the breaker and everything worked.
Parts Used:
-
RICHARD from BETHLEHEM, PA
-
Difficulty Level:Really Easy
-
Total Repair Time:15 - 30 mins
-
Tools:Nutdriver, Screw drivers
1 person
found this instruction helpful.
Was this instruction helpful to you?
Thank you for voting!
Bottom element in oven caught on fire and broke in two
The element was 25 years old and I was concerned about changing it. But is was so easy. I turned off power and removed 2 screws and then unscrewed the wiring from the old element. I had the new one installed in minutes. I was so glad to have my oven working again. Who needs a man.
Parts Used:
-
SHERYL from VERO BEACH, FL
-
Difficulty Level:Easy
-
Total Repair Time:15 - 30 mins
-
Tools:Nutdriver
1 person
found this instruction helpful.
Was this instruction helpful to you?
Thank you for voting!
Lower baking element had burned out.
Using a nut driver, I removed the two screws holding the baking element to the firewall of the oven. I then pulled the baking element out exposing the two wires connected to it. I then used the same nutdriver to remove the nuts and detached the old element. I then connected the new element to the wires, pushed the wires inside the firewall and reattached the element to the firewall of the oven.
The time it took was literally a few minutes. Works like a new oven!
The time it took was literally a few minutes. Works like a new oven!
Parts Used:
-
Rob from Las Cruces, NM
-
Difficulty Level:Really Easy
-
Total Repair Time:Less than 15 mins
-
Tools:Nutdriver
1 person
found this instruction helpful.
Was this instruction helpful to you?
Thank you for voting!
Baking element had burned out and actually cracked in half.
It was so simple, I turned off the breker to the oven, unscrewed two screws holding in the element, pulled out until the wire connetion was exposed. I unscrewed those two screws, then placed the replacement part, put the two screws on, pushed back the wiring and insulation.Final step was screwing two screws to hold the unit to the oven back. So simple! The part was ordered regular mail and still was here in 2 days. Will recommend to friends for sure!
Parts Used:
-
Marie from Roxboro, NC
-
Difficulty Level:Really Easy
-
Total Repair Time:Less than 15 mins
-
Tools:Screw drivers, Socket set
1 person
found this instruction helpful.
Was this instruction helpful to you?
Thank you for voting!
Bake Element Burnt Out On Upper Oven
Unscrewed the element from the oven,disconnected the two screws for the electrical and reverse the procedure to install new element. Took all of about 10 minutes.
Parts Used:
-
GREGORY from HOUSTON, TX
-
Difficulty Level:Really Easy
-
Total Repair Time:Less than 15 mins
-
Tools:Nutdriver
1 person
found this instruction helpful.
Was this instruction helpful to you?
Thank you for voting!
element went out on oven
Made sure oven was turned off. I used nut driver to remove nuts holding old element to back of oven. gently pulled element out of wall, taking care not to yank because of wires attached to back of element. Made sure oven was off again and then used nut driver to carefully remove wire leads from receptors on element. removed old element from oven and got the new element. carefully used nut driver to attach wire leads to new element. When snugging the bolts to leads, used pliers to keep leads on the element from bending. carefully replaced wires and rear of element into the space behind oven, and used nut driver to attach the back of element to the back of oven. shut oven and turned on to make sure it worked. it did. I was very pleased with my experience with part select dot com, and will be buying another element soon to replace the one in my other oven! Thank you
Parts Used:
-
Brian from Deer Park, TX
-
Difficulty Level:Really Easy
-
Total Repair Time:Less than 15 mins
-
Tools:Nutdriver, Pliers
1 person
found this instruction helpful.
Was this instruction helpful to you?
Thank you for voting!
Bad Bake Element
The bake element in my 17 year old GE free standing electric range became defective. This element has 2 terminals -- black (240V) and white (neutral). While removing the element from the range, a 2nd black wire was pulled out of the back of the oven. This wire had a bare terminal connection and apparently had been loose behind the oven shell for all these 17 years. Inspection of this wire showed it carried 115V. I wrapped this wire with electrical tape and reinserted it into the insulation behind the oven shell.
Parts Used:
-
John from Spring Grove, PA
-
Difficulty Level:Easy
-
Total Repair Time:Less than 15 mins
-
Tools:Nutdriver, Screw drivers
1 of 2 people
found this instruction helpful.
Was this instruction helpful to you?
Thank you for voting!
Oven element was shorted out
No. 1 thing I did is I unplugged power supply to oven, second- unscrewed two screws that was holding cover plate and removed cover plate with a set of pliers, pulled element out and unscrewed two screw with power wires and installed new element, tightened screws and re-installed cover plate, tested oven turning on oven and in a few seconds element got hot, job done!
Parts Used:
-
KEVIN from WAUSEON, OH
-
Difficulty Level:Really Easy
-
Total Repair Time:Less than 15 mins
-
Tools:Pliers
1 of 2 people
found this instruction helpful.
Was this instruction helpful to you?
Thank you for voting!
Oven took long time to reach desired temp. Element sparkled and burned up.
First I turned off the breaker to the oven,
then I removed the two screws that hold the element in place. I then pulled the element out about 3 inches and disconnected the two wires. I placed the new element in the oven, reconnected the wiring and replaced the two screws in the mounting bracket. I reset the breaker and turned the oven on to about 450 degrees for 30 minutes to burn off the new smell of the element. This job was very easy and I saved about $100 from paying a service to do it.
then I removed the two screws that hold the element in place. I then pulled the element out about 3 inches and disconnected the two wires. I placed the new element in the oven, reconnected the wiring and replaced the two screws in the mounting bracket. I reset the breaker and turned the oven on to about 450 degrees for 30 minutes to burn off the new smell of the element. This job was very easy and I saved about $100 from paying a service to do it.
Parts Used:
-
Joe from Raleigh, NC
-
Difficulty Level:Really Easy
-
Total Repair Time:Less than 15 mins
-
Tools:Nutdriver
1 of 2 people
found this instruction helpful.
Was this instruction helpful to you?
Thank you for voting!
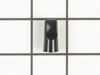
Timer Knobs were broken and one was missing
I received the kit two days after I ordered it, opened it and installed the knobs in less than 3 minites. The knobs were exact matches for the broken ones. The stove top now looks great and I cannot understand why I waited so long to make this simple repair.
Parts Used:
-
Emmette G from Hingham, MA
-
Difficulty Level:Really Easy
-
Total Repair Time:Less than 15 mins
1 of 2 people
found this instruction helpful.
Was this instruction helpful to you?
Thank you for voting!
Bake unit had burned out
With great ease. Only thing I would have appreciated was knowing the size ofvthevrequired socket wrench. Otherwise it was easy and fun as the instructions were crystal clear.
Parts Used:
-
Margaret from Brookland, NY
-
Difficulty Level:Really Easy
-
Total Repair Time:Less than 15 mins
-
Tools:Socket set
1 of 2 people
found this instruction helpful.
Was this instruction helpful to you?
Thank you for voting!
Oven would not heat, but broiler, burners and thermostat was clicking, so we figured it was the bake element.
Had to take back panel off of the inside of the oven to get to the screws to remove the old element and attache the new. Removed the two screws to remove the old, pulled it out unattached the wires and attached the new one.
Parts Used:
-
Patricia from Reading, MA
-
Difficulty Level:Easy
-
Total Repair Time:15 - 30 mins
-
Tools:Nutdriver, Screw drivers
1 of 2 people
found this instruction helpful.
Was this instruction helpful to you?
Thank you for voting!
Bake element failure
I removed the old element and replaced it with a new part. It was very simple.
The power was turned off. The elemnt wiring was removed. The new one was installed in reverse order. Power back on and the oven tested just fine.
The power was turned off. The elemnt wiring was removed. The new one was installed in reverse order. Power back on and the oven tested just fine.
Parts Used:
-
Daniel from St Mary's, GA
-
Difficulty Level:Easy
-
Total Repair Time:15 - 30 mins
-
Tools:Nutdriver, Screw drivers
1 of 2 people
found this instruction helpful.
Was this instruction helpful to you?
Thank you for voting!