















JSP57CF3CC General Electric Range - Instructions
Keep searches simple. Use keywords, e.g. "leaking", "pump", "broken" or "fit".
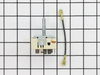
Overheating dual element
Not only did we (my wife did help) replace the dual element but afterwards we realized the control switch was not functioning properly and so that was replaced as well, and now our appliance works as intended. Also the instructions, are helpful as well. We used care not to force or over tighten anything and with two sets of eyes and the extra hands everything went much better. Anything that was removed was noted as to it's location and replaced .
Parts Used:
-
Alberto from TUCSON, AZ
-
Difficulty Level:Really Easy
-
Total Repair Time:30 - 60 mins
-
Tools:Nutdriver, Pliers, Screw drivers, Wrench (Adjustable)
2 of 2 people
found this instruction helpful.
Was this instruction helpful to you?
Thank you for voting!
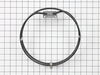
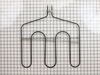
Both standard & convection oven not heating in upper oven
Circuit breaker off. Watched You Tube video to easily remove and set aside oven door, and shelves, unscrewed back wall cover over convection heating element, and slid out cover over floor heating element. Used ratchet to easily disconnect both old heating elements & pull from rear wall, holding onto two clip electrical connectors while gently pulling out plenty of slack as wires fed through insulation material. Concern of "losing" wires back into oven wall not truly a problem if careful. Both sets of connectors pulled off, easily and then slid onto replacement elements without trouble. Circular convection element screwed back into place and cover replaced. Replacement floor element was similar, but not identical, to original. Wires connected fine, but base plate and two screw holes to attach to rear wall were of different size. It rests underneath oven lower cover on its own feet, so really didn't require support. Being DIY obsessive, I nonetheless used its base plate as template to drill two new holes in oven back, secured with old screws. Replaced cover, shelves, door, and woking like new!
Parts Used:
-
Gordon from Ojai, CA
-
Difficulty Level:Easy
-
Total Repair Time:30 - 60 mins
-
Tools:Socket set
2 of 2 people
found this instruction helpful.
Was this instruction helpful to you?
Thank you for voting!
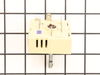
knob thermostat burnt out
it went well as compared to getting a new ~~800$ cooktop and ~~150 to install, I took a shot for 30$ bucks and it worked great!! problem solved and great support ! !! thanks for all your help
Parts Used:
-
John from CENTERPORT, NY
-
Difficulty Level:Really Easy
-
Total Repair Time:30 - 60 mins
-
Tools:Pliers
2 of 2 people
found this instruction helpful.
Was this instruction helpful to you?
Thank you for voting!
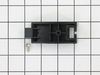
Broken rear drawer support
Installed the new brackets at the back of the drawer with the 2 screws provided. The new rear mount design is much better than than the old side mount.
Parts Used:
-
Jesse from Knob Noster, MO
-
Difficulty Level:Really Easy
-
Total Repair Time:Less than 15 mins
-
Tools:Nutdriver
2 of 3 people
found this instruction helpful.
Was this instruction helpful to you?
Thank you for voting!
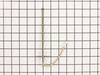
Erratic oven temp
RE: 2 yr. old GE double wall oven with convection option in upper oven, non-convection in lower oven: baked goods were not browning, were undercooked or burned. Tested both ovens on regular bake setting using 2 oven thermometers. Set ovens for 350. Although after 10 min both ovens beeped "ready", the oven thermometers actually read 200 - then would swing up as high as 500 and as low as 200 during the 20 min test period. Decided to first replace top oven sensor only, just in case it really was a more expensive control panel problem. It was a bit awkward to reach back there with the oven door in the way, but I have long arms! Aimed my flashlight, removed nuts with a socket wrench, pulled out the sensor, popped the clip and the old sensor easily separated from its connection. Snapped on the new sensor, pushed it back in and reset the nuts. Easy. Set the oven for 350 and tested again with 2 oven thermometers for 45 min. Voila! The oven thermometers read exactly 350 when the oven beeped "ready" and it stayed at 350 throughout the entire 45 min retest period with only a 3 degree variation both up and down. What a great improvement! Immediately went online to Parts Select and ordered another sensor for the bottom oven which was having the same problem. Fixed both ovens all for under $30 - and just in time for Christmas cookies! Don't want to know what the repair guy would have charged.......Merry Christmas!
Parts Used:
-
Gail from Glen Allen, VA
-
Difficulty Level:Easy
-
Total Repair Time:15 - 30 mins
-
Tools:Nutdriver, Socket set
2 of 3 people
found this instruction helpful.
Was this instruction helpful to you?
Thank you for voting!
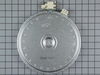
inner coil of burner no good..supposed to last forever!??
Remove two screws hold cook top down: prop it open with piece of wood. (TURN OFF POWER TO RANGE FIRST!). Carefully make diagram of where wires go: remove and replace.. piece of cake!
Parts Used:
-
D. Scott from Melbourne Village, FL
-
Difficulty Level:Easy
-
Total Repair Time:30 - 60 mins
-
Tools:Nutdriver, Pliers, Screw drivers
2 of 3 people
found this instruction helpful.
Was this instruction helpful to you?
Thank you for voting!
cooktop switch broken
Really easy. Part came in rapid time and was the right part. Went on web and got instructions with video how to install.
Parts Used:
-
kathleen from Wynantskill, NY
-
Difficulty Level:Really Easy
-
Total Repair Time:30 - 60 mins
-
Tools:Screw drivers, Socket set
1 person
found this instruction helpful.
Was this instruction helpful to you?
Thank you for voting!
The storage drawer came without supports.
I just removed the drawer and installed the rear supports as instructed on paper included with the part.
Parts Used:
-
Dock from Aurora, CO
-
Difficulty Level:Really Easy
-
Total Repair Time:Less than 15 mins
-
Tools:Nutdriver
2 of 4 people
found this instruction helpful.
Was this instruction helpful to you?
Thank you for voting!
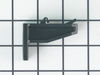
Plastic guide Broken
-
NICK from Vernon, CA
-
Difficulty Level:Easy
-
Total Repair Time:15 - 30 mins
-
Tools:Pliers, Screw drivers
9 of 25 people
found this instruction helpful.
Was this instruction helpful to you?
Thank you for voting!
burner would switch to full power randomly
Remove the top back panel to expose the switch. Remove the switch knob & mounting bezel and then unscrew the 2 mounting screws from the front. Replace the wires one by one and follow the enclosed directions in the event that this is an upgrade for an older switch. Remount the switch from the front and replace the back panel.
Parts Used:
-
Richard from SIMSBURY, CT
-
Difficulty Level:Easy
-
Total Repair Time:30 - 60 mins
-
Tools:Nutdriver, Pliers, Screw drivers
1 person
found this instruction helpful.
Was this instruction helpful to you?
Thank you for voting!
inner element not working
opened oven door and removed two 1/4 " screws from range top. lifted range top and propped open like a car hood with a 1" diam dowel rod. marked on new element the wire color locations from old element and removed wires. removed the two small screws and clips that hold the element to the range top and removed element. Matched where the mounting screws locate to the new element. Installed new element in reverse order.
Parts Used:
-
Michael from BAY CITY, MI
-
Difficulty Level:Really Easy
-
Total Repair Time:Less than 15 mins
-
Tools:Nutdriver, Pliers, Screw drivers
1 person
found this instruction helpful.
Was this instruction helpful to you?
Thank you for voting!
shortage in wiring cause the housing to burn out
Replaced new light housing.
Thanks to you guys for the prompt response
Thanks to you guys for the prompt response
Parts Used:
-
fred from PALM COAST, FL
-
Difficulty Level:Really Easy
-
Total Repair Time:Less than 15 mins
1 person
found this instruction helpful.
Was this instruction helpful to you?
Thank you for voting!
The center element of the 2-stage electric burner failed.
The cooktop is just set in the counter with no fasteners. I shut off the power and lifted the unit out. Ten small screws held the top to the body. After removal, I took a picture to have a wiring reference. I disconnected five wires with push-on terminals, then removed two Tinnerman nuts with needle-nose pliers. The failed burner was free to remove. There were two mounting ears on the bottom of the burner at positions 12 and 48 as stamped on the bottom. I transferred the mounting ears to the new burner, one screw each. I then positioned the new burner and secured with the two Tinnerman nuts, replaced the five wires, screwed the top back on and slipped the unit into the counter. Done.
Parts Used:
-
Robert from Cinnaminson, NJ
-
Difficulty Level:Easy
-
Total Repair Time:30 - 60 mins
-
Tools:Pliers, Screw drivers
2 of 4 people
found this instruction helpful.
Was this instruction helpful to you?
Thank you for voting!
Small element in center burned into(inoperative
1.Move range in position to access electrical wall disconnect and unplug. 2.Remove two 5/16 screws (located under top fwd. edge of cook top, Lift entire top assy up from front and prop with appropriate device(short 2x4 about18 inches long works well) 3.Remove two small phillips screws securing two metallic keeper devices holding burner assy in place. This should allow burner assy to be removed.4.Disconnect electrical spade connectors from ceramic terminal blocks on old burner assy.CAUTION: [SPADE CONNECTORS FIT TIGHTLY DO NOT PULL ON WIRES USE PRYING FORCE WITH FLAT SCREWDRIVER DIRECTLY ON TERMINAL].Remove connectors one at a time re-connecting to same location on new assy. Reassemble in reverse order.
Parts Used:
-
Douglas from Gravette, AR
-
Difficulty Level:Easy
-
Total Repair Time:30 - 60 mins
-
Tools:Nutdriver, Screw drivers
1 person
found this instruction helpful.
Was this instruction helpful to you?
Thank you for voting!
Remove and replace Broil (upper) heating element.
Turn off the power to the oven. (There should be a circuit breaker in the main power panel dedicated to just the oven) (the oven should be cool to the touch).
Open and remove the door by pulling it up and off the hinges (this is best accomplished with a helper).
Remove the racks (wire shelves).
Remove the two 1/4" mounting screws that secure the heating element to the back and the two screws that secure the element to the top of the oven..
Gently pull the wires out and disconnect them from the heating element.
Now reverse the process.
Connect the wires to the new heating element in the same fashion as they came off.
Push the wires and heating element back in place and secure with the four screws.
Replace the wire racks (shelves).
Replace the door (again, this is best accomplished with a helper).
Turn the power back on.
Run a test of the broiler to make sure the repair was completed properly.
voila!
Open and remove the door by pulling it up and off the hinges (this is best accomplished with a helper).
Remove the racks (wire shelves).
Remove the two 1/4" mounting screws that secure the heating element to the back and the two screws that secure the element to the top of the oven..
Gently pull the wires out and disconnect them from the heating element.
Now reverse the process.
Connect the wires to the new heating element in the same fashion as they came off.
Push the wires and heating element back in place and secure with the four screws.
Replace the wire racks (shelves).
Replace the door (again, this is best accomplished with a helper).
Turn the power back on.
Run a test of the broiler to make sure the repair was completed properly.
voila!
Parts Used:
-
Russell from ARROYO GRANDE, CA
-
Difficulty Level:Really Easy
-
Total Repair Time:30 - 60 mins
-
Tools:Nutdriver
1 person
found this instruction helpful.
Was this instruction helpful to you?
Thank you for voting!