















JP3536DJ2BB General Electric Cooktop - Instructions
Keep searches simple. Use keywords, e.g. "leaking", "pump", "broken" or "fit".
Outer element not working
Turn off breaker to stove. Remove 2 screws in front under stove top molding. Raise stove top from front on hinges in back. I used a piece of wood to support top up while I worked on burner. Remove screws holding old burner in place. I found my problem on the old burner - the outer element had been shorted and fried. Carefully remove each wire and reinstall in new burner in proper location. Reinstall burner and stove top with old screws.
Parts Used:

-
Larry from Stevensville, MD
-
Difficulty Level:Easy
-
Total Repair Time:Less than 15 mins
-
Tools:Screw drivers
6 of 9 people
found this instruction helpful.
Was this instruction helpful to you?
Thank you for voting!
Element broket
1.- going online to orden part 2 disconnect the power from the aplaince shoot Dow the power 3 tear down the appliance and disconnect the four terminals from the damage part reconnect the terminals to th new part reensamble the appliance and ready to go save $275 bucks in handy man labor
Parts Used:

-
Marco Antonio from CORP CHRISTI, TX
-
Difficulty Level:Really Easy
-
Total Repair Time:Less than 15 mins
-
Tools:Nutdriver
4 of 5 people
found this instruction helpful.
Was this instruction helpful to you?
Thank you for voting!
Stovetop radiant burner went out
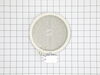
Turned off power at circuit breaker. Disconnected electrical connections from stove and lifted stove top out of counter. Removed glass top by removing about 8 screws from side of stove top.Replaced burner element and replaced glass top.
Parts Used:
-
Frank from Marietta, GA
-
Difficulty Level:Easy
-
Total Repair Time:15 - 30 mins
-
Tools:Screw drivers
4 of 8 people
found this instruction helpful.
Was this instruction helpful to you?
Thank you for voting!
Did not function
It’s easy to replace and you can found out the video from YouTube to follow the instructions
Parts Used:
-
Lung from PINEVILLE, NC
-
Difficulty Level:Really Easy
-
Total Repair Time:15 - 30 mins
-
Tools:Screw drivers
2 of 2 people
found this instruction helpful.
Was this instruction helpful to you?
Thank you for voting!
Installing new cooktop in an island
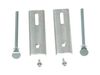
The included brackets would not work, so I ordered the alternate installation kit from this site and it made the job go easy.Thanks
Parts Used:
-
Donald E from SALEM, AL
-
Difficulty Level:Easy
-
Total Repair Time:30 - 60 mins
-
Tools:Nutdriver, Pliers, Screw drivers
2 of 4 people
found this instruction helpful.
Was this instruction helpful to you?
Thank you for voting!
8 Inch Burner Inop.
Remove range top [ten phillips screws] remove electrical connectors and lift out burner. Reverse procedure for installation.
Parts Used:
-
DONNA from EAST MEADOW, NY
-
Difficulty Level:Really Easy
-
Total Repair Time:15 - 30 mins
-
Tools:Socket set
Was this instruction helpful to you?
Thank you for voting!