















JKP07*D2 General Electric Wall Oven - Instructions
Keep searches simple. Use keywords, e.g. "leaking", "pump", "broken" or "fit".
old element blew up
Toughest chore was to find a tool to remove the two hex screws that held the element to the back of the oven. Once I found the proper tool, the rest was easy. Pulled the circuit breaker, removed the two hex screws, disconnected the two electrical leads and put the new part in and did everything in reverse. Probably saved over $100 doing it myself.
Parts Used:
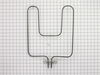
-
David from Chester Springs, PA
-
Difficulty Level:Easy
-
Total Repair Time:15 - 30 mins
-
Tools:Nutdriver, Screw drivers, Socket set
1 of 3 people
found this instruction helpful.
Was this instruction helpful to you?
Thank you for voting!
Light burnt out.
Turned the wire protector to the side. Turned out the old bulb and replaced it with the new. Turned the wire protector back in place and I'm like new.
Parts Used:

-
Roscoe G from ROCHESTER, NY
-
Difficulty Level:Very Easy
-
Total Repair Time:Less than 15 mins
2 of 6 people
found this instruction helpful.
Was this instruction helpful to you?
Thank you for voting!
Bake element burnt out
First, I turned of breaker for the appliance. Removed two hex head (1/4") screws that hold element in place at back of oven. Gently pulled element exposing wires connected at base of element by hex head screws. Removed the screws and olf elelemt, placed new element in place, tightened screws, inserted into base and tightned screws for plate that holds element. After turning on the breaker, I set the oven to a low temp so I could feel the heat without burning my hand and was satisfied that the element worked.
Parts Used:
-
Joe from Exton, PA
-
Difficulty Level:Easy
-
Total Repair Time:Less than 15 mins
-
Tools:Nutdriver
2 of 6 people
found this instruction helpful.
Was this instruction helpful to you?
Thank you for voting!
Bottom Heating element broke
Ordered the part on Fri. AM and it arrived Sat. PM! Could not believe how quickly it arrived. Husband replaced the old element and I am baking again! Thank you.
Parts Used:
-
Betty from Salem, NJ
-
Difficulty Level:Easy
-
Total Repair Time:Less than 15 mins
-
Tools:Pliers, Screw drivers
1 of 3 people
found this instruction helpful.
Was this instruction helpful to you?
Thank you for voting!
the bake element burned
as you explained in the e.g.
it was the easiest thing to do for my husband, and in 10 minutes I was able to bake again.
Thanks so much for the fast delivery!!!
Sincerely Rosemarie Ressel
it was the easiest thing to do for my husband, and in 10 minutes I was able to bake again.
Thanks so much for the fast delivery!!!
Sincerely Rosemarie Ressel
Parts Used:
-
Rosemarie from Saint Simons Island, GA
-
Difficulty Level:Really Easy
-
Total Repair Time:Less than 15 mins
-
Tools:Nutdriver
1 of 3 people
found this instruction helpful.
Was this instruction helpful to you?
Thank you for voting!
Burned out element
Removed two screws that held the element flange onto the back of the oven, then two more little screws that held the element tips to the wires in back. Installed in the reverse sequence in about 10 minutes. A whole lot cheaper than calling a repairman! Thanks, the PartSelect customer service lady was a great help in getting me the right part for a 20 year old oven too.
Parts Used:
-
Gregg from Centennial, CO
-
Difficulty Level:Really Easy
-
Total Repair Time:Less than 15 mins
-
Tools:Screw drivers
1 of 3 people
found this instruction helpful.
Was this instruction helpful to you?
Thank you for voting!
Heating element corroded.
I have to admit that I tried to remove the element myself but I did not have the right tool for the last two screws. If I did it would have been very easy. I ordered the part and had someone else put it in so I cheated.
Parts Used:
-
Diana from Millbrae, CA
-
Difficulty Level:Easy
-
Total Repair Time:15 - 30 mins
0 of 1 people
found this instruction helpful.
Was this instruction helpful to you?
Thank you for voting!
broken oven element
I removed the two screws that keep the element in place.Then I pull the element a little bit and disconnected the two wires and removed the old element. Then I reconnected the two wires on the new element then put the element back on position and put back the two screws that keep the element in place. Done.
Parts Used:
-
Juan from North White Plains, NY
-
Difficulty Level:Really Easy
-
Total Repair Time:Less than 15 mins
-
Tools:Pliers
0 of 1 people
found this instruction helpful.
Was this instruction helpful to you?
Thank you for voting!
Heaty element broke in half
Our home was built in 1990 and has an original GE oven in it. When the bake element broke in half, I thought for sure it meant buying a new oven. When I looked on line and found Part Select.com, I was impressed to find the exact part I needed. I requested the part on Saturday, and it arrived on Tuesday. I installed the part on Saturday just in time for hosting our Super Bowl party and baking enchiladas! You guys saved the day! Thanks PartSelect!
Parts Used:
-
Mike from Carrollton, TX
-
Difficulty Level:Really Easy
-
Total Repair Time:Less than 15 mins
-
Tools:Nutdriver, Wrench set
0 of 1 people
found this instruction helpful.
Was this instruction helpful to you?
Thank you for voting!
bottom unit in oven was burnt out
removed 4 screws and exchanged units put the 4 screws back in. about 10 min.
Parts Used:
-
robert from emden, MO
-
Difficulty Level:Really Easy
-
Total Repair Time:Less than 15 mins
-
Tools:Screw drivers
0 of 1 people
found this instruction helpful.
Was this instruction helpful to you?
Thank you for voting!
burned out lower heating element
Very simple 4 screws/nuts ...off on...done.
Best part was that I ordered the part regular shipping on a Sunday. Monday was a holiday...the part was at my doorstep at 8AM Tuesday morning. Wow that's service.
Best part was that I ordered the part regular shipping on a Sunday. Monday was a holiday...the part was at my doorstep at 8AM Tuesday morning. Wow that's service.
Parts Used:
-
Rand from San Mateo, CA
-
Difficulty Level:Really Easy
-
Total Repair Time:Less than 15 mins
-
Tools:Nutdriver, Screw drivers
0 of 1 people
found this instruction helpful.
Was this instruction helpful to you?
Thank you for voting!
oven wouldn't heat eliment was burnt and sparking
-
wayne from two rivers, WI
-
Difficulty Level:Easy
-
Total Repair Time:Less than 15 mins
-
Tools:Socket set
0 of 1 people
found this instruction helpful.
Was this instruction helpful to you?
Thank you for voting!
Lower heat element died in our 30+ yr old oven
-
Rachel from Stone Mountain, GA
-
Difficulty Level:Really Easy
-
Total Repair Time:Less than 15 mins
-
Tools:Screw drivers
0 of 1 people
found this instruction helpful.
Was this instruction helpful to you?
Thank you for voting!
Old element burned out
Turn off power to oven. Make sure with tester that the power is indeed off. Disconnected the two fasteners holding the old unit face plate to rear of oven. Pull the unit outward to expose the leads. Disconnected the leads. Reform new element to remove minor bends so it will sit flat on the floor of the oven. With plies holding the leads straight connect new unit to oven leads. Push new unit back into mounting hole. Reconnect new unit face plate to back of oven. Check that unit is level. Turn the power back on. Test the unit. All works just fine.
Parts Used:
-
Keith from Wauwatosa, AL
-
Difficulty Level:Really Easy
-
Total Repair Time:Less than 15 mins
-
Tools:Nutdriver, Pliers, Screw drivers
1 of 4 people
found this instruction helpful.
Was this instruction helpful to you?
Thank you for voting!
Old element burnt out.
No instructions provided, but not needed. Removed two screws holding element in place. Removed two screws connecting element to power wires. Installed new element using reverse process.
Parts Used:
-
Charles from Saint Louis, MO
-
Difficulty Level:Really Easy
-
Total Repair Time:Less than 15 mins
-
Tools:Nutdriver, Screw drivers
0 of 1 people
found this instruction helpful.
Was this instruction helpful to you?
Thank you for voting!