















JGBP26BEA3CT General Electric Range - Instructions
Keep searches simple. Use keywords, e.g. "leaking", "pump", "broken" or "fit".
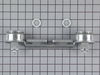
My old burners were beyond the point of coming clean and made my stove top look bad.
My husband and I simply took the burner units out of the packing, took the old ones off, put the new ones in. The new units needed to be leveled, but the leveling nuts included fit perfectly, and the entire repair took less than 15 minutes.
Parts Used:
-
Helen from Flemington, NJ
-
Difficulty Level:Easy
-
Total Repair Time:Less than 15 mins
23 of 30 people
found this instruction helpful.
Was this instruction helpful to you?
Thank you for voting!
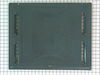
Pies Boiled Over And Baked On Oven Bottom
Removed the two screws put the heat shield off the old one onto the new one put new bottom in and tightened two screws. Done #38. 69 Cost of part with shipping cost included.
Parts Used:
-
Marjorie from Yucca Valley, CA
-
Difficulty Level:Really Easy
-
Total Repair Time:Less than 15 mins
-
Tools:Screw drivers
20 of 25 people
found this instruction helpful.
Was this instruction helpful to you?
Thank you for voting!
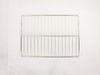
Oven rack missing when I purchased the house
I was very pleased with how quickly the new oven rack arrived and it was a perfect fit. Thanks.
Parts Used:
-
Patricia from Houston, TX
-
Difficulty Level:Really Easy
-
Total Repair Time:Less than 15 mins
18 of 28 people
found this instruction helpful.
Was this instruction helpful to you?
Thank you for voting!
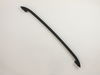
the oven handle broke during delivery
I remove the damage handle from the oven door,Then i install the new door handle with no problem.The tools i used was a hand nut driver and a phillip #3driver.
Parts Used:
-
william from new orleans, LA
-
Difficulty Level:Easy
-
Total Repair Time:Less than 15 mins
-
Tools:Nutdriver, Screw drivers
15 of 19 people
found this instruction helpful.
Was this instruction helpful to you?
Thank you for voting!
Burners were burning the pans and flames coming out at all different angles of the burner
The toughest part of the repair was the preparation to remove the old burners. As a result of the burning there was a carbon residue on the burners, on the gas outlet feed to the burners. This took some scrubbing and removing the carbon residue. Bits had burned onto the outlet and had to be scrapped off. Once all cleaned, replacing the burners was easy just had to place the balancing nuts in place and put on the burners. One problem arose the hood of the stove did not go back in place after replacing the burners so I then removed the balancing nuts put back on the burners stove top hood fit back in place and burners operated properly. This part of the repair took five minutes.
Parts Used:
-
ANNE from HICKSVILLE, NY
-
Difficulty Level:Easy
-
Total Repair Time:15 - 30 mins
13 of 15 people
found this instruction helpful.
Was this instruction helpful to you?
Thank you for voting!
Interior light needed replaced
Unplugged the appliance for safety. Removed two 1/4" screws that held the assembly in place. Carefully removed the wire guard that retains the glass shield. Unscrewed old light bulb and replaced with new part. Reversed the steps after cleaning glass cover.
Parts Used:

-
Leo from TWIN FALLS, ID
-
Difficulty Level:Really Easy
-
Total Repair Time:Less than 15 mins
-
Tools:Nutdriver
22 of 43 people
found this instruction helpful.
Was this instruction helpful to you?
Thank you for voting!
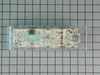
oven wouldn't head at the right temp.
frist removed 4 screws from the side cover 2 screw from the front cover disconect 4screw that hold the part in discont the 4 wires
Parts Used:
-
Lynn from Luling, LA
-
Difficulty Level:Really Easy
-
Total Repair Time:Less than 15 mins
-
Tools:Screw drivers
16 of 27 people
found this instruction helpful.
Was this instruction helpful to you?
Thank you for voting!
Burners very old / needed to replace
Very easy! Open the top of the stove, remove the old double burner and place the new one! Anyone can do it! It's that easy... :)
Parts Used:
-
Debbie from Santa Clara, CA
-
Difficulty Level:Really Easy
-
Total Repair Time:Less than 15 mins
9 of 9 people
found this instruction helpful.
Was this instruction helpful to you?
Thank you for voting!
Needed extra oven space
Thanksgiving was coming and I needed extra oven space. So I ordered an additional rack. Installation ... just put it in the oven. My part came the day after I ordered it.
Parts Used:
-
noreen from flushing, NY
-
Difficulty Level:Really Easy
-
Total Repair Time:Less than 15 mins
11 of 15 people
found this instruction helpful.
Was this instruction helpful to you?
Thank you for voting!
Oven bottom tray would not clean up.Looked like finish was off it
removed two screws and took out bottom tray and put the new one in and replaced the screws.DId it my self.
Parts Used:
-
Jim from 29 Palms, CA
-
Difficulty Level:Really Easy
-
Total Repair Time:Less than 15 mins
-
Tools:Screw drivers
11 of 17 people
found this instruction helpful.
Was this instruction helpful to you?
Thank you for voting!
Twice I ordered the oven light bulb & each time the light bulb was defected
I had to call for a appointment for repair with GE Appliance because I thought then it . .was something electrical. The technician came out & checked everything out, turned out it was not electrical, The technician went out to his truck got a light bulb from his truck, put it in & it worked. It cost me $121.00 for trip charge from GE appliance for a light bulb that worked, your light bulbs were defective twice. Very disappointed with your products, cost me alot of money for a good light bulb thru GE appliance
Parts Used:
-
Barbara from BELLEVUE, WA
-
Difficulty Level:Very Difficult
-
Total Repair Time:Less than 15 mins
15 of 32 people
found this instruction helpful.
Was this instruction helpful to you?
Thank you for voting!
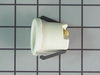
Replace Oven light socket and light bulb in kitchen Range
1) Turn off power at circuit breaker panel
2) Slide out Range from wall
3) Unplug Range
4) Remove back panel and unplug electrical connections to socket
5) From front of oven, remove glass cover over old oven light bulb and remove flange that holds socket and bulb
6) Remove old socket from mounting flange and discard.
7) Place new socket into mounting flange
8) Screw mounting flange and new socket into the oven from front. Reattach electrical connections from back.
9) Screw in new light bulb from front
10) Replace existing glass cover over new light bulb and snap wire holder in place
11) Replace back panel
11) Plug in range
12) Slide range back to original position
13) Turn on power
Works like a charm! Thanks for having the parts after 30 years!
2) Slide out Range from wall
3) Unplug Range
4) Remove back panel and unplug electrical connections to socket
5) From front of oven, remove glass cover over old oven light bulb and remove flange that holds socket and bulb
6) Remove old socket from mounting flange and discard.
7) Place new socket into mounting flange
8) Screw mounting flange and new socket into the oven from front. Reattach electrical connections from back.
9) Screw in new light bulb from front
10) Replace existing glass cover over new light bulb and snap wire holder in place
11) Replace back panel
11) Plug in range
12) Slide range back to original position
13) Turn on power
Works like a charm! Thanks for having the parts after 30 years!
Parts Used:
-
Ronald from TUCSON, AZ
-
Difficulty Level:A Bit Difficult
-
Total Repair Time:30 - 60 mins
-
Tools:Pliers, Screw drivers, Socket set, Wrench set
6 of 6 people
found this instruction helpful.
Was this instruction helpful to you?
Thank you for voting!
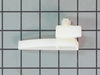
I broke the left drawer glide on our oven
I unscrewed to old glide and replaced it then re attached the screw
Parts Used:
-
Keith from Freeport, IL
-
Difficulty Level:Really Easy
-
Total Repair Time:Less than 15 mins
-
Tools:Screw drivers
5 of 6 people
found this instruction helpful.
Was this instruction helpful to you?
Thank you for voting!
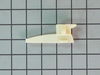
nylon guide was broke off
took drawer out removed broken guide. It had 1 screw removed it put the new guide in place put screw back in. Put drawer back in stove, It works fine.
Parts Used:
-
Lathan from Goodyear, AZ
-
Difficulty Level:Really Easy
-
Total Repair Time:15 - 30 mins
-
Tools:Screw drivers
5 of 7 people
found this instruction helpful.
Was this instruction helpful to you?
Thank you for voting!
old blackened oven racks
-
Roger from Falls Church, VA
-
Difficulty Level:Really Easy
-
Total Repair Time:Less than 15 mins
8 of 17 people
found this instruction helpful.
Was this instruction helpful to you?
Thank you for voting!