















JE1460BF002 General Electric Microwave - Instructions
Keep searches simple. Use keywords, e.g. "leaking", "pump", "broken" or "fit".
light out
get microwave out of cabinet. Took two people because it was very heavy. Used special hex drive socekt because of dimple in the female nut.
Parts Used:
-
charles from RATHDRUM, ID
-
Difficulty Level:Really Easy
-
Total Repair Time:30 - 60 mins
-
Tools:Screw drivers
2 of 2 people
found this instruction helpful.
Was this instruction helpful to you?
Thank you for voting!
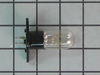
Replacing burnt out bulb on microwave
To remove the outer cover of the microwave you have to unscrew 7 or 8 Phillips screws but most of them have "secure" type heads, so you need a driver with a hole in the middle, to fit over the pin on the screw head. I had one of those already, so it wasn't a problem. The metal cover is slid between rubberized strips on the front face of the enclosure and needs to be lifted and tugged out quite firmly in order to release it. Once the cover was removed, the bulb can be seen attached to the main frame of the microwave by a soft metal lug that can be bent back by hand to release the bulb and its integrated holder. The wiring harness simply pulls off of the bulb prongs and there you have the charred remains of the original bulb! I tried every appliance store and hardware store in Bismarck, but nobody had this part. When I typed in the serial number on the bulb, Partselect's site came up with exactly what I needed. Replacement was a simple reversal of the process, making sure not to over-tighten the sheet metal screws on the cabinet. Voila! We have light beams again. Thanks Partselect.
Parts Used:
-
Paul from BISMARCK, ND
-
Difficulty Level:Easy
-
Total Repair Time:15 - 30 mins
-
Tools:Screw drivers
2 of 2 people
found this instruction helpful.
Was this instruction helpful to you?
Thank you for voting!
Light bulb was burned out - the microwave still worked, but no light
removed the outer case - this was the most difficult part because the microwave is large, heavy, and cumbersome.
once the outer case was off, it was simple - easy to see where the old part was and the replacement was an exact match
it was then just a matter of disconnecting the old burned out part and replacing it with the new one
then wrestling the outer cover back into place and re-fitting the screws.
Microwave is fine now and hopefully good for another 10 years!
once the outer case was off, it was simple - easy to see where the old part was and the replacement was an exact match
it was then just a matter of disconnecting the old burned out part and replacing it with the new one
then wrestling the outer cover back into place and re-fitting the screws.
Microwave is fine now and hopefully good for another 10 years!
Parts Used:
-
Janet from BLOOMFIELD, NY
-
Difficulty Level:Easy
-
Total Repair Time:30 - 60 mins
-
Tools:Nutdriver, Screw drivers
2 of 2 people
found this instruction helpful.
Was this instruction helpful to you?
Thank you for voting!
Microwave not turning on. All other functions operate
DISCONNECT THE POWER CORD and discharge the capacitor
Leave unplugged overnight
Remove vent grille by removing the 2 philips screws
Remove the LED panel by removing 1 phillips screw
Disconnect all connectors that plug into back of the LED board completely
Remove the wires from the switches (3) at the inside edge of the microwave door
Gently remove each switch housing and test all three switches for continuity
Carefully replace non-functioning switches and reassemble the panel
GOOD LUCK
Leave unplugged overnight
Remove vent grille by removing the 2 philips screws
Remove the LED panel by removing 1 phillips screw
Disconnect all connectors that plug into back of the LED board completely
Remove the wires from the switches (3) at the inside edge of the microwave door
Gently remove each switch housing and test all three switches for continuity
Carefully replace non-functioning switches and reassemble the panel
GOOD LUCK
Parts Used:
-
Tom from DENVER, CO
-
Difficulty Level:A Bit Difficult
-
Total Repair Time:1- 2 hours
-
Tools:Screw drivers
2 of 2 people
found this instruction helpful.
Was this instruction helpful to you?
Thank you for voting!
Light didn't work
I assumed light was burned out and got a replacement bulb.
Removed back and side screws with slight difficulity.
Was not able to remove cover. The top front would not loosen. I tried every trick in my 80 year repertoire. I gave up and put it back together.
I emailed PartSelect last week explaining the problem. So far no reply.
I am sure I have the right model # and others seem to have little trouble removing the cover.
I paid $85 + tax for the oven and it has worked well for about 8(?) years.
From what I read here, I figured I could handle the bulb replacement.
I'm just out the cost of the bulb and shipping and the oven still works. It would have been nice to have the light work again but we will just wait until it quits working and buy another inexpensive unit.
Removed back and side screws with slight difficulity.
Was not able to remove cover. The top front would not loosen. I tried every trick in my 80 year repertoire. I gave up and put it back together.
I emailed PartSelect last week explaining the problem. So far no reply.
I am sure I have the right model # and others seem to have little trouble removing the cover.
I paid $85 + tax for the oven and it has worked well for about 8(?) years.
From what I read here, I figured I could handle the bulb replacement.
I'm just out the cost of the bulb and shipping and the oven still works. It would have been nice to have the light work again but we will just wait until it quits working and buy another inexpensive unit.
Parts Used:
-
FLEET from OLYMPIA, WA
-
Difficulty Level:Very Difficult
-
Total Repair Time:More than 2 hours
-
Tools:Screw drivers, Wrench (Adjustable)
1 person
found this instruction helpful.
Was this instruction helpful to you?
Thank you for voting!
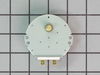
The Turn Table Didn't Work Every Time.
Remove tray and rotating ring assembly. Turn the microwave onto the back. Locate the center plate and cut it loose with the side cutters. (Note: there are retaining slots on the opposite side) these slots hold the cover plate in place when reattaching. Use a magnetic phillips head screw driver so you don't drop the cover retaining screw. After cutting loose the cover, unplug the wires from the motor. (Note placement for correct reattachment). Remove 2 screws and remove old motor. Replace motor. Replace the screws and reattach the wires. Replace the cover (rotate so the prongs fit into the slots) tighten screw; you're done!!! I ordered the rotating ring, but I don't need it. Now I have an extra.
Parts Used:
-
Sandra from Kosse, TX
-
Difficulty Level:Really Easy
-
Total Repair Time:Less than 15 mins
-
Tools:Screw drivers
1 person
found this instruction helpful.
Was this instruction helpful to you?
Thank you for voting!
no power in microwave in turn table wouldn't turn light would work act like door was open
remov cover to check voltage and found problem at the interlock switch ohm the switch and found it was open replace both switches it work fine now
Parts Used:
-
johnny from port orange, FL
-
Difficulty Level:Easy
-
Total Repair Time:1- 2 hours
-
Tools:Screw drivers
5 of 13 people
found this instruction helpful.
Was this instruction helpful to you?
Thank you for voting!
Try to heat food and fuse would blow.
-
bart from new sarpy, LA
-
Difficulty Level:A Bit Difficult
-
Total Repair Time:1- 2 hours
-
Tools:Screw drivers
8 of 22 people
found this instruction helpful.
Was this instruction helpful to you?
Thank you for voting!
Microwave would not heat up
-
Suzanne from POWELL, OH
-
Difficulty Level:Really Easy
-
Total Repair Time:15 - 30 mins
1 person
found this instruction helpful.
Was this instruction helpful to you?
Thank you for voting!
Door Switch went bad, Internal Fan would run every time you open the door
Unscrewed the control panel (2 screws), lift up and let hang, with a plan screwdriver open bracket holding the switch, unplug 2 wires, replace with new switch, plug in the 2 wires, push switch back into bracket. Then slide on the control panel, put the 2 screws back. Easy fix.
Parts Used:
-
gilbert from TOMS RIVER, NJ
-
Difficulty Level:Really Easy
-
Total Repair Time:15 - 30 mins
-
Tools:Screw drivers
1 person
found this instruction helpful.
Was this instruction helpful to you?
Thank you for voting!
Turntable Stopped Working/Display Timer Would Countdown But Not Heat
With this model, you must remove the outer covering. Don't try to access the display unit from the front like I've seen in some other GE microwave videos. After removing the outer covering, the switches are easy to replace. They are very visible and easy to get to without taking any other parts off. You will see the door switches just behind the display board. Remove the switch and then remove the connecting wires to ensure you don't inadvertently brake a wire. You will need a tamper resistant star bit to remove 3 or 4 screws from the back panel. All other screws are philips head. I went ahead and replaced both switches (yes...there are two of them) and works like a charm. I saved an $800 microwave for less than $60 and know what to do if it happens again. Appears to be a common problem on this model. Thanks for others making a post...It saved me time and money reading others remarks. Good luck!
Parts Used:
-
Steve from Wesley Chapel, FL
-
Difficulty Level:Really Easy
-
Total Repair Time:30 - 60 mins
-
Tools:Screw drivers
1 person
found this instruction helpful.
Was this instruction helpful to you?
Thank you for voting!
light bulb burned out
Remove the top of the microwave, regular phillips screws on sides, torque screws on back. Lift up back and slide off cover. Light bulb socket is easily detached and bulb unplugged and replaced. Slide cover from back lifted slightly so lip will slide into front of microwave, than replace screws. Be sure to unplug microwave before you start.
Parts Used:
-
Eugene from BOZEMAN, MT
-
Difficulty Level:Easy
-
Total Repair Time:30 - 60 mins
-
Tools:Nutdriver, Screw drivers
1 person
found this instruction helpful.
Was this instruction helpful to you?
Thank you for voting!
The unit would run when the door was open!
First I had to accept the fact that the unit was designed to keep non-professional people from doing any repairs. The switch was installed in such a manner that I had to break the mounting to remove the switch, then drill a hole in the mounting to secure the new switch in place.
Parts Used:
-
Mike from BLUFFTON, SC
-
Difficulty Level:A Bit Difficult
-
Total Repair Time:1- 2 hours
-
Tools:Nutdriver, Pliers, Screw drivers, Socket set, Wrench set
1 person
found this instruction helpful.
Was this instruction helpful to you?
Thank you for voting!
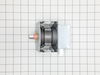
Burned out magnetron
Removed cover
Disconnected capacitor from old magnetron
Removed old magnetron
Installed new part
Connected capacitor
Reinstalled cover
Disconnected capacitor from old magnetron
Removed old magnetron
Installed new part
Connected capacitor
Reinstalled cover
Parts Used:
-
Dewey from MADISON, AL
-
Difficulty Level:Very Easy
-
Total Repair Time:15 - 30 mins
-
Tools:Screw drivers
1 person
found this instruction helpful.
Was this instruction helpful to you?
Thank you for voting!
Not heat
-unplug
-remove top and front covers
-unplug wire connectors from heating assembly
-remove heating assembly from metal stand and push out of the way
-remove metal stand from dry
-pull out heating assembly
-install new one in reserve order
-remove top and front covers
-unplug wire connectors from heating assembly
-remove heating assembly from metal stand and push out of the way
-remove metal stand from dry
-pull out heating assembly
-install new one in reserve order
Parts Used:

-
Kip from POWELL, OH
-
Difficulty Level:Very Easy
-
Total Repair Time:15 - 30 mins
-
Tools:Screw drivers, Socket set
1 person
found this instruction helpful.
Was this instruction helpful to you?
Thank you for voting!