















JDS9860BCP Jenn-Air Range - Instructions
Keep searches simple. Use keywords, e.g. "leaking", "pump", "broken" or "fit".
Stove top wouldn't come on. Oven couldn't go higher than low heat
Had a technician from Home Advisor to check the problem out with my Whirlpool Double oven(1 1/2 old). Paid $60 to find the problem. According to the technician problem was control board and cost of labor and parts $465.00
Jumped on Part Select website, placed a question with my stove problem through the chat. Immediately they answered my question and told me the problem was the Terminal Block. Cost of part and shipping $25.00. Replaced it myself and everything works fine.
Thank you, Thank you Part Select for your help and honesty.
Sincerely
Peter from Maryland
Jumped on Part Select website, placed a question with my stove problem through the chat. Immediately they answered my question and told me the problem was the Terminal Block. Cost of part and shipping $25.00. Replaced it myself and everything works fine.
Thank you, Thank you Part Select for your help and honesty.
Sincerely
Peter from Maryland
Parts Used:

-
Peter from FREDERICK, MD
-
Difficulty Level:Really Easy
-
Total Repair Time:Less than 15 mins
-
Tools:Screw drivers, Socket set
7 of 9 people
found this instruction helpful.
Was this instruction helpful to you?
Thank you for voting!
my oven would not heat to proper temp
I slide the range out and unplugged it from the outlet. I removed the back of the oven ( 8 screws ) using a cordless drill and phillips bit then with a phillips screwdriver I removed the oven sensor (2 screws) then I installed the new sensor , reinstalled the oven back , plugged the range in , slide it back into place and that was it. This repair took about 10 mins and the oven works perfectly. Thanks !
Parts Used:
-
mark from CHAMBERLAIN, SD
-
Difficulty Level:Very Easy
-
Total Repair Time:Less than 15 mins
-
Tools:Screw drivers
6 of 6 people
found this instruction helpful.
Was this instruction helpful to you?
Thank you for voting!
Element Melted
First, I shut the power at the main box then, I removed the screws holding the element to top of stove then removed two screws in the back wall that the element was secured to. Then took pliers and pulled apart the wire and the end of the element and then just reversed the procedure and then turn on the power and it worked fine.
Parts Used:
-
Ben from Bethlehem, PA
-
Difficulty Level:Really Easy
-
Total Repair Time:Less than 15 mins
-
Tools:Pliers, Screw drivers
8 of 13 people
found this instruction helpful.
Was this instruction helpful to you?
Thank you for voting!
Downdraft Blower Failure
Blower motor stopped working and the breaker tripped. Horrible smell! from the somewhere in the oven. Looking at the wiring diagram told me that there was a relay board feeding he motor, but I had no idea where it was, which took a little Internet searching to find it. Finally seeing that it was in the rear I was happy to see that there was enough flexible gas line to pull out the stove enough to check the board, which was fried. I replaced the board and then looked for the reason it smoked and found that the blower motor was shorted (and stank horribly).
It was straighforward to replace, but when I put everything back, NOTHING worked at all - no lights on the control panel, nothing. I then checked the voltage across the terminals and saw 240V and was puzzled until saw that there was no 120V to neutral where the plug connected to the back of the stove. The outlet, however, had 120V to neutral. Since it was a molded plug I thought that was not likey to be a cmmon failure, so after killing th breaker I took off the outlet cover that the stove plugged into and found out that the neutral terminal was intermittent.
The neutral contacts were not grabbing the netral terminal on the plug tightly enough and were a little discolored in one spot. All that moving around of the plug while moving the stove probably moved it just enough not to work at all - that thing was a fire hazard that I'm surprised hadn't been the cause of more damage in a house only 12 years old. Rather than try and clean the termnals and trust bending them to be tighter (and worry about metal fatigue) I spent the $10 so that I could sleep better for a tight new 240V 30A outlet.
Everthing works like a charm now.
It was straighforward to replace, but when I put everything back, NOTHING worked at all - no lights on the control panel, nothing. I then checked the voltage across the terminals and saw 240V and was puzzled until saw that there was no 120V to neutral where the plug connected to the back of the stove. The outlet, however, had 120V to neutral. Since it was a molded plug I thought that was not likey to be a cmmon failure, so after killing th breaker I took off the outlet cover that the stove plugged into and found out that the neutral terminal was intermittent.
The neutral contacts were not grabbing the netral terminal on the plug tightly enough and were a little discolored in one spot. All that moving around of the plug while moving the stove probably moved it just enough not to work at all - that thing was a fire hazard that I'm surprised hadn't been the cause of more damage in a house only 12 years old. Rather than try and clean the termnals and trust bending them to be tighter (and worry about metal fatigue) I spent the $10 so that I could sleep better for a tight new 240V 30A outlet.
Everthing works like a charm now.
Parts Used:
-
Steven from Marshfield, MA
-
Difficulty Level:A Bit Difficult
-
Total Repair Time:1- 2 hours
-
Tools:Nutdriver, Screw drivers
10 of 19 people
found this instruction helpful.
Was this instruction helpful to you?
Thank you for voting!
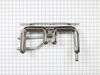
grill burner was old and started to deteriorate.
I haven't done anything yet because the part I am replacing is different from the one i have to order. I guess you might say I am getting screwed. I purchased the grill burner for $234.00 plus tax and shipping. Then realized I needed to purchase an igniter. My original one came with 2 igniters attached to the burner part. These new ones are all separate. $55 and $49 if i remember correctly. I ordered just the larger one and I am hoping I do not have to buy the smaller one. The large igniter will not even arrive until the end of August that is 6 weeks after the order date. I was told by the customer service rep it would only take 10 days to get it to the warehouse.The price tag is over $500 just to replace the grill burner on my stove top.That is some rip off. Otherwise my stove top is in excellent condition.
Parts Used:
-
jean from ST PETE BEACH, FL
-
Difficulty Level:Really Easy
-
Total Repair Time:30 - 60 mins
5 of 5 people
found this instruction helpful.
Was this instruction helpful to you?
Thank you for voting!
Oven sensor caused cooling fan to run continuously. Had to flip breaker to get it to turn off..
Left oven off. Located sensor in pdf manual. Unscrewed mount, pulled sensor out to access connector. Disconnected old sensor, checked continuity(resistance) on ohms with multimeter. No continuity; connected new sensor, screwed mount back into place, turned on oven and baked cookies to check operation & it worked perfectly.
Parts Used:
-
Aubrey from EADS, TN
-
Difficulty Level:Really Easy
-
Total Repair Time:Less than 15 mins
-
Tools:Screw drivers
5 of 5 people
found this instruction helpful.
Was this instruction helpful to you?
Thank you for voting!
Heating element broke, needed replacement
Repairman wanted $99 just to come look at it, then the cost to fix it. I got online, found the part, 2 screws and $40 later and all fixed. Wife baked me an apple pie that evening, better than ever!
Parts Used:

-
thomas from LOUISVILLE, KY
-
Difficulty Level:Very Easy
-
Total Repair Time:Less than 15 mins
-
Tools:Screw drivers
5 of 5 people
found this instruction helpful.
Was this instruction helpful to you?
Thank you for voting!
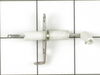
burner would not ignite
Even though the ceramic insulator looked new (white), it had become non-functional, replacement was simple, 2 phillips screws, reassemble and test. Now I will have to order the other 3.
Parts Used:
-
Scott from Sacramento, CA
-
Difficulty Level:Really Easy
-
Total Repair Time:Less than 15 mins
-
Tools:Screw drivers
6 of 8 people
found this instruction helpful.
Was this instruction helpful to you?
Thank you for voting!
Bottom baking element stoped heating
First I removed the two screws on the bottom heating element that hold the element in palace,one on the left side one on the right side, I then pulled the element out about 2 to 3 inches and disconnected the two wires. I then installed the new element. It took me about 20 mins. The cost of having some come out to fix this was about ten times of what I paid for this part. Thanks for the quick service.
Parts Used:
-
Napoleon from Glen Carbon, IL
-
Difficulty Level:Really Easy
-
Total Repair Time:15 - 30 mins
-
Tools:Screw drivers
5 of 6 people
found this instruction helpful.
Was this instruction helpful to you?
Thank you for voting!
oven wouldn't heat. Lower element only .
First, I removed the two screws that hold the element in place. I then tried to pull the element out to disconnect the wires attached to the clips. The left side came right out. The right side would not. Had to pull the range out from the wall
(would only come out about a foot and a half due to the gas line connection). Removed the back (2 screws). Removed the clip from the element from the rear and redirected the wire into the oven. Replaced the back, pushed the oven back, attached the wire clip and screwed the element in place. Works fine. This is definitely a job not requiring an electrician.
(would only come out about a foot and a half due to the gas line connection). Removed the back (2 screws). Removed the clip from the element from the rear and redirected the wire into the oven. Replaced the back, pushed the oven back, attached the wire clip and screwed the element in place. Works fine. This is definitely a job not requiring an electrician.
Parts Used:
-
harry from chapel hill, NC
-
Difficulty Level:Easy
-
Total Repair Time:30 - 60 mins
-
Tools:Screw drivers
5 of 6 people
found this instruction helpful.
Was this instruction helpful to you?
Thank you for voting!
ELEMENT BURNT OUT
turn off breaker take two screws loose from back of oven slowly pull out element unplug element an plug new element in push element in place an put screws back in turn on breaker done
Parts Used:
-
stacy from West Liberty, KY
-
Difficulty Level:Really Easy
-
Total Repair Time:Less than 15 mins
-
Tools:Screw drivers
5 of 6 people
found this instruction helpful.
Was this instruction helpful to you?
Thank you for voting!
high blower vibration
blower wheel was caked with dried grease clumps; replaced blower wheel, urethan foam and 3 motor isolators; blower/fan no longer vibrating cooktop.
Parts Used:


-
Lawrence from Chandler, TX
-
Difficulty Level:Really Easy
-
Total Repair Time:1- 2 hours
-
Tools:Nutdriver, Pliers, Screw drivers, Socket set
10 of 21 people
found this instruction helpful.
Was this instruction helpful to you?
Thank you for voting!
oven would not heat up
Removed the oven door and oven racks. Turned off the power to the range/oven. Unscrewed the bottom element and place the new element in its place. Screwed element in and replaced the oven door and racks. Turned the power back on and turned the oven on. It works great.
Parts Used:
-
Mary Ann from Rimrock, AZ
-
Difficulty Level:Really Easy
-
Total Repair Time:15 - 30 mins
-
Tools:Screw drivers
5 of 7 people
found this instruction helpful.
Was this instruction helpful to you?
Thank you for voting!
broken door hinge
unplug unit remove rear panel screws lift up stove top remove top two screws remove panel remove two hinge screws remove replace hinge and follow in reverse order
Parts Used:

-
James from Elmont, NY
-
Difficulty Level:Easy
-
Total Repair Time:15 - 30 mins
-
Tools:Nutdriver, Screw drivers
7 of 14 people
found this instruction helpful.
Was this instruction helpful to you?
Thank you for voting!
Lack of burner gas ignition
I used the other good burner assembly to isolate the problem to the igniters or the igniter block. I ordered both parts from Parts Select. They shipped the parts promptly and after 10 minutes of install time, the burners worked flawlessly.
Thank You Parts Select.
Thank You Parts Select.
Parts Used:
-
Andrew from Lufkin, TX
-
Difficulty Level:Really Easy
-
Total Repair Time:Less than 15 mins
-
Tools:Screw drivers
5 of 8 people
found this instruction helpful.
Was this instruction helpful to you?
Thank you for voting!