















JCGS650SEF4SS General Electric Range - Instructions
Keep searches simple. Use keywords, e.g. "leaking", "pump", "broken" or "fit".
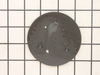
Food ran over the burner and damaged it.It was easy to place it back inII
It only required placing the new burner in the proper location.
Parts Used:
-
Alan from PASADENA, TX
-
Difficulty Level:Really Easy
-
Total Repair Time:30 - 60 mins
1 person
found this instruction helpful.
Was this instruction helpful to you?
Thank you for voting!
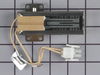
oven would not come on
remove the door,racks,cover over burner,burner,element,replaced element and rest in reversed order.
Parts Used:
-
Carl from Bristol, VT
-
Difficulty Level:Really Easy
-
Total Repair Time:30 - 60 mins
-
Tools:Socket set
2 of 4 people
found this instruction helpful.
Was this instruction helpful to you?
Thank you for voting!
Oven would not light-element glowed
First I removed the botoom drawer.
Second, removed three 1/4 in (head size) screws and removed the reflector pan from the bottom of the oven.
Third I removed the three racks in the main part of the oven and then the two slot head screws that retain the oven floor. I then removed the oven floor.
Four, now that I had access to the ignitor, I removed the two 1/4 (head size) screws that mounted the ignitor to the burner.
Fifth I disconnected the wire plug which is located in the lower section of the oven. I was unable to route the wire with it's connector on out of the oven, so I just snipped the wires and took it out in two pieces.
Installation was just the reversal of this with the obvious exception of snipping the wires. I was able to route the wires differently so that I did not have to pass the connector behind any restrictions.
Finally afte all was reassembled, I did an ops check and everything worked just fine.
Second, removed three 1/4 in (head size) screws and removed the reflector pan from the bottom of the oven.
Third I removed the three racks in the main part of the oven and then the two slot head screws that retain the oven floor. I then removed the oven floor.
Four, now that I had access to the ignitor, I removed the two 1/4 (head size) screws that mounted the ignitor to the burner.
Fifth I disconnected the wire plug which is located in the lower section of the oven. I was unable to route the wire with it's connector on out of the oven, so I just snipped the wires and took it out in two pieces.
Installation was just the reversal of this with the obvious exception of snipping the wires. I was able to route the wires differently so that I did not have to pass the connector behind any restrictions.
Finally afte all was reassembled, I did an ops check and everything worked just fine.
Parts Used:
-
David from Huntington Woods, MI
-
Difficulty Level:Easy
-
Total Repair Time:15 - 30 mins
-
Tools:Screw drivers, Socket set
2 of 4 people
found this instruction helpful.
Was this instruction helpful to you?
Thank you for voting!
Oven wouldn't light
Remove interior bottom of oven, remove igniter screws, unplug igniter. reinstall igniter.
Parts Used:
-
David from FLAGSTAFF, AZ
-
Difficulty Level:Easy
-
Total Repair Time:15 - 30 mins
-
Tools:Screw drivers
1 person
found this instruction helpful.
Was this instruction helpful to you?
Thank you for voting!
Gas Range oven not heating/replaced new heating element
Removed oven shelves, removed lower cover, removed heating element, removed lower drawer and unplugged element.
Parts Used:
-
Andrew from EL SOBRANTE, CA
-
Difficulty Level:Really Easy
-
Total Repair Time:15 - 30 mins
-
Tools:Nutdriver, Screw drivers
2 of 4 people
found this instruction helpful.
Was this instruction helpful to you?
Thank you for voting!
igniter wouldn.t work
had to take back off of oven because of the connector and the plug end insert had the wrong pin so i had to take it apart and use old ones then i put the assembly in /and put oven back together
Parts Used:
-
don from rohnert park, CA
-
Difficulty Level:A Bit Difficult
-
Total Repair Time:30 - 60 mins
-
Tools:Nutdriver, Socket set
2 of 4 people
found this instruction helpful.
Was this instruction helpful to you?
Thank you for voting!
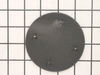
Burner cap replacement
I got really great customer service on finally getting the right part. It came really fast it fit perfect but the cap is a high gloss black instead of a flat black. I will need to call customer service again to see if they can the correct color this time.
Otherwise everything was great!
Otherwise everything was great!
Parts Used:
-
Rita from ST AUGUSTINE, FL
-
Difficulty Level:Really Easy
-
Total Repair Time:Less than 15 mins
1 person
found this instruction helpful.
Was this instruction helpful to you?
Thank you for voting!
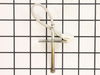
Not Reaching Temperature above 300 Degrees
Take off 6 screws of back cover of the range, unplug the white wire. Go to the inside of oven, pull out racks. At the top of the oven is your Broiler element, in the center you will see a rod sticking out with one screw holding it in place. Take out screw and pull temperature sensor out toward you. Reverse steps to put it back together.
Parts Used:
-
Ron from SAN TAN VLY, AZ
-
Difficulty Level:Very Easy
-
Total Repair Time:Less than 15 mins
-
Tools:Nutdriver
1 person
found this instruction helpful.
Was this instruction helpful to you?
Thank you for voting!
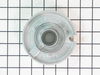
flame was inconsistent. too much air.
-
Raymond J. from EASTPORT, NY
-
Difficulty Level:Really Easy
-
Total Repair Time:Less than 15 mins
1 person
found this instruction helpful.
Was this instruction helpful to you?
Thank you for voting!
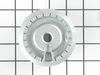
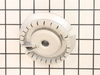
The old burners were damaged by the prior owners.
The repair was extremely easy. Just removed the old burners and dropped in the new ones. No tools needed.
Parts Used:
-
Mohammad from BARTLETT, IL
-
Difficulty Level:Very Easy
-
Total Repair Time:Less than 15 mins
1 person
found this instruction helpful.
Was this instruction helpful to you?
Thank you for voting!
Burners wouldn't light
Had two burners on the stove that would not light. Had tried cleaning them but they still did not ignite. Replaced both burner heads. Once replaced. they ignited right away and have worked ever since.
Parts Used:
-
Robert from SOUTH ELGIN, IL
-
Difficulty Level:Very Easy
-
Total Repair Time:Less than 15 mins
1 person
found this instruction helpful.
Was this instruction helpful to you?
Thank you for voting!
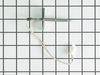
temperature sensor went
Took back panel off unplugged sensor and replugged in and worked like a charm!Sears wanted $400 and was going to 'overrepair"Got the 60 dollar part on here. UPS shipped to wrong address and customer service refunded my shipping and was excellent! would definetly use again!thanks
Parts Used:
-
Alex R from Randoff, NJ
-
Difficulty Level:Easy
-
Total Repair Time:Less than 15 mins
-
Tools:Nutdriver
1 person
found this instruction helpful.
Was this instruction helpful to you?
Thank you for voting!
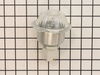
shortage in wiring cause the housing to burn out
Replaced new light housing.
Thanks to you guys for the prompt response
Thanks to you guys for the prompt response
Parts Used:
-
fred from PALM COAST, FL
-
Difficulty Level:Really Easy
-
Total Repair Time:Less than 15 mins
1 person
found this instruction helpful.
Was this instruction helpful to you?
Thank you for voting!
burner cap wasn't working proper.
-
GLENN from ST CLR SHORES, MI
-
Difficulty Level:Really Easy
-
Total Repair Time:Less than 15 mins
1 of 2 people
found this instruction helpful.
Was this instruction helpful to you?
Thank you for voting!
Ignitor would glow at orange but not white. Not enough heat to open valve to let gas run
Got the general idea off a u-tube video. Very simple and would have been even easier had I used a 1/4 in nutdriver instead of socket. Removed 2 screws (flathead) on the lower cover of oven. Removed 1 nut holding shield. Removed 1 nut holding protective trap door on rear, pulled coupling through hole and disconnected. Removed 2 nuts holding ignitor. That's it. Replace everything in sequence and your done.
Parts Used:
-
Fawn from MEREDITH, NH
-
Difficulty Level:Easy
-
Total Repair Time:30 - 60 mins
-
Tools:Screw drivers, Socket set
1 of 2 people
found this instruction helpful.
Was this instruction helpful to you?
Thank you for voting!