















JBS160DM3BB General Electric Range - Instructions
Keep searches simple. Use keywords, e.g. "leaking", "pump", "broken" or "fit".
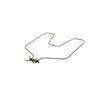
Old bake element burned out
Turned off circuit breaker, removed screws holding old element in with nut drivers, pulled out old element about 3-4" to reach terminals connected to back of element, removed spade lug terminals with needle nose pliers. Reconnected terminals to new element and screwed new element in place with nut drivers. Turned on circuit breaker and oven. New element works perfectly. Took about 8-10 minutes. Very easy to do.
Parts Used:
-
Thomas from Hamilton, VA
-
Difficulty Level:Really Easy
-
Total Repair Time:Less than 15 mins
-
Tools:Nutdriver, Pliers
Was this instruction helpful to you?
Thank you for voting!
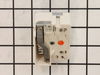
Burner light would not go out.
Identified the switch that went bad. Order a new one and replaced it. The part came in a timely fashion and I am pleased with the result.
Parts Used:
-
Creed from Topsham, ME
-
Difficulty Level:Really Easy
-
Total Repair Time:Less than 15 mins
-
Tools:Pliers, Screw drivers, Socket set
Was this instruction helpful to you?
Thank you for voting!
Broken bake element
-
Marcus from Lagrange, GA
-
Difficulty Level:Really Easy
-
Total Repair Time:Less than 15 mins
-
Tools:Pliers
Was this instruction helpful to you?
Thank you for voting!
slot that heating element fits was worn down and caused burners to be uneven
-
Judith from Broadway, VA
-
Difficulty Level:Really Easy
-
Total Repair Time:Less than 15 mins
Was this instruction helpful to you?
Thank you for voting!
6" and 8" burner bowl replacement
Slide out burner elements. Remove old burner bowls. Insert new burner bowls and reinstall burner elements.
Parts Used:
-
Shawn from Lubbock, TX
-
Difficulty Level:Really Easy
-
Total Repair Time:Less than 15 mins
Was this instruction helpful to you?
Thank you for voting!
Burner Switch Went Out
Turn off power at main electric panel/ move stove away from wall and unplug cord from outlet. Take knob off the front take two screws off the panel, take back panel off and remove the used switch and take and replace the wiring to the new one , one at a time wire for wire. Then put back tighter in reverse of the way you took it off. Plug in cord and move stove back to the wall. Easy
Parts Used:
-
Jim from Prosser, WA
-
Difficulty Level:Really Easy
-
Total Repair Time:Less than 15 mins
-
Tools:Nutdriver, Pliers
Was this instruction helpful to you?
Thank you for voting!
surface burner would not work
watched it on parts select this is a real fast and simple install took longer to pull the range out of its position well started by shuting off the power then double checked that the range was deenergized removed the knob then the 2 screws then on the rear of the range removed the back panel about 8 screws used a nut driver then removed the old switch removed each wire one by one and pluged each wire into the new switch just as they were on the old switch the new switch was exactly the same so every thing matched up perfect installed the screws to the front which hold the swich in place then the back cover turned on the power and tested the switch every thing working ok done shut off power slid range back into its place turned power back on everything still ok
Parts Used:
-
julio from hobbs, NM
-
Difficulty Level:Really Easy
-
Total Repair Time:Less than 15 mins
-
Tools:Nutdriver
Was this instruction helpful to you?
Thank you for voting!
bowls were worn out
-
frances from winston salem, NC
-
Difficulty Level:Really Easy
-
Total Repair Time:Less than 15 mins
Was this instruction helpful to you?
Thank you for voting!
GE Electric Range rear left burner quit coming on
Removed the back top cover with 1/4" nutdriver. Removed the burner terminal block with 1/4" nutdriver. Within 15 minutes had the terminal block kit removed and installed and in service.
Parts Used:
-
Richard from Richmond, TX
-
Difficulty Level:Really Easy
-
Total Repair Time:Less than 15 mins
-
Tools:Nutdriver, Pliers
Was this instruction helpful to you?
Thank you for voting!
Replace oven gasket
I used the pliers to remove the old pins, and popped then new pins in place...super simple!
Parts Used:
-
Jenny from Muskego, WI
-
Difficulty Level:Really Easy
-
Total Repair Time:Less than 15 mins
-
Tools:Pliers
Was this instruction helpful to you?
Thank you for voting!
Bake Element burnt out
-
Greg from Chicopee, MA
-
Difficulty Level:Really Easy
-
Total Repair Time:Less than 15 mins
-
Tools:Socket set
Was this instruction helpful to you?
Thank you for voting!
Broiler Element Replacement
There were two small screws at the back of the stove (this was the part that intimidated me. At first glance it doesn't look like it should be removed). But you just have to unscrew them, disconnect the wires behind them (this part can be done by hand), and pull the element out. The new element slides right in! Just make sure the power to the stove is disconnected either by breaker or by unplugging it. I'm not sure if it matters, but I made sure to connect the wires to the same side of the element that they were removed from.
Parts Used:

-
Emily from Snoqualmie Pass, WA
-
Difficulty Level:Really Easy
-
Total Repair Time:Less than 15 mins
-
Tools:Nutdriver
Was this instruction helpful to you?
Thank you for voting!
Heating element not working
Saw the brief video and as stated took less than five minutes to replace. It took longer to clean up the floor under the oven than to replace heating element.
Parts Used:
-
Stuart from Yelm, WA
-
Difficulty Level:Really Easy
-
Total Repair Time:Less than 15 mins
-
Tools:Nutdriver
Was this instruction helpful to you?
Thank you for voting!
burned out
-
mary from morton, WA
-
Difficulty Level:Really Easy
-
Total Repair Time:Less than 15 mins
-
Tools:Nutdriver
Was this instruction helpful to you?
Thank you for voting!
The 8" burner switch heated burner to high Temp
Went online looked up model no and found Part No. and ordered it couple of days It came in mail Cut power to oven took knob off two screws back panel. wired new switch like the old one replced thwe switch and two screws and panel connected the power tried new switch it worked great.
Parts Used:
-
Randy from Ellenboro, NC
-
Difficulty Level:Easy
-
Total Repair Time:Less than 15 mins
-
Tools:Nutdriver, Pliers, Screw drivers
Was this instruction helpful to you?
Thank you for voting!