















JBP65GV2WH General Electric Range - Instructions
Keep searches simple. Use keywords, e.g. "leaking", "pump", "broken" or "fit".
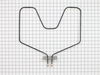
No heat on bake.
The first thing I did wrong was order the wrong part. Then later I did find the Model number on the side of the bottom drawer. I reordered the right part and turned off the electrical breaker. Removed the old element. I then installed the element in the oven with 2 screw nuts and pulled out the stove, took off the back panel and slipped the wire nuts onto the element. Very simple. I am really thankful there is a place to order the part and it came the next day after I ordered it. WHOW!
Parts Used:
-
Marian from Inglis, FL
-
Difficulty Level:Really Easy
-
Total Repair Time:Less than 15 mins
-
Tools:Nutdriver
1 person
found this instruction helpful.
Was this instruction helpful to you?
Thank you for voting!
Bake element burned out
I removed the oven door and racks. After turning off the power I raised the old element up to be able to access the screws. I undid the two that connected the element to the back of the oven. After pulling the element forward, I undid the two screws that supplied power. I reconnected everything and, after turning the power back on, tested the element. It worked perfectly. It has been used quite extensively since then with no problems.
Parts Used:
-
Mark from North Richland Hills, TX
-
Difficulty Level:Really Easy
-
Total Repair Time:Less than 15 mins
-
Tools:Nutdriver
1 person
found this instruction helpful.
Was this instruction helpful to you?
Thank you for voting!
Took forever to preheat
When I told my husband I ordered the part and was going to fix it myself, he laughed and said I might not have ordered the right part for the problem and I should just buy a new stove.
The part was delivered the day before Christmas, just 3 days after I placed the order! I had read the stories of others fixing theirs and gave it a shot. It took me longer to find the tools then it did to replace the element!
I took the screws out , pulled the element toward me and disconnected the wires. Put it back the way I found it. Oven heated up in less then 5 minutes!
The part was delivered the day before Christmas, just 3 days after I placed the order! I had read the stories of others fixing theirs and gave it a shot. It took me longer to find the tools then it did to replace the element!
I took the screws out , pulled the element toward me and disconnected the wires. Put it back the way I found it. Oven heated up in less then 5 minutes!
Parts Used:
-
Terri from Edgewater, FL
-
Difficulty Level:Really Easy
-
Total Repair Time:Less than 15 mins
-
Tools:Screw drivers, Socket set
1 person
found this instruction helpful.
Was this instruction helpful to you?
Thank you for voting!
After being invited to my mom's house for supper, the oven lower baking element had shorted out and self destructed.
After supper, without biscuits, I removed the element by simply removing 4 screws with my nut driver. We went home and I immediately went online to your web site, inserted the old element part number, followed the ordering instructions, and in 3 dayd the new element had been delivered to our door. Several days later we were invited to mom's for dinner once again. I quickly installed the new element (perfect fit and works great) and enjoyed a great supper........with biscuits this time. Thank you.
Parts Used:
-
Arthur from Dallas, PA
-
Difficulty Level:Really Easy
-
Total Repair Time:Less than 15 mins
-
Tools:Nutdriver
1 person
found this instruction helpful.
Was this instruction helpful to you?
Thank you for voting!
The bottom bake element burned out.
1. Cut power off. 2. Remove old element, make sure you do not lose the screws, pull the connecting posts out and we used strings on posts so they could not get lost in the wall. 3. We then replaced the new element with little of no problems, it took approximately 30-45 minutes for the whole process.
Parts Used:
-
Pauline from DECATUR, GA
-
Difficulty Level:Really Easy
-
Total Repair Time:30 - 60 mins
-
Tools:Screw drivers
1 person
found this instruction helpful.
Was this instruction helpful to you?
Thank you for voting!
Burned out
Remove two screws to loosen the ceramic top....prop top open and change part...the part was exactly the same...change wires from one to the other and transfer clamps.....1st grade craft class would have done it in half the time I did......you folks have your parts inventory and description application to a science.....God Bless
Parts Used:

-
Dean from Elkton, FL
-
Difficulty Level:Really Easy
-
Total Repair Time:15 - 30 mins
-
Tools:Screw drivers
1 person
found this instruction helpful.
Was this instruction helpful to you?
Thank you for voting!
bake element no heat
-
larry from buckhannon, WV
-
Difficulty Level:Really Easy
-
Total Repair Time:15 - 30 mins
-
Tools:Nutdriver, Pliers
1 person
found this instruction helpful.
Was this instruction helpful to you?
Thank you for voting!
The bottom oven heat element didn't work
1. Removed the old element. Had a little trouble loosening the screws. After we got them loose, everything was easy.
2. Pulled out the element and disconnected the wires.
3. Connected the wires on the new element.
4. Screwed the element back in.
5. Connected the stove and turned on the oven.
6. It works like a new one.
2. Pulled out the element and disconnected the wires.
3. Connected the wires on the new element.
4. Screwed the element back in.
5. Connected the stove and turned on the oven.
6. It works like a new one.
Parts Used:
-
Marilee from Newburgh, IN
-
Difficulty Level:Easy
-
Total Repair Time:15 - 30 mins
-
Tools:Pliers, Socket set
1 person
found this instruction helpful.
Was this instruction helpful to you?
Thank you for voting!
Bake element burned out in oven
First shut off power to the range in the electrical
breaker box (its the 220 breaker) as marked.
Remove the oven door ( open part way and lift up) the
door will come off.
Remove the 2 screws that the element is attached to the
back of the oven wall. Pull element out part way and
disconnect the 2 wires. Take out element.
The new element had different connections so I cut off
the clips stripped the wires and attached to the element
connection . The element had connections that this was
possible. Push wires back into oven wall and install the
new element with the 2 screws that were removed. You
could also put on clips to the 2 wires that attach to the
element if so desired. (Eye hole clips.)
breaker box (its the 220 breaker) as marked.
Remove the oven door ( open part way and lift up) the
door will come off.
Remove the 2 screws that the element is attached to the
back of the oven wall. Pull element out part way and
disconnect the 2 wires. Take out element.
The new element had different connections so I cut off
the clips stripped the wires and attached to the element
connection . The element had connections that this was
possible. Push wires back into oven wall and install the
new element with the 2 screws that were removed. You
could also put on clips to the 2 wires that attach to the
element if so desired. (Eye hole clips.)
Parts Used:
-
AL from GENOA, NE
-
Difficulty Level:Really Easy
-
Total Repair Time:15 - 30 mins
-
Tools:Nutdriver, Screw drivers
1 person
found this instruction helpful.
Was this instruction helpful to you?
Thank you for voting!
Burner burned out
Very easy. Unpluged range from outlet, took two screws from the front under side of the range top, raised cook top up, took off four wires from burner, removed two screws than holds burner on cook top, replaced with new burner, installed two screws that hold burner in place, installed the four wires to burner, lowered cook top back into place replaced two screws that hold cook top down, pluged back into outlet. DONE!
Parts Used:
-
Daniel from Norborne, MO
-
Difficulty Level:Really Easy
-
Total Repair Time:Less than 15 mins
-
Tools:Pliers, Screw drivers
1 person
found this instruction helpful.
Was this instruction helpful to you?
Thank you for voting!
No heat from bake element
Ordered part, took old bake element out, installed new bake element. It was real easy.
Parts Used:
-
Roberta from Southampton, NJ
-
Difficulty Level:Really Easy
-
Total Repair Time:Less than 15 mins
-
Tools:Socket set
1 person
found this instruction helpful.
Was this instruction helpful to you?
Thank you for voting!
bake element burned out
removed the two screws, unsnapped the burnedout element and snapped new element in place, replaced two screws.
Parts Used:
-
Joe from Ashland, MO
-
Difficulty Level:Really Easy
-
Total Repair Time:Less than 15 mins
-
Tools:Nutdriver
1 of 2 people
found this instruction helpful.
Was this instruction helpful to you?
Thank you for voting!
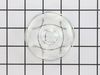
dropped & broke the oven light bulb cover
-
joseph from san jose, CA
-
Difficulty Level:Really Easy
-
Total Repair Time:Less than 15 mins
1 of 2 people
found this instruction helpful.
Was this instruction helpful to you?
Thank you for voting!
lower element did not heat
First shut off power to the store and used a socket set to remove 2 screws and disconnnect the element. Connected the new element but had to use the old screws as the new ones did not work with my appliance.
Parts Used:
-
mary from cape coral, FL
-
Difficulty Level:Easy
-
Total Repair Time:15 - 30 mins
-
Tools:Screw drivers, Socket set
1 of 2 people
found this instruction helpful.
Was this instruction helpful to you?
Thank you for voting!
Bake element failure
I removed the old element and replaced it with a new part. It was very simple.
The power was turned off. The elemnt wiring was removed. The new one was installed in reverse order. Power back on and the oven tested just fine.
The power was turned off. The elemnt wiring was removed. The new one was installed in reverse order. Power back on and the oven tested just fine.
Parts Used:
-
Daniel from St Mary's, GA
-
Difficulty Level:Easy
-
Total Repair Time:15 - 30 mins
-
Tools:Nutdriver, Screw drivers
1 of 2 people
found this instruction helpful.
Was this instruction helpful to you?
Thank you for voting!