















JBP24BY2 General Electric Range - Instructions
Keep searches simple. Use keywords, e.g. "leaking", "pump", "broken" or "fit".
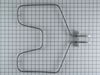
My previous heating element, broke while a family member was trying to clean it.
This was so easy. First pull stove out and disconnect plug in from the wall. Then, I removed the two screws that hold the element in place. I then pulled the element out about 3 inches and disconnected the two wires. Then I installed the new one in reverse order.
Parts Used:
-
Ricky from Arlington, TX
-
Difficulty Level:Really Easy
-
Total Repair Time:Less than 15 mins
-
Tools:Nutdriver
6 of 6 people
found this instruction helpful.
Was this instruction helpful to you?
Thank you for voting!
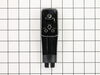
The door handle was broken on the left
I did not know what kind of tool was needed to remove the screws so I asked at the hardware store. When i said the screw was star shaped, he sold me torque wrench with multiple heads. First I removed the screw holding the broken handle in place. I cleaned surfaces. Next I attempted to put the handle in place on the horizontal bar and then put the screw into the opening. That did not work. I jiggled the handle for a while but could not get the pegs into the holes. Finally, I just held the handle in place and began to turn the screw and the handle slid into place as the screw got tighter.
Parts Used:
-
Sylvia from Baltimore, MD
-
Difficulty Level:Really Easy
-
Total Repair Time:Less than 15 mins
-
Tools:Screw drivers
6 of 7 people
found this instruction helpful.
Was this instruction helpful to you?
Thank you for voting!
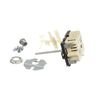
Swicth Stem Broken
Disconnect power. . . Remove control panel, pull wire connectors,[note location] remove old switch, install new, install wires, snip stem to length, set knob . . . Turn on power - works. [Note this is a live part even when not connected]
Parts Used:
-
FRANK from COPAKE, NY
-
Difficulty Level:Easy
-
Total Repair Time:30 - 60 mins
-
Tools:Screw drivers
8 of 13 people
found this instruction helpful.
Was this instruction helpful to you?
Thank you for voting!
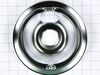
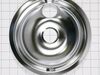
We had been searching for burner bowls for our GE range (10+ years old) and could not find replacements for them. I found the burner bowls we needed on partselect.com . I was able to easily place the order and the burner bowls were delivered to me the next day.
No repair necessary, but the service was excellent!
Parts Used:
-
Marlene from Rancho Murieta, CA
-
Difficulty Level:Really Easy
-
Total Repair Time:Less than 15 mins
7 of 11 people
found this instruction helpful.
Was this instruction helpful to you?
Thank you for voting!
I needed new drip pans
I lifted out the burners and took out the old drip pans ans then replaced the burners. However the 8 inch pans were bigger than the old ones and they do not fit properly. They are sitting on top of the stove and not inserted like they should be. I will have to look elsewhere to find ones that fit.
Parts Used:
-
Carol from Brookfield, WI
-
Difficulty Level:Really Easy
-
Total Repair Time:Less than 15 mins
5 of 5 people
found this instruction helpful.
Was this instruction helpful to you?
Thank you for voting!
old one did not fit right
took the old one out and dropped the new one in, replaced the electric burner and done
thw worse part was paying as much for s&h as i did for the part itself
thw worse part was paying as much for s&h as i did for the part itself
Parts Used:
-
Pat from PALM BAY, FL
-
Difficulty Level:Really Easy
-
Total Repair Time:30 - 60 mins
4 of 4 people
found this instruction helpful.
Was this instruction helpful to you?
Thank you for voting!
Electric Burner Control Broken
New one a little different ,but it was marked for wiring!
Had to install upside down because wires would not reach right side up!
Had to pull back side of knob out and turn 180 degrees and glue in knob, so knob would be right side up!
Works fine! Now all burners work again!
Had to install upside down because wires would not reach right side up!
Had to pull back side of knob out and turn 180 degrees and glue in knob, so knob would be right side up!
Works fine! Now all burners work again!
Parts Used:
-
Robert from VINELAND, NJ
-
Difficulty Level:A Bit Difficult
-
Total Repair Time:30 - 60 mins
4 of 5 people
found this instruction helpful.
Was this instruction helpful to you?
Thank you for voting!
Old infinite switch WB21X36771 broke...heating element stopped heating
1. Bought replacement part said to replace old switch.
2. Pulled old switch out.
3. Replacement part did not match. Would have to take entire switch panel apart to change to this part.
4. Multiple-part instructions very poor. For my switch unreadable.
5. Old part was "push to turn". New part was not.
6. Knob did not fit new switch. Old shaft was "D" shaped. New is square.
7. Gave up. Need to call repair shop.
8. Hope this helps.
2. Pulled old switch out.
3. Replacement part did not match. Would have to take entire switch panel apart to change to this part.
4. Multiple-part instructions very poor. For my switch unreadable.
5. Old part was "push to turn". New part was not.
6. Knob did not fit new switch. Old shaft was "D" shaped. New is square.
7. Gave up. Need to call repair shop.
8. Hope this helps.
Parts Used:
-
Richard from PLANO, TX
-
Difficulty Level:Very Difficult
-
Total Repair Time:More than 2 hours
-
Tools:Pliers, Screw drivers
5 of 8 people
found this instruction helpful.
Was this instruction helpful to you?
Thank you for voting!
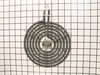
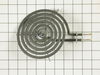
Surface Burners were very slow.
Removed old surface burners and replaced them by plugging in the new surface burners. Now they work GREAT! Parts ordered and received with-in 3 business days. Fed EX delivered parts in good order very quickly. We recommend PartSelect.com
Parts Used:
-
Fisher from Fort Collins, CO
-
Difficulty Level:Really Easy
-
Total Repair Time:Less than 15 mins
4 of 5 people
found this instruction helpful.
Was this instruction helpful to you?
Thank you for voting!
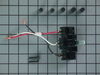
no burnt wire
-
Bernard from N CHARLESTON, SC
-
Difficulty Level:Very Easy
-
Total Repair Time:Less than 15 mins
-
Tools:Screw drivers
5 of 8 people
found this instruction helpful.
Was this instruction helpful to you?
Thank you for voting!
hard to get the wires out , and screws dont line up like the original
When I pulled the old element out only one of the wires was visible, the other wire was still connected and after pulling a few times it came out , but the wire connector wasnt visible and I had to dig around in the small opening to find it (2 hours worth of digging and pulling) I finally got a hold of the wire and pulled it through and was able to connect it to the element, had to bend the metal around the opening to be able to get my finger in there and find the wire, The screws that hold the element in place wernt the same as the original so i just have it pushed up in place but it seems to work ok , took way longer than i thought it would.
Parts Used:
-
Robert from Nashville, TN
-
Difficulty Level:Difficult
-
Total Repair Time:More than 2 hours
-
Tools:Pliers, Screw drivers
6 of 11 people
found this instruction helpful.
Was this instruction helpful to you?
Thank you for voting!
infinite switch would not shut off at times.
First shut the power to the stove,then had to slide the stove out so I could get at the back to remove the panel screws.Once you have the back off remove the knob on the front.Under the knob is 2 phillips screws that you need to remove.Next I took the new switch and matched up the wires to the old switch.Reinstall is the reverse.Once the switch is in place you must remove the excess shaft to match the length of the old one.This is done with the use of 2 pliers,you grasp the shaft with both pliers and snap it off where you need it.The kit comes with spacers so you have got to match up the right one so the switch is solid on the shaft.This finishes the project,next turn the power back on and check that all is working ok.Job finished.
Parts Used:
-
Ervin from Milford, DE
-
Difficulty Level:Really Easy
-
Total Repair Time:30 - 60 mins
-
Tools:Screw drivers
6 of 11 people
found this instruction helpful.
Was this instruction helpful to you?
Thank you for voting!
not heating properly
Unplug coil, remove pan - place new pan, plug in new element and bingo. Took approximately 30 seconds!
Parts Used:
-
David from Placerville, CA
-
Difficulty Level:Really Easy
-
Total Repair Time:Less than 15 mins
3 of 3 people
found this instruction helpful.
Was this instruction helpful to you?
Thank you for voting!
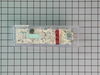
ranges and oven wouldn't work
I turned the power off to the stove. I removed the 4 screws from the back. I took the 2 screws out of the old control to8 to give me a reference for the wires. I then disconnected each wire from the old part and directly to the new part. I then turned the power on before I put the stove back, and as I flipped the breaker, my wife yelled at me that she just saw fire come out of the back. I thought that was interesting because there just went $105 up in smoke. I turned the power off and went to look at the damage. After searching over all the parts and not finding any burnt areas, I had my wife turn on the power while I looked for the problem. I located the problem at the power box where the stove is connected to the wall. When I pulled the stove out it pulled one of the wires out of the wire nut and caused it to hit the metal box and when the power came back on, it melted the wire nut because of the loose wire. I replaced the wire nut and reconnected the wires securely and tried turning the power on again, and the part worked just like new. Be careful not to pull loose any wires.
Parts Used:
-
Chris from Valdosta, GA
-
Difficulty Level:Easy
-
Total Repair Time:15 - 30 mins
-
Tools:Nutdriver, Pliers, Screw drivers
4 of 6 people
found this instruction helpful.
Was this instruction helpful to you?
Thank you for voting!
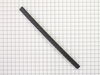
Replaced broken oven door handle
Got all my parts and tools ready. Sat on a stool in front of oven. Swapped out old with new. Not bad at all.
Parts Used:
-
Gerald from LA FAYETTE, GA
-
Difficulty Level:Easy
-
Total Repair Time:15 - 30 mins
-
Tools:Pliers, Screw drivers
3 of 3 people
found this instruction helpful.
Was this instruction helpful to you?
Thank you for voting!