















JB960KD1CC General Electric Range - Instructions
Keep searches simple. Use keywords, e.g. "leaking", "pump", "broken" or "fit".
Convection Fan Motor Quit
Used the nut driver to take out the bad motor and installed the new one.
Parts Used:
-
Marilyn R from Adel, IA
-
Difficulty Level:Really Easy
-
Total Repair Time:Less than 15 mins
-
Tools:Nutdriver
4 of 11 people
found this instruction helpful.
Was this instruction helpful to you?
Thank you for voting!
Still can't get1 hindge in. inner window broken
Got door off no problem used screw drive to release locks and lifted door off. Took 3 1//4 screws out the 2 3" long screws out to separate door half's took screws of hinges and then8 1/4 inch screws of sheet metal that covered window. Replaced window and reverse what I did taking apart. Still having trouble getting 1 hinge to connect to stove. Help would be appreciated.
Parts Used:
-
Chuck from Sunbury, OH
-
Difficulty Level:Difficult
-
Total Repair Time:30 - 60 mins
-
Tools:Nutdriver, Screw drivers, Wrench set
1 of 2 people
found this instruction helpful.
Was this instruction helpful to you?
Thank you for voting!
shatter inner window glass
Removed fasteners holding door assembly together. Cleaned out broken glass. Placed new glass frame. Reinstalled fasteners
Parts Used:
-
Ed from Kingston, PA
-
Difficulty Level:Really Easy
-
Total Repair Time:15 - 30 mins
-
Tools:Socket set
2 of 5 people
found this instruction helpful.
Was this instruction helpful to you?
Thank you for voting!
dropped & broke the oven light bulb cover
-
joseph from san jose, CA
-
Difficulty Level:Really Easy
-
Total Repair Time:Less than 15 mins
1 of 2 people
found this instruction helpful.
Was this instruction helpful to you?
Thank you for voting!
Oven will not heat
As many people have encountered, my oven would not heat but the igniter would be bright orange and glow! Over time, the igniter wears and degrades causing oxidation to the surface. This cause the igniter to fail and operate at a lower current level, below 2.8 amps! Normal igniters operator over 3.0 to 3.1 amps. When is happens, a low current igniter does not have enough input to the control valve to tell the valve to open to allow gas to flow over the igniter to light the oven, thus heat the oven! This has got to be the NUMBER one reason for an oven not heating!
Parts Used:
-
Joseph from Homosassa, FL
-
Difficulty Level:Easy
-
Total Repair Time:15 - 30 mins
-
Tools:Pliers, Screw drivers
1 of 3 people
found this instruction helpful.
Was this instruction helpful to you?
Thank you for voting!
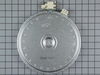
cooktop inner ring did not work
Dear PartSelect:
I am very impressed by your service and company. My order arrived in less than 24 hours. It was a perfect match and is currently in service. I am very satisfied with the entire experience and will use your company again.
I simply opened up the cooktop with a screwdriver and disconnected the wires to the affected burner. After the part arrived, I reconnected them. I had to swap over two brackets from the old burner, so don't throw it away until the new one arrives. It went back together very easily and worked immediately.
Matt Brennan
I am very impressed by your service and company. My order arrived in less than 24 hours. It was a perfect match and is currently in service. I am very satisfied with the entire experience and will use your company again.
I simply opened up the cooktop with a screwdriver and disconnected the wires to the affected burner. After the part arrived, I reconnected them. I had to swap over two brackets from the old burner, so don't throw it away until the new one arrives. It went back together very easily and worked immediately.
Matt Brennan
Parts Used:
-
Matthew from Lexington Park, MD
-
Difficulty Level:Really Easy
-
Total Repair Time:15 - 30 mins
-
Tools:Screw drivers
1 of 3 people
found this instruction helpful.
Was this instruction helpful to you?
Thank you for voting!
Two stage burner was not working on the outer part of burner.
Locate breaker box and turn off breaker to stove. Removed the two screw in front that hold the top in place. Raised the top and supported it with the box the new burner came in. Removed two screws that held the burner in place and the 5 wires one at a time an installed them on the new burner. Put new burner in place and installed two mounting screws. Reinstalled the two screws in the front to hold the top in place then turned the breaker back on and tested burner. Worked great. Received part in 2 days.
Parts Used:
-
Gregory from Pleasant Valley, MO
-
Difficulty Level:Really Easy
-
Total Repair Time:15 - 30 mins
-
Tools:Nutdriver, Pliers, Screw drivers
0 of 1 people
found this instruction helpful.
Was this instruction helpful to you?
Thank you for voting!
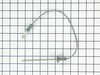
Broken Probe Sensor
-
Michael from Tucson, AZ
-
Difficulty Level:Really Easy
-
Total Repair Time:Less than 15 mins
0 of 1 people
found this instruction helpful.
Was this instruction helpful to you?
Thank you for voting!
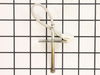
F2 error when oven was heating up, along with a beeping noise and then it shut off
Unplugged oven, turned off breaker, took cover off back of oven, removed old sensor by disconnecting in back of oven and undoing screw inside oven. Pulled old one out replaced with new took 15min. Cost me less than $20. Parts Select rocks! Even received part in two days with standard shipping!
Parts Used:
-
Lori from Paris, TN
-
Difficulty Level:Really Easy
-
Total Repair Time:15 - 30 mins
-
Tools:Screw drivers, Socket set
0 of 1 people
found this instruction helpful.
Was this instruction helpful to you?
Thank you for voting!
oven was not getting up to temp
Once I opened up the back of the range, the sensor wires where there and burnt just like your info said. One nut to take off in the oven and the sensor came right out and the new one went right in. The oven works great, cooked the turkey today. The worst part of the repare was the cleaning behind and under the range, it hasn't moved since it was put in 6 years ago. Very pleased with PS.
Parts Used:
-
walter from townshend, VT
-
Difficulty Level:Really Easy
-
Total Repair Time:Less than 15 mins
-
Tools:Nutdriver
0 of 1 people
found this instruction helpful.
Was this instruction helpful to you?
Thank you for voting!
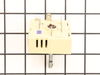
Two burners were not working
I got someone to look at the stove. They told me what I needed. I looked all over the Internet and couldn't find the part. One guy told me just to buy a new stove top because mine was an antique. It still looked good and two burners were still working. I didn't give up. I found the part on partselect bsite and was thrilled. It shipped fast and was exactly the right part. Now my stove works like new.
Parts Used:
-
Terri from Leesburg, FL
-
Difficulty Level:Really Easy
-
Total Repair Time:15 - 30 mins
-
Tools:Screw drivers
3 of 10 people
found this instruction helpful.
Was this instruction helpful to you?
Thank you for voting!
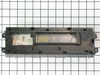
controll panel burned out.
The panel went easy, but i could not make the connection between the control panel and the push panel.
Parts Used:
-
thomas from dexter, MI
-
Difficulty Level:Easy
-
Total Repair Time:More than 2 hours
-
Tools:Nutdriver, Screw drivers
1 of 6 people
found this instruction helpful.
Was this instruction helpful to you?
Thank you for voting!
burner worked on high only
Followed directions from Rodney of Erath La. Directions were perfect and helped me to decide to under take this job. Job took a little longer spending some time to clean the glass top on both sides and around the counter top where it mounts. The actual repair time was quick and easy thanks to Rodney. Price of the part was reasonable and delivery got here quick. Will deal with parts select again! Carl from Florida
Parts Used:
-
Carl from Delray Beach, FL
-
Difficulty Level:Really Easy
-
Total Repair Time:30 - 60 mins
-
Tools:Screw drivers, Socket set
Was this instruction helpful to you?
Thank you for voting!
Twisting of stuck cook-top killed the event
The age of the system resulted in the cook top being heavily stuck by food-stuff to the range surface. The result was a twisting of the top when breaking it free. It caused the cooktop (a $500+ part) to crack diagonally across the whole surface. Thus ended the quick do-it-yourself process, and out to buy a new range. Parts-select was very good about the return process of the un-used and un-opened burner element.
Parts Used:
-
James from Kingsville, MD
-
Difficulty Level:Difficult
-
Total Repair Time:30 - 60 mins
-
Tools:Screw drivers
Was this instruction helpful to you?
Thank you for voting!
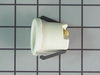
broken light socket
The only tool needed was a nutdriver to remove the lamp socket. I needed my head mounted light to see what I was doing, and everything went smoothly from there. Simple job.
Parts Used:
-
James from Monterey, TN
-
Difficulty Level:Easy
-
Total Repair Time:15 - 30 mins
-
Tools:Nutdriver
Was this instruction helpful to you?
Thank you for voting!