















JB770DP1BB General Electric Range - Instructions
Keep searches simple. Use keywords, e.g. "leaking", "pump", "broken" or "fit".
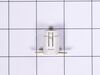
Pilot light out
Removed the power plug from the wall, screwdriver and small socket allowed me to remove the front control panel. Once I located the pilot light I pulled off the holding clips and placed a new light into the holding clips...problem solved.
Parts Used:
-
Henry from Sonoita, AZ
-
Difficulty Level:Really Easy
-
Total Repair Time:15 - 30 mins
-
Tools:Screw drivers, Socket set
Was this instruction helpful to you?
Thank you for voting!
one leg of the terminal block was loose and overheated under load.the terminal block melted and could have caused a fire.
I took a picture of the setup and damage . I then disconnected the burnt wires and replaced the wires . Then I installed the new terminal block and connected the wires to the proper positions. The reason for the failure was that the delivery people didn't tighten the cord when they installed the stove . I would check the connections periodically as to avoid another situation like this .
Parts Used:
-
brendan from lebanon, NH
-
Difficulty Level:Easy
-
Total Repair Time:30 - 60 mins
-
Tools:Pliers, Screw drivers, Socket set, Wrench set
Was this instruction helpful to you?
Thank you for voting!
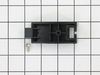
Range lower drawer would not stay on track.
-
Richard from Newark, DE
-
Difficulty Level:Really Easy
-
Total Repair Time:Less than 15 mins
-
Tools:Nutdriver
Was this instruction helpful to you?
Thank you for voting!
Broken drawer support
Followed the example picture on the part bag. Anyone could do this, incredibly easy. Took about 4 minutes to install both sides.
Parts Used:
-
Mario from Deer Park, WA
-
Difficulty Level:Really Easy
-
Total Repair Time:Less than 15 mins
-
Tools:Nutdriver
Was this instruction helpful to you?
Thank you for voting!
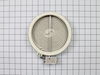
Burner not operational.
Disconnected power supply. Removed damaged element by releasing retainer clips and unplugging wire contacts. Replaced with new element.
Parts Used:
-
Gerald from Philadelphia, PA
-
Difficulty Level:Really Easy
-
Total Repair Time:Less than 15 mins
-
Tools:Screw drivers
Was this instruction helpful to you?
Thank you for voting!
Stove drawer rear guides broken
-
Robert from Shakopee, MN
-
Difficulty Level:Really Easy
-
Total Repair Time:Less than 15 mins
-
Tools:Nutdriver
Was this instruction helpful to you?
Thank you for voting!
The oven temperature could not be controlled
Disconnect the range from the mains. Open the door. Remove the single screw holding the temperature sensor - this is located on the back wall on center and is screwed to the broiler mounting plate. Remove the four screws holding the boiler element and allow it to hang down on the wire; this exposes a space to feed the wire through later. Now move to the back of the range and remove the six screws that hold the central cover plate. Now push the insulation to up out of the way and you can disconnect the temperature sensor, pull it out through front, insert the new one and connect it. Reassemble in the reverse order. Mine worked perfectly!
Parts Used:
-
Keith from Annapolis, MD
-
Difficulty Level:Easy
-
Total Repair Time:15 - 30 mins
-
Tools:Nutdriver, Socket set
Was this instruction helpful to you?
Thank you for voting!
rear drawer supports broke
Directtions were by diagram only, no written instructions. Drawing was small and difficult to follow but the repair itself was easy.
Parts Used:
-
TERRY from RICHMOND, VA
-
Difficulty Level:Really Easy
-
Total Repair Time:15 - 30 mins
-
Tools:Socket set
Was this instruction helpful to you?
Thank you for voting!
Spilled 1/2 gallon Hot wax on stove
Took door apart to clean inside of glass door. scraped most of the wax from the stove 99%. Could not get the last 1%. Cleaned all parts. Put door back together again, put the door seal on after I got the right one. Had to reorder a new seal(one that was actually made for that model) messed up the first one and whalla! Took about 3 weeks to clean off the wax from stove and the surrounding area. Stove is good as new. Thanks for the quick service. Would definitely recommend and use you guys again. Thank You.
Parts Used:
-
Roman from West Chester, PA
-
Difficulty Level:Easy
-
Total Repair Time:30 - 60 mins
-
Tools:Nutdriver, Screw drivers
Was this instruction helpful to you?
Thank you for voting!
I shattered the exterior oven door glass (black)
This was the second replacement glass I've bought, but I'm unsure if the first one was from PartsSelect or GE directly. It was a couple years ago when I purchased the first one. The first one popped in rather easily. I scraped out the rust and debris that had built up within the lower metal track and then inserted the glass. By pulling upwards on the door handle I had just enough room to pop it into the upper plastic tabs. The second door I bought was harder. I truly feel the second was larger. I tried the original procedure, but there was significantly more glass at the top, and I couldn't push up on the handle to even clear the handle itself. I removed the glass to re-cleaned the lower track, but it was clear of debris, so that wasn't the problem. I had to completely dismantle the outside plastic frame, insert the window and put it back together. It did fit after that, but now the door scrapes at the top ever so slightly when you shut it. Overall I'm very satisfied, since the oven is older now, but looks great again.
Parts Used:
-
noah from Canal Fulton, OH
-
Difficulty Level:Very Difficult
-
Total Repair Time:30 - 60 mins
-
Tools:Screw drivers, Socket set
Was this instruction helpful to you?
Thank you for voting!
Hard to move drawer in and out because the rear drawer supports broke off.
Repair was very easy - less than a few minutes - just had to screw in 2 screws to the new drawer supports.
Parts Used:
-
Steven from Lansdale, PA
-
Difficulty Level:Really Easy
-
Total Repair Time:Less than 15 mins
-
Tools:Screw drivers
Was this instruction helpful to you?
Thank you for voting!
3 of 4 Oven Lamps burnt out
Remove the glass cover to the halogen lamp fixture (counter clockwise turn, about a 1/4 turn). Recommend use of rubber coated gloves as the glass covers do not offer much by way of a good grip. Gently remove the halogen lamp (bulb) and insert new bulb into socket. Since the oven door is open, the lamp will light up indicating successful installation. Replace the glass cover (clockwise turn) until secure. Pitch the burnt out halogen lamp in the trash.
Parts Used:
-
Dave from Woodbine, MD
-
Difficulty Level:Easy
-
Total Repair Time:Less than 15 mins
Was this instruction helpful to you?
Thank you for voting!
F2 error code
Really easy fix. Unplug oven. With a 5/16 nut driver take the 5 screws out of the center long tin cover and remove. Unplug little white temperature sensor plug located between broil heating element. Open oven door and remove one screw holding temp. sensor using same nut driver and simply pull out old sensor. Install new sensor. It's that easy. No more f2 been working like a champ!!!
Parts Used:
-
jud from gatesville, TX
-
Difficulty Level:Really Easy
-
Total Repair Time:Less than 15 mins
-
Tools:Nutdriver
Was this instruction helpful to you?
Thank you for voting!
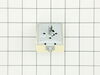
Dual burner on range stopped working.
Changed out the burner with a new replacement and it still didn't work. The socket on the old burner had a burn mark on it. The infinite switch operated sloppy not crisp like the other burners.Ordered a replacement online. Moved the range away from wall and cabinet and shut off electric at panel box. Removed upper back panel. removed switch knob and 2 screws holding switch. Compared electrical connections of both switches and saw that they were different. Read instructions which were included with new switch and found diagram for connecting old lead to new lead correctly. After all leads were connected, remounted new switch powered up and tested OK.
Parts Used:
-
Robert from Estero, FL
-
Difficulty Level:Easy
-
Total Repair Time:Less than 15 mins
-
Tools:Nutdriver, Pliers, Screw drivers
Was this instruction helpful to you?
Thank you for voting!
burner control
installed new burner control w/knob. about 30 min. stove back in place. working fine
Parts Used:

-
hugh from sun city center, FL
-
Difficulty Level:Really Easy
-
Total Repair Time:Less than 15 mins
-
Tools:Nutdriver, Screw drivers
Was this instruction helpful to you?
Thank you for voting!