















JB5004D4 General Electric Range - Instructions
Keep searches simple. Use keywords, e.g. "leaking", "pump", "broken" or "fit".
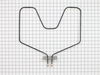
Heating Element Was No Longer Working.
Removed oven door by holding sides and pulling upward. It's easy to remove and replace. Removed shelves by sliding back and up, then out. Removed two hex nuts with socket wrench. They are on back wall of oven and secure element to that wall. I then pulled element out about 3 inches and disconnected the two leads.
I put new element in, reconnected two leads, replace two hex nuts and was done.
Turn off power to stove at circuit breaker before starting.
I put new element in, reconnected two leads, replace two hex nuts and was done.
Turn off power to stove at circuit breaker before starting.
Parts Used:
-
Karen from Stuart, FL
-
Difficulty Level:Really Easy
-
Total Repair Time:Less than 15 mins
-
Tools:Screw drivers, Socket set
1 person
found this instruction helpful.
Was this instruction helpful to you?
Thank you for voting!
No heat from bake element
Ordered part, took old bake element out, installed new bake element. It was real easy.
Parts Used:
-
Roberta from Southampton, NJ
-
Difficulty Level:Really Easy
-
Total Repair Time:Less than 15 mins
-
Tools:Socket set
1 person
found this instruction helpful.
Was this instruction helpful to you?
Thank you for voting!
elemant had burnt into
First I removed the two screws that hold the element in place. I then pulled the element out about 3 inches and disconnected the two wires, then i connect the new element and and replaced the screwes that held it in very simple and I must say Part select was very fast at getting me the correct part the first time , they have earned a spot in my Favorite list
Parts Used:
-
Tracy from Paris, IL
-
Difficulty Level:Really Easy
-
Total Repair Time:Less than 15 mins
-
Tools:Nutdriver
1 person
found this instruction helpful.
Was this instruction helpful to you?
Thank you for voting!
boken element
remove screws attaching burner plate to back of oven, pull out element, undo wiring to old burner by unscrewing 2 screws, remove old burner, reverse process to put new burner in
Parts Used:
-
cynthia from snyder, NY
-
Difficulty Level:Really Easy
-
Total Repair Time:15 - 30 mins
-
Tools:Wrench set
1 person
found this instruction helpful.
Was this instruction helpful to you?
Thank you for voting!
The oven heating element was broken
I removed the 2 screws and the 2 wires from the broken heating element. I removed the broken oven heating element. Then I attached the 2 wires to the new heating element and put the 2 screws in to attach the new heating element into the oven. The new oven heating element worked just fine and I was done.
Parts Used:
-
Daniel from Denver, CO
-
Difficulty Level:Really Easy
-
Total Repair Time:15 - 30 mins
-
Tools:Pliers
1 person
found this instruction helpful.
Was this instruction helpful to you?
Thank you for voting!
Element at the bottom of oven cracked
First I turned off the circuit breaker leading to the oven. Then I removed the two screws that held the old element in place. I pulled out the element and disconnected the wires. I reconnected the wires to the new element and pushed it back in place. I then secured it with the two screws. I turned the circuit breaker back on and turned on the oven. Works just great!!!
Parts Used:
-
AMELDA from BRYANS ROAD, MD
-
Difficulty Level:Really Easy
-
Total Repair Time:15 - 30 mins
-
Tools:Pliers
1 person
found this instruction helpful.
Was this instruction helpful to you?
Thank you for voting!
bake element no heat
-
larry from buckhannon, WV
-
Difficulty Level:Really Easy
-
Total Repair Time:15 - 30 mins
-
Tools:Nutdriver, Pliers
1 person
found this instruction helpful.
Was this instruction helpful to you?
Thank you for voting!
bake element burned out
removed the two screws, unsnapped the burnedout element and snapped new element in place, replaced two screws.
Parts Used:
-
Joe from Ashland, MO
-
Difficulty Level:Really Easy
-
Total Repair Time:Less than 15 mins
-
Tools:Nutdriver
1 of 2 people
found this instruction helpful.
Was this instruction helpful to you?
Thank you for voting!
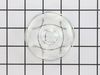
dropped & broke the oven light bulb cover
-
joseph from san jose, CA
-
Difficulty Level:Really Easy
-
Total Repair Time:Less than 15 mins
1 of 2 people
found this instruction helpful.
Was this instruction helpful to you?
Thank you for voting!
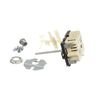
no power going to burner when switch is on, switch bad
I followed the easy instructions and everything went well. I had the new switch installed in about 30 minutes. My wires were different colors than on the instructions but it was still easy to figure out where the wires went on the new switch. Just do not be in a hurry and make sure you measure before you break off the extension bar. My knob fit on the new switch without any of the parts that came with the switch.
Parts Used:
-
Robert from Woolwich Twp., NJ
-
Difficulty Level:Easy
-
Total Repair Time:15 - 30 mins
-
Tools:Pliers, Screw drivers
2 of 5 people
found this instruction helpful.
Was this instruction helpful to you?
Thank you for voting!
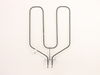
Broken broiler element
Replacing the part was fairly simple. Do not forget to dis-connect the element from the back.
Parts Used:
-
Michael from Medford, NY
-
Difficulty Level:Easy
-
Total Repair Time:15 - 30 mins
-
Tools:Nutdriver, Screw drivers
1 of 2 people
found this instruction helpful.
Was this instruction helpful to you?
Thank you for voting!
Lower oven element burnt out
I first removed the two hex head screws, pulled the element slowly forward about four to five inches and disconected the two wires on the old element.
I removed the old element and attached the wires to the new element. I then slowly pushed it back into the rear wall of the oven, carefull not to disturb the insulation around the opening and replaced the two screws that hold the element to the back wall of the oven. It was easy enough to do, even for a woman. I turned on the oven and it worked great. No problems so far.
I removed the old element and attached the wires to the new element. I then slowly pushed it back into the rear wall of the oven, carefull not to disturb the insulation around the opening and replaced the two screws that hold the element to the back wall of the oven. It was easy enough to do, even for a woman. I turned on the oven and it worked great. No problems so far.
Parts Used:
-
Brenda from Elida, OH
-
Difficulty Level:Easy
-
Total Repair Time:15 - 30 mins
-
Tools:Nutdriver, Screw drivers, Socket set
1 of 2 people
found this instruction helpful.
Was this instruction helpful to you?
Thank you for voting!
Oven would not heat, but broiler, burners and thermostat was clicking, so we figured it was the bake element.
Had to take back panel off of the inside of the oven to get to the screws to remove the old element and attache the new. Removed the two screws to remove the old, pulled it out unattached the wires and attached the new one.
Parts Used:
-
Patricia from Reading, MA
-
Difficulty Level:Easy
-
Total Repair Time:15 - 30 mins
-
Tools:Nutdriver, Screw drivers
1 of 2 people
found this instruction helpful.
Was this instruction helpful to you?
Thank you for voting!
lower element did not heat
First shut off power to the store and used a socket set to remove 2 screws and disconnnect the element. Connected the new element but had to use the old screws as the new ones did not work with my appliance.
Parts Used:
-
mary from cape coral, FL
-
Difficulty Level:Easy
-
Total Repair Time:15 - 30 mins
-
Tools:Screw drivers, Socket set
1 of 2 people
found this instruction helpful.
Was this instruction helpful to you?
Thank you for voting!
Part worn out
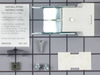
Removed old terminal block by removing one mounting screw. Removed two wires from block. Installed new terminal block by reversing procedure.
Parts Used:
-
William L. from Houma, LA
-
Difficulty Level:Really Easy
-
Total Repair Time:Less than 15 mins
-
Tools:Screw drivers
1 of 2 people
found this instruction helpful.
Was this instruction helpful to you?
Thank you for voting!