















J2S968TH2WW General Electric Range - Instructions
Keep searches simple. Use keywords, e.g. "leaking", "pump", "broken" or "fit".
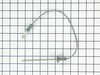
Oven meat probe broken
This item worked as described. I paid more for this 'oem' probe than the generic 1 because i didn't want to chance it not working as others have reported.
- works great. tested it....snaps in, reads correctly, snaps out.
- works great. tested it....snaps in, reads correctly, snaps out.
Parts Used:
-
robert from FAIRFIELD, OH
-
Difficulty Level:Very Easy
-
Total Repair Time:Less than 15 mins
1 person
found this instruction helpful.
Was this instruction helpful to you?
Thank you for voting!
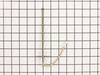
Remove back panel or access sensor, replace sensor and panel
-
Mike from Glencoe, NM
-
Difficulty Level:Very Easy
-
Total Repair Time:Less than 15 mins
-
Tools:Nutdriver
1 person
found this instruction helpful.
Was this instruction helpful to you?
Thank you for voting!
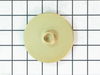
Yellow flame on large burner
Removed top grate. Removed burner head . replaced with new burner head. Replaced grate.Very simple replacement. Old burner head was warped with age.
Parts Used:
-
Charles from Glendale, NY
-
Difficulty Level:Very Easy
-
Total Repair Time:Less than 15 mins
1 person
found this instruction helpful.
Was this instruction helpful to you?
Thank you for voting!
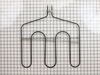
Remove and replace Broil (upper) heating element.
Turn off the power to the oven. (There should be a circuit breaker in the main power panel dedicated to just the oven) (the oven should be cool to the touch).
Open and remove the door by pulling it up and off the hinges (this is best accomplished with a helper).
Remove the racks (wire shelves).
Remove the two 1/4" mounting screws that secure the heating element to the back and the two screws that secure the element to the top of the oven..
Gently pull the wires out and disconnect them from the heating element.
Now reverse the process.
Connect the wires to the new heating element in the same fashion as they came off.
Push the wires and heating element back in place and secure with the four screws.
Replace the wire racks (shelves).
Replace the door (again, this is best accomplished with a helper).
Turn the power back on.
Run a test of the broiler to make sure the repair was completed properly.
voila!
Open and remove the door by pulling it up and off the hinges (this is best accomplished with a helper).
Remove the racks (wire shelves).
Remove the two 1/4" mounting screws that secure the heating element to the back and the two screws that secure the element to the top of the oven..
Gently pull the wires out and disconnect them from the heating element.
Now reverse the process.
Connect the wires to the new heating element in the same fashion as they came off.
Push the wires and heating element back in place and secure with the four screws.
Replace the wire racks (shelves).
Replace the door (again, this is best accomplished with a helper).
Turn the power back on.
Run a test of the broiler to make sure the repair was completed properly.
voila!
Parts Used:
-
Russell from ARROYO GRANDE, CA
-
Difficulty Level:Really Easy
-
Total Repair Time:30 - 60 mins
-
Tools:Nutdriver
1 person
found this instruction helpful.
Was this instruction helpful to you?
Thank you for voting!
Lower Oven Broiler Stopped Working
Turned power off to oven
Unscrewed broiler nuts (total of 4)
Pulled Broiler out from back of stove
Disconnected wires
Reconnected wire
Remounted broiler and replaced bolts
Turned power back on
Unscrewed broiler nuts (total of 4)
Pulled Broiler out from back of stove
Disconnected wires
Reconnected wire
Remounted broiler and replaced bolts
Turned power back on
Parts Used:
-
Frank from PARKER, CO
-
Difficulty Level:Really Easy
-
Total Repair Time:30 - 60 mins
-
Tools:Nutdriver, Pliers
1 person
found this instruction helpful.
Was this instruction helpful to you?
Thank you for voting!
The Grate foot is to big for the hole.
-
Harold from Broadalbin, NY
-
Difficulty Level:A Bit Difficult
-
Total Repair Time:15 - 30 mins
1 of 2 people
found this instruction helpful.
Was this instruction helpful to you?
Thank you for voting!
very easy
-
ROBERT from CYPRESS, TX
-
Difficulty Level:Really Easy
-
Total Repair Time:Less than 15 mins
1 of 2 people
found this instruction helpful.
Was this instruction helpful to you?
Thank you for voting!
Light bulb went out,could not find replacement part.
Turn the glass enclosure counterclockwise to expose bulb.Turn the power off at circuit breaker panel.Handle the bulb carefully with paper towel covering the bulb.Push the bulb in socket.replace glass enclosure,turn power back on.
Parts Used:

-
Gregory from Pearl River, LA
-
Difficulty Level:Really Easy
-
Total Repair Time:Less than 15 mins
1 of 2 people
found this instruction helpful.
Was this instruction helpful to you?
Thank you for voting!
The Grate Foot was deteriorated on several sections for my cook top. The hardest part was finding the right part.
-
Chelagh from Fredericksburg, VA
-
Difficulty Level:Really Easy
-
Total Repair Time:Less than 15 mins
1 of 3 people
found this instruction helpful.
Was this instruction helpful to you?
Thank you for voting!
Oven will not heat
As many people have encountered, my oven would not heat but the igniter would be bright orange and glow! Over time, the igniter wears and degrades causing oxidation to the surface. This cause the igniter to fail and operate at a lower current level, below 2.8 amps! Normal igniters operator over 3.0 to 3.1 amps. When is happens, a low current igniter does not have enough input to the control valve to tell the valve to open to allow gas to flow over the igniter to light the oven, thus heat the oven! This has got to be the NUMBER one reason for an oven not heating!
Parts Used:
-
Joseph from Homosassa, FL
-
Difficulty Level:Easy
-
Total Repair Time:15 - 30 mins
-
Tools:Pliers, Screw drivers
1 of 3 people
found this instruction helpful.
Was this instruction helpful to you?
Thank you for voting!
Broken Probe Sensor
-
Michael from Tucson, AZ
-
Difficulty Level:Really Easy
-
Total Repair Time:Less than 15 mins
0 of 1 people
found this instruction helpful.
Was this instruction helpful to you?
Thank you for voting!
Grate foot bdroke off allowing grate to scratch cooktop
-
John from Tijeras, NM
-
Difficulty Level:Really Easy
-
Total Repair Time:Less than 15 mins
0 of 1 people
found this instruction helpful.
Was this instruction helpful to you?
Thank you for voting!
Leaking from front door
First remove the screws around the inside perimeter of the door. These require a special hex driver. Take off the inside plastic liner of door.
Peal off the old Insulation Foam Strip and replace it with the new strip in the same location. Make sure the wires are off to the right side. Replace the door plastic liner. Done. The Insulation Foam Strip really acts more like a loose gasket to keep spashing from creeping under the door and drippin out on the floor.
Peal off the old Insulation Foam Strip and replace it with the new strip in the same location. Make sure the wires are off to the right side. Replace the door plastic liner. Done. The Insulation Foam Strip really acts more like a loose gasket to keep spashing from creeping under the door and drippin out on the floor.
Parts Used:
-
Gene from Simi Valley, CA
-
Difficulty Level:Easy
-
Total Repair Time:Less than 15 mins
-
Tools:Nutdriver, Screw drivers
1 of 9 people
found this instruction helpful.
Was this instruction helpful to you?
Thank you for voting!
Missing grate foot.
-
Barbara J from Sweetwater, TX
-
Difficulty Level:Really Easy
-
Total Repair Time:Less than 15 mins
-
Tools:Pliers
Was this instruction helpful to you?
Thank you for voting!
Broiler Element Repair
I was attempting to replace the broiler element on the oven, but I discovered that the wiring may be the actual problem. I suggest before you order parts for a broiler repair, that you test the wires to ensure that you have continuity. I will have to trace the wires back to the source (the other element works fine) and see if I can find the problem with the current. I will keep the broiler element I ordered until I can confirm that the old element works.
Parts Used:
-
Robert from SANTA MARIA, CA
-
Difficulty Level:Easy
-
Total Repair Time:15 - 30 mins
-
Tools:Nutdriver
Was this instruction helpful to you?
Thank you for voting!